How to Add Vessels to Martide's Maritime Recruitment Platform

As a shipowner or ship manager, your fleet is at the heart of everything you do. And that’s why Martide has made it easy and intuitive to manage all of your vessel and crew information by storing all of it in one centralized place in our maritime recruitment software solution.
Our crew management and marine recruitment and crew management platform also takes the hassle out of managing crew planning numbers, minimum safe manning and budgets. What’s not to love?!
So for this blog post, we’re going to take a closer look at how to use and how to get the most out of everything our website’s Fleet Page has to offer.
We’ll take a look at how to add a vessel and start building your fleet in our system as well as uploading vessel documents, filtering your vessel searches and setting your handover duration.
How to add vessels on Martide’s maritime recruitment platform
First of all, log in to your Martide account and you will be taken to your User Dashboard. Click Fleet in the side menu bar. You will be taken to a page that looks something like this:

On this page you can search for an existing vessel and display or edit those vessels if needed. You can see a vessel's name, IMO and number of crew, as well as the names of her Master and Chief Engineer, her status, flag and a list of the crew.
You can also search and filter your vessels by Technical Manager, Vessel Name and Vessel Status.
And of course you can also add a new vessel to the system, which is what we’re going to be looking at in this blog post. Get started by clicking the blue Create Vessel button in the top right hand corner.
How to add a new vessel to your fleet
Luckily, as with most things in Martide, this isn’t rocket science and to add a new vessel all you need to do is to select the Add Vessel button in the top right corner of the screen. See below:

Once you’ve clicked on + Add Vessel you will be taken to a page that looks like this:
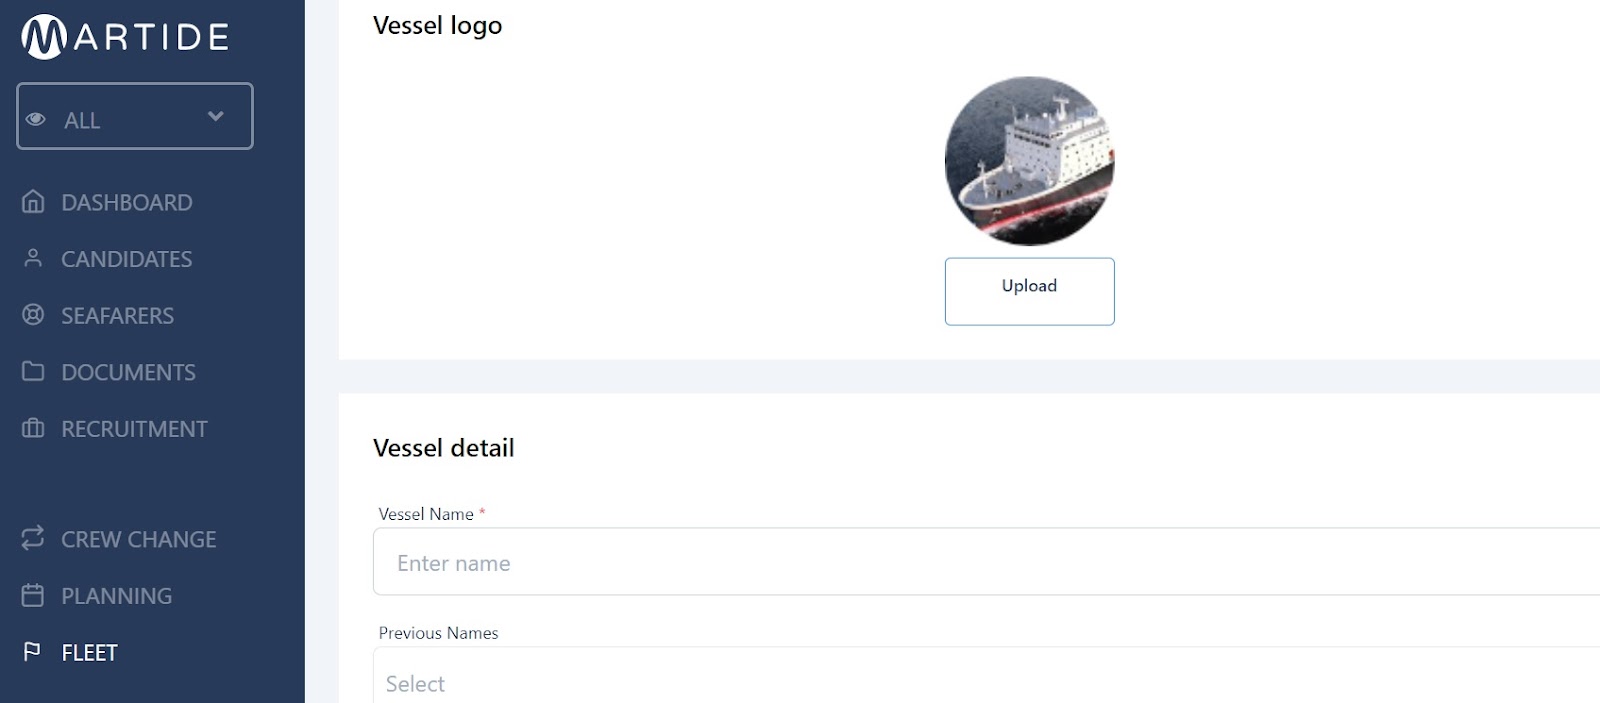
Welcome to your new vessel profile page. This is where you will enter all the details about your ship. You can upload an image of your vessel or a logo. You can enter the vessel's details and specifications including her name, the flag, and her IMO, contact information, and dimensions.
Read more: New Martide Feature: Vessel Custom Contacts
You will also be able to select the billing information, and, of course, because this is integrated maritime recruitment at its best, you can also upload the vessel's documents here too. More on that in a moment.
When you’ve finished entering all of your vessel’s data, click the blue Save button at the foot of the page. Friendly note: to be able to save your entry you must have added the vessel name, IMO, vessel type and flag.
And then once you’ve saved your vessel you will see a page that looks something like this:

This is your vessel’s profile page and here you can scroll down the page to see all the details you added when creating it. You can also toggle between Vessel Details and Crew Information by clicking on the word CREW next to VESSEL DETAILS at the top.
To edit any details, simply click the little pen icon in each section (see the image below), and then add your crew numbers, minimum safe manning numbers, and handover duration in days. You will also be able to add your budget and set the currency.
How to upload documents to Martide
Uploading your vessel’s documents is simple. Just scroll down almost to the bottom of the page where you will see the Documents section.
Note the little pen icon in the image below that allows you to edit the section above in the right hand corner:
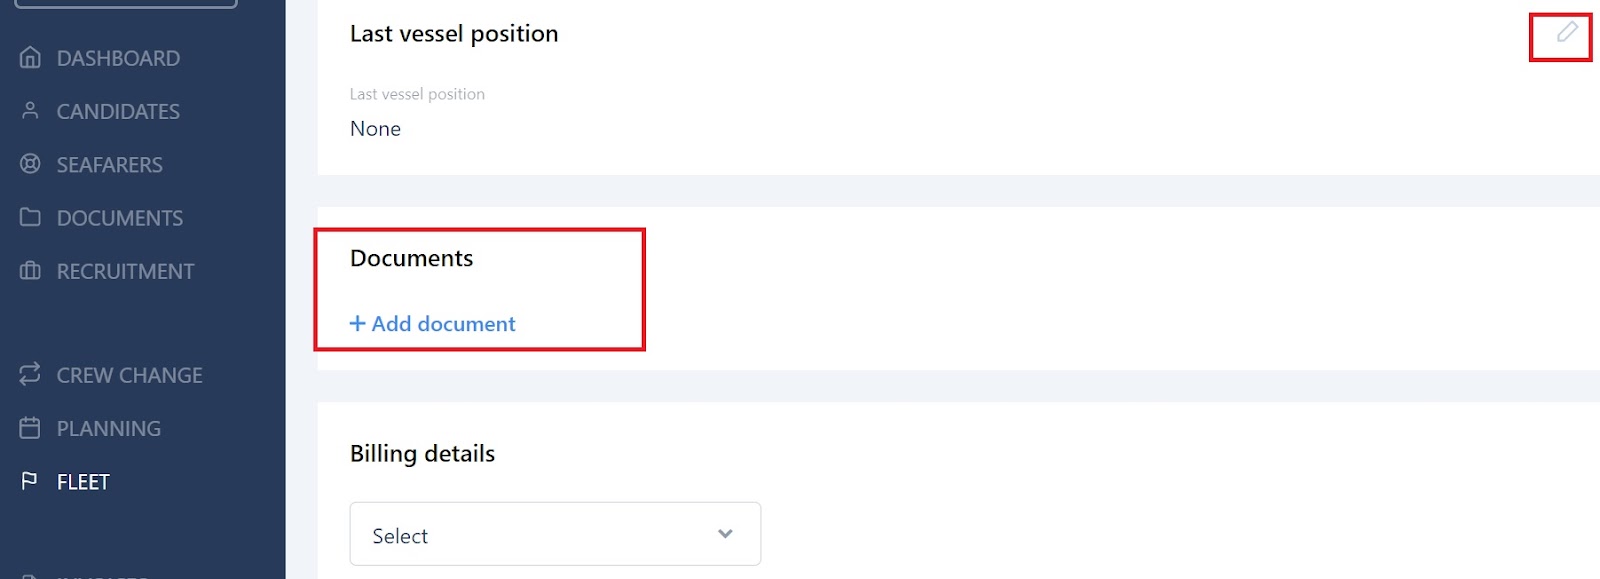
To upload documents, click on the words +Add Document and a pop-up box like the one below will open:
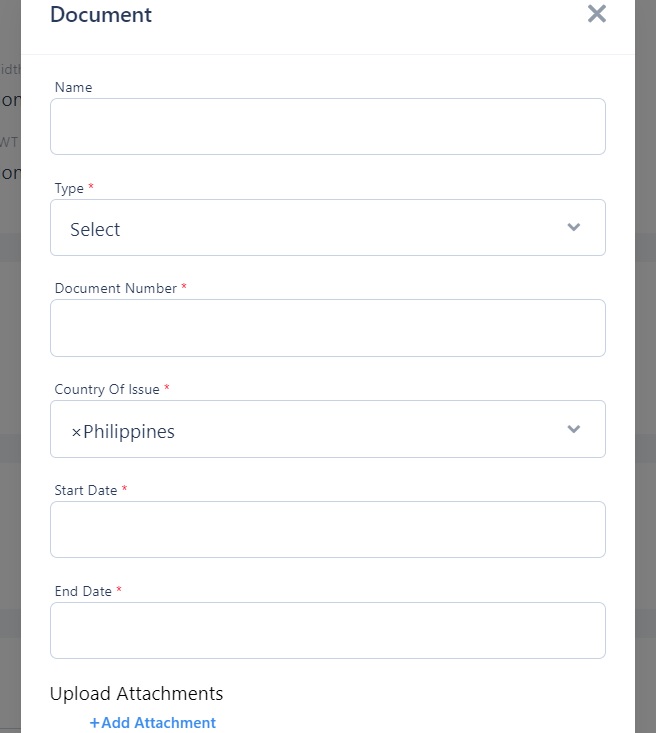
Now you can enter the name of the document and select its type - for example, Flag Registration Certificate or Class Certificate. You should also enter the document number and select its country of issue.
Next you’ll need to enter the document’s start and end dates and of course, finally, you will want to upload a copy of the document or certificate from your computer by clicking +Add Attachment - see below:
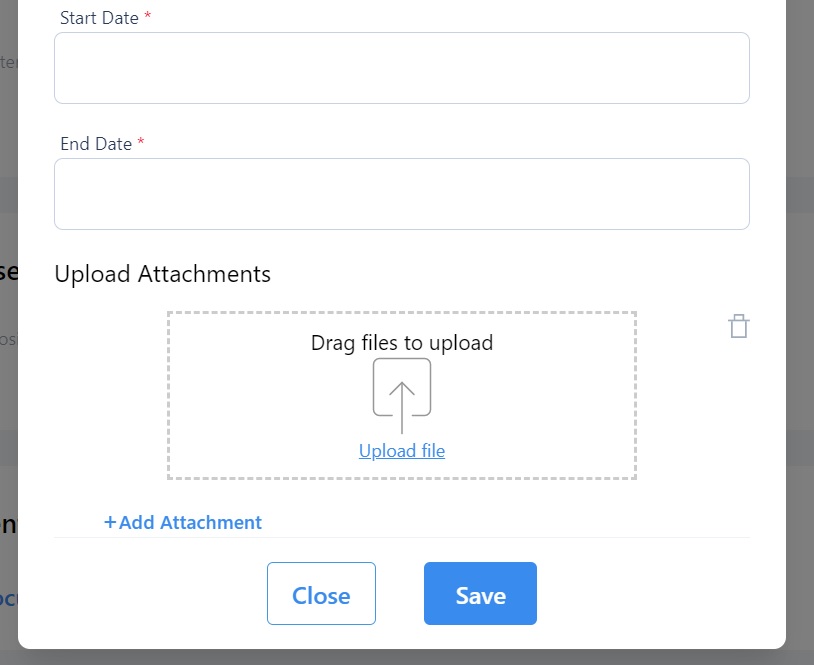
Drag a file from your computer or click on Upload File. You can add as many attachments/documents as you like. To remove a document click the little trash can icon on the right of the upload box.
How to add planned crew, minimum safe manning and handover duration
Obviously your crew planning and minimum safe manning numbers are a vital part of the maritime recruitment and crew management process. You’ll want to add these into the system, as well as the number of days you will require for crew handover.
To toggle between the Vessel Details and Crew, at the top of the page, click on CREW:

You will be taken to a page that looks like this:
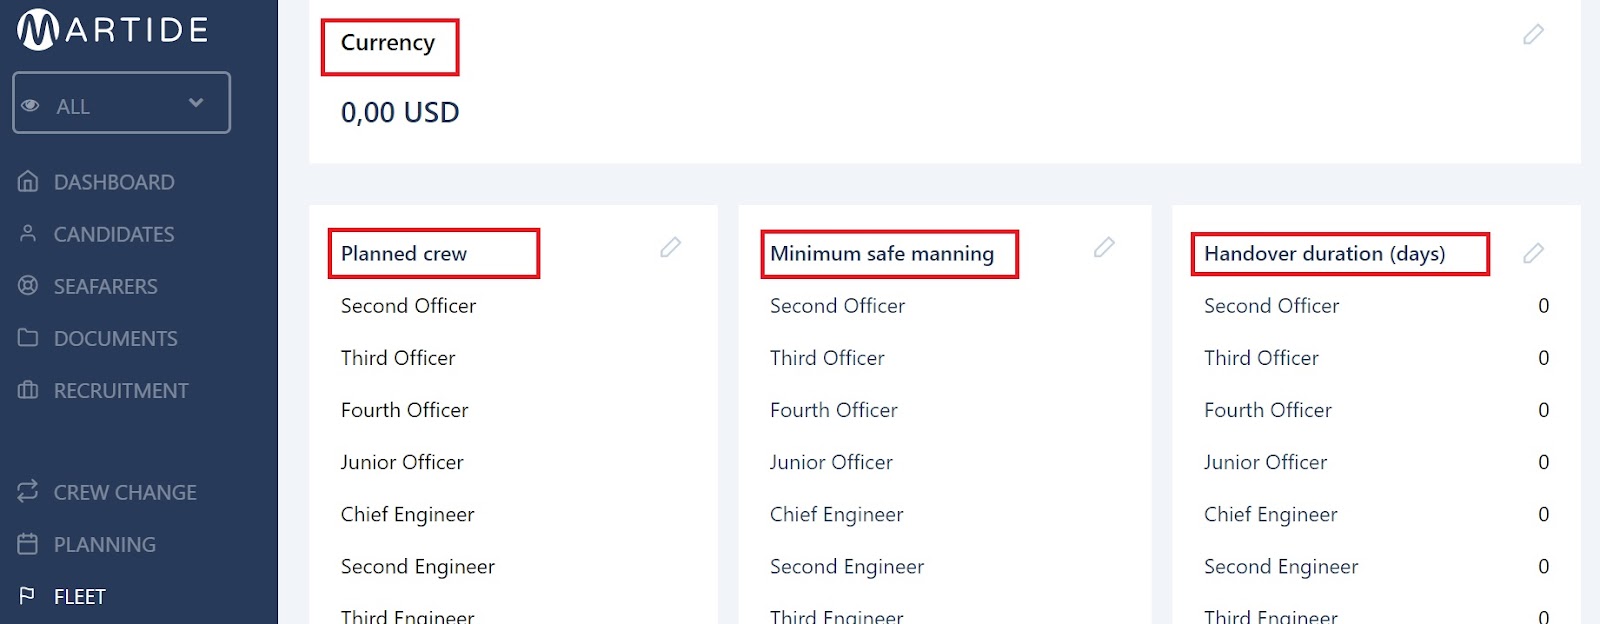
In the image above you can see the four sections: Currency, Planned Crew, Minimum Safe Manning, and Handover Duration (Days). Now we’ll take a look at how to set the data for these.
How to set the vessel’s budget and currency
This couldn’t be any simpler, so don’t worry even if you’re not a math fan! Just click the pen icon in the Currency section and you will see this:
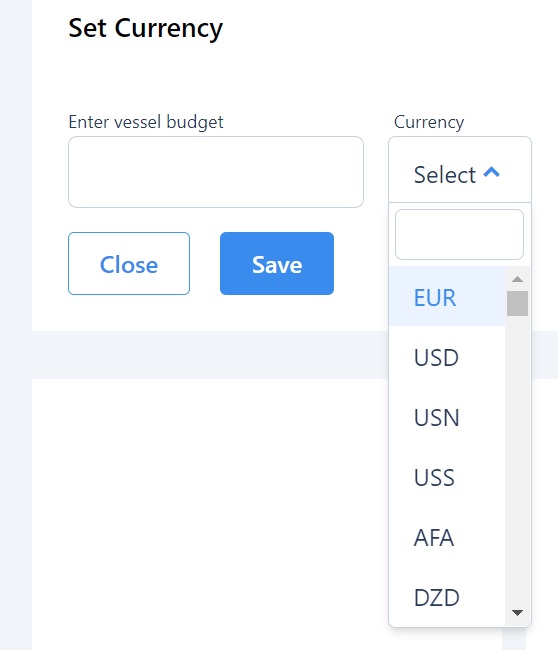
Simply enter your vessel’s budget and select the correct currency from the drop down box.
How to set your planned crew numbers
Again, this is quick and easy to do, which makes our maritime recruitment and crew management solution another reason why you should use it to help streamline your operations!
Click the pen icon in the Planned Crew section. You will see this:

Scroll down the page to see all seafarer ranks and set your planned crew numbers for that vessel by clicking the plus and minus signs to add and subtract seafarers accordingly. Then click the blue Save button at the bottom of the page when you’re done:

The good news is that the minimum safe manning and handover duration days work in exactly the same way: click the pen, add as many people or days as you need and ‘save’.
Now your vessel’s details are complete and you have added your ship to your fleet.
Now, if you have a large fleet you may want to filter your vessels to make it easier to find what you’re looking for.
Luckily we’ve thought of this too, so to do this, return to the main Fleet page either by clicking Fleet in the side menu or the arrow next to Vessel Details at the top of the page.
How to filter your vessels
At the top of the main Fleet page you will see three options for filtering: Technical Manager, Vessel Name and Vessel Status as well as a Filter button on the right:

Here you can:
- Click on Technical Manager and you will see a drop down list of any technical managers you have entered in the system. Check the boxes next to each to filter your vessels by them.
- Click on Vessel Name and you will see a drop down list of all of the vessels you have entered into the system. Check the boxes next to each to filter your vessels by name.
- Click on Vessel Status and you will see a drop down list of statuses such as Active and Archived. Check the boxes next to each to filter your vessels by status.
If you want to hide the three filter options, click the Filter button on the right next to the +Add Vessel button and they will disappear. All you need to do is to click the button again to get them back:

How to display or edit a vessel
Of course, you might want to see your vessel’s details, or you may need to change information. That’s not a problem.
On the main Fleet page, click a vessel’s name to open its profile. Now you can view its information. Just click the pen icons to edit any of its sections.
And that’s it!
We hope you've found this blog post about your Fleet page useful. We also have a step by step guide to using the page (with less words and more action!) on our dedicated Support website here.
And to find out how to add vessels to Vessel Groups for easier filtering and sorting, take a look at our guide here.
This blog post was originally published on August 20th 2019 and updated on February 23rd to reflect changes in our platform.

Eve Church
Eve is Martide's content writer, publishing regular posts on everything from our maritime recruitment and crew planning software to life at sea. Eve has been writing professionally for more than two decades, crafting everything from SEO-focused blog posts and website landing pages to magazine articles and corporate whitepapers.
UK