Candidates
The Candidates page is a searchable recruitment database of seafarers who have a Martide profile that is set to public.
When you add a candidate to an Assignment and hire them, they will move to the Seafarers page. Seafarers are people you have interacted with, i.e. they have applied for one of your jobs or worked for you before.
Understanding your Candidates page
Log in to your Martide account and click on Candidates in the menu on the left. You will go to a page like this:
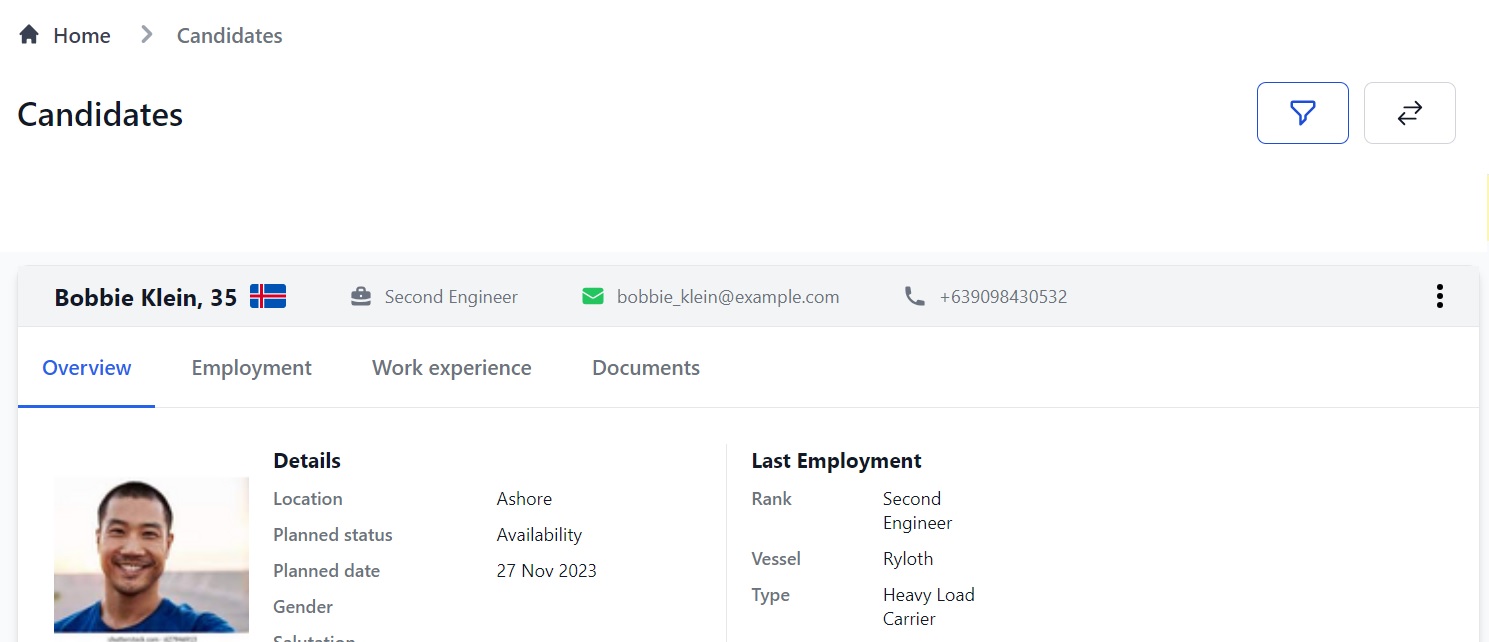
Here you can:
- See an overview of all candidates. Click the tabs at the top to see their Employment information, Work Experience and Documents.
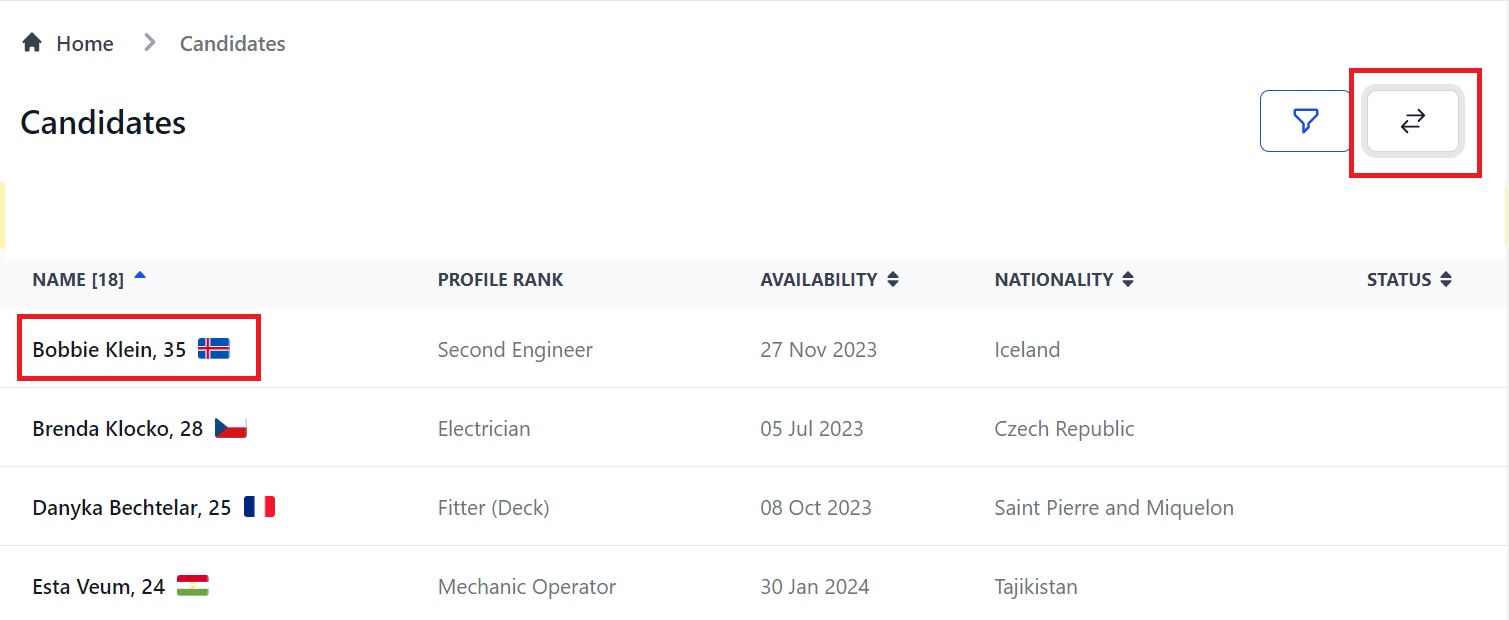
- View the candidates as a list by clicking the 2 arrows at the top.
- Filter candidates by various info by clicking the funnel at the top.
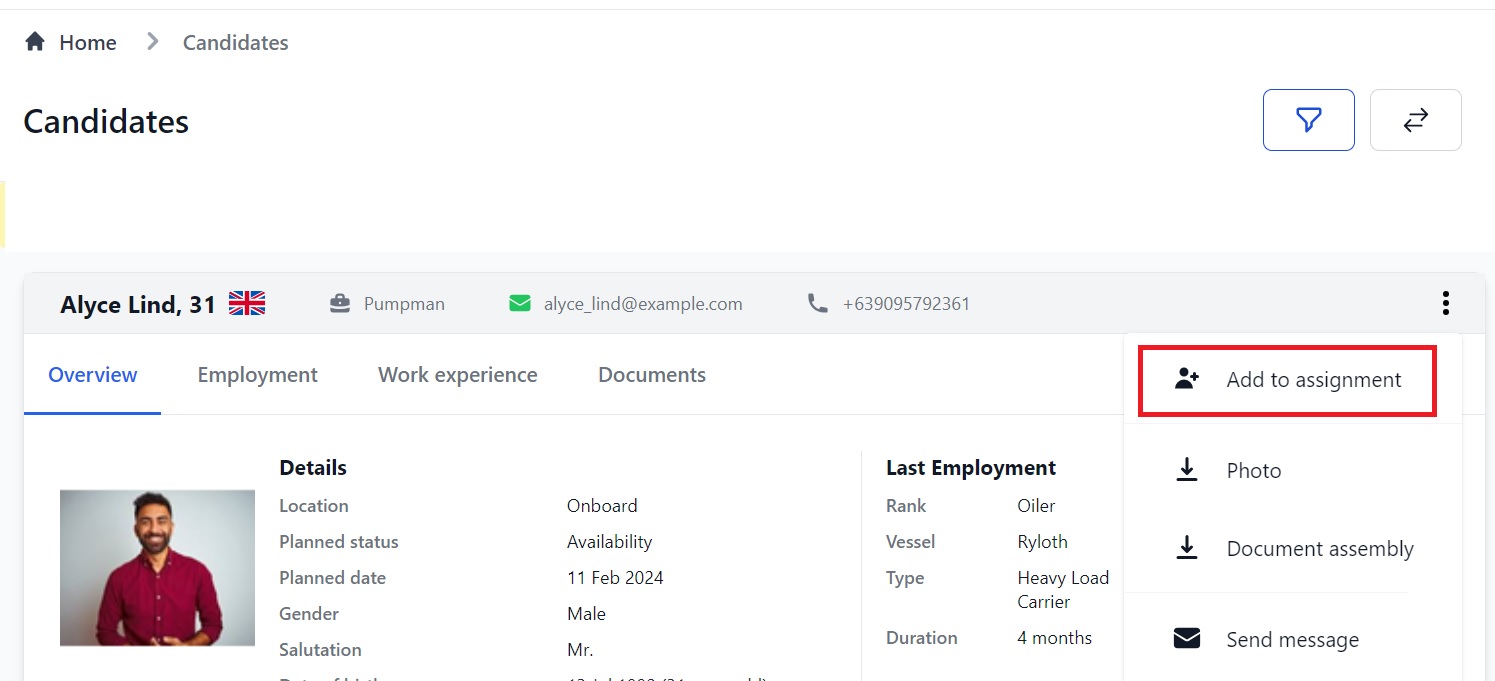
- Add a candidate to an Assignment, download their photo, use the Document Assembly feature, send them a message or edit their profile by clicking the 3 vertical dots at the top of their profile.
- Go to a candidate’s full profile by clicking on their name.
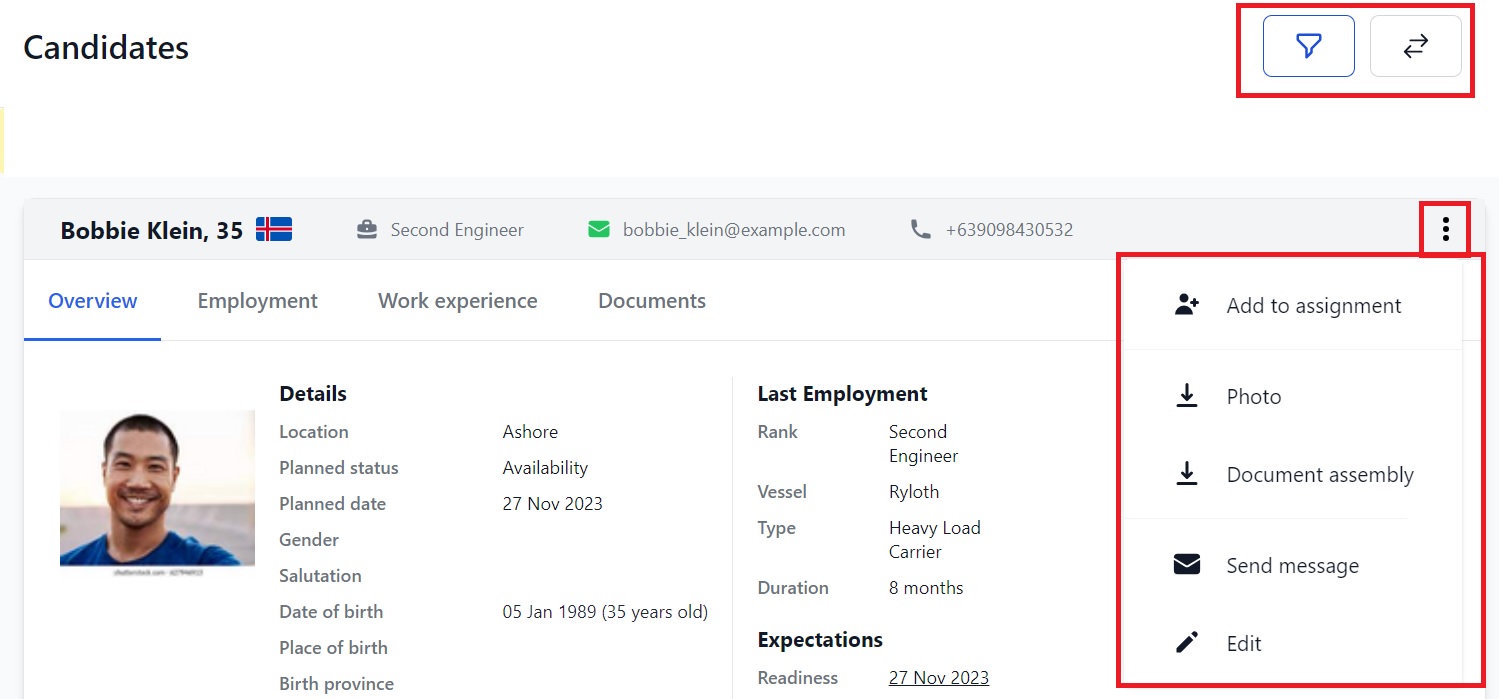
How to view and edit a candidate
You can see an overview of all candidates on the Candidate's page or you can go to their full profile by clicking on their name.
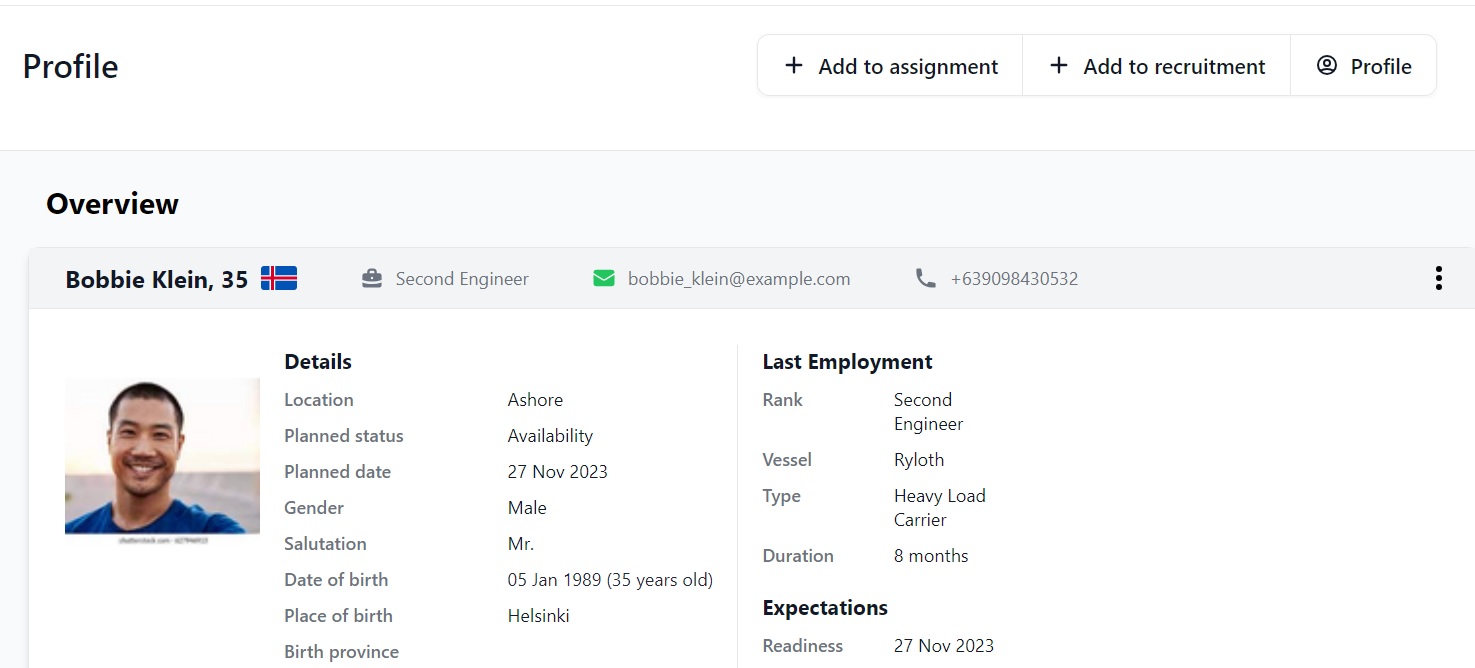
Here you can:
- See the candidate's personal details, an overview of their last employment, and their expectations.
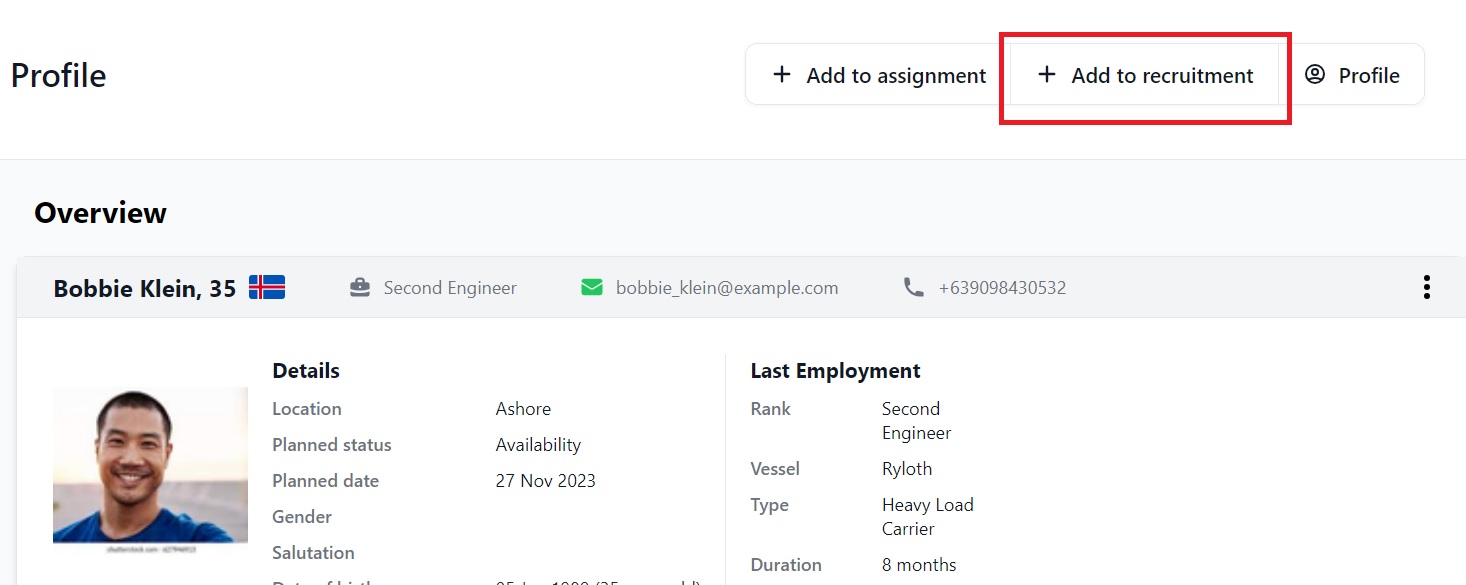
- Add them to an Assignment or a Recruitment by clicking Add to Assignment or Add to Recruitment at the top.
- Click the 3 vertical dots to download their photo, use the Document Assembly feature, send them a message, or edit their info.
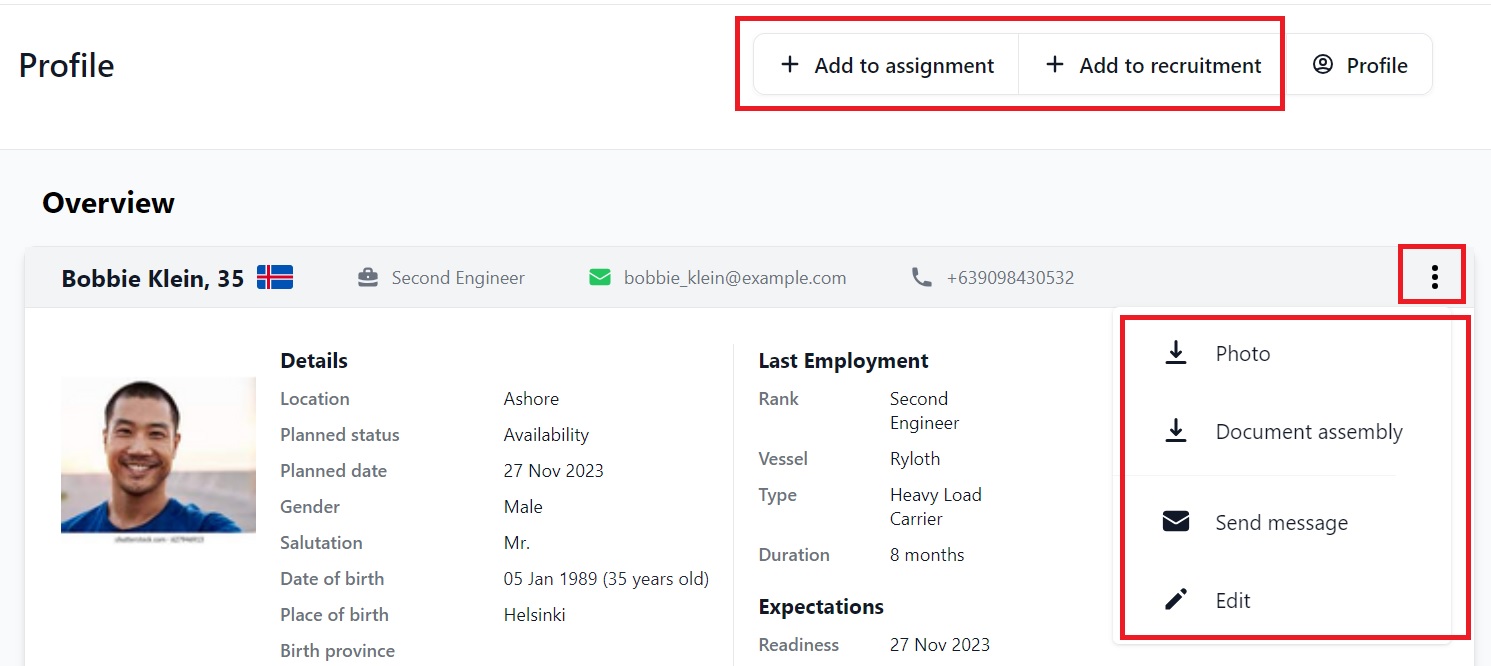
The other way of viewing and editing a candidate is to click on their name when the screen is in list format. You will also go to their profile page:
The profile is long so to make it easier to find the info you need, click a header in the side menu and you will go to that section:
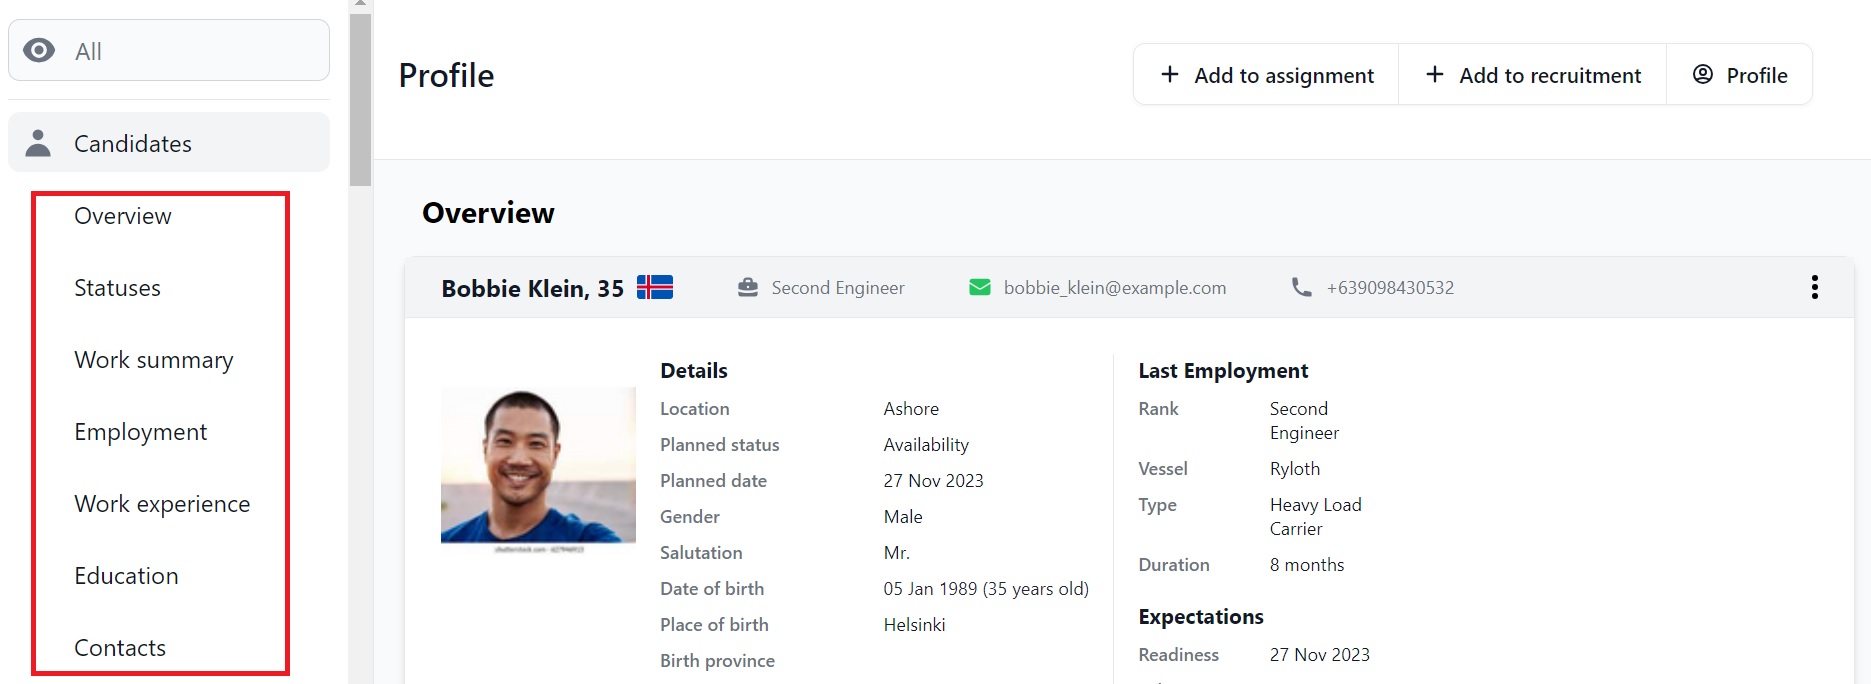
Here you can:
- See an overview of the candidate's personal details, last employment, and expectations.
- Add the candidate to an Assignment or Recruitment by clicking Add to Assignment or Add to Recruitment.
- Download their photo, add them to a Document Assembly template, send them a message, or edit their profile overview by clicking the 3 vertical dots.
- Scroll down the page to see all the different sections which include everything from their employment history to their bank details. For a full explanation of the sections in a candidate's profile, see this page.
How to add a candidate to an Assignment or Recruitment
There are 3 ways to add a candidate to an Assignment:
- Click Add to assignment at the top of their profile (image 1) or
- Click Add to assignment at the bottom of the Employment section in their profile (image 2) or
- Click the 3 vertical dots in their overview on the Candidates page and click Add to assignment in the drop down menu (image 3)
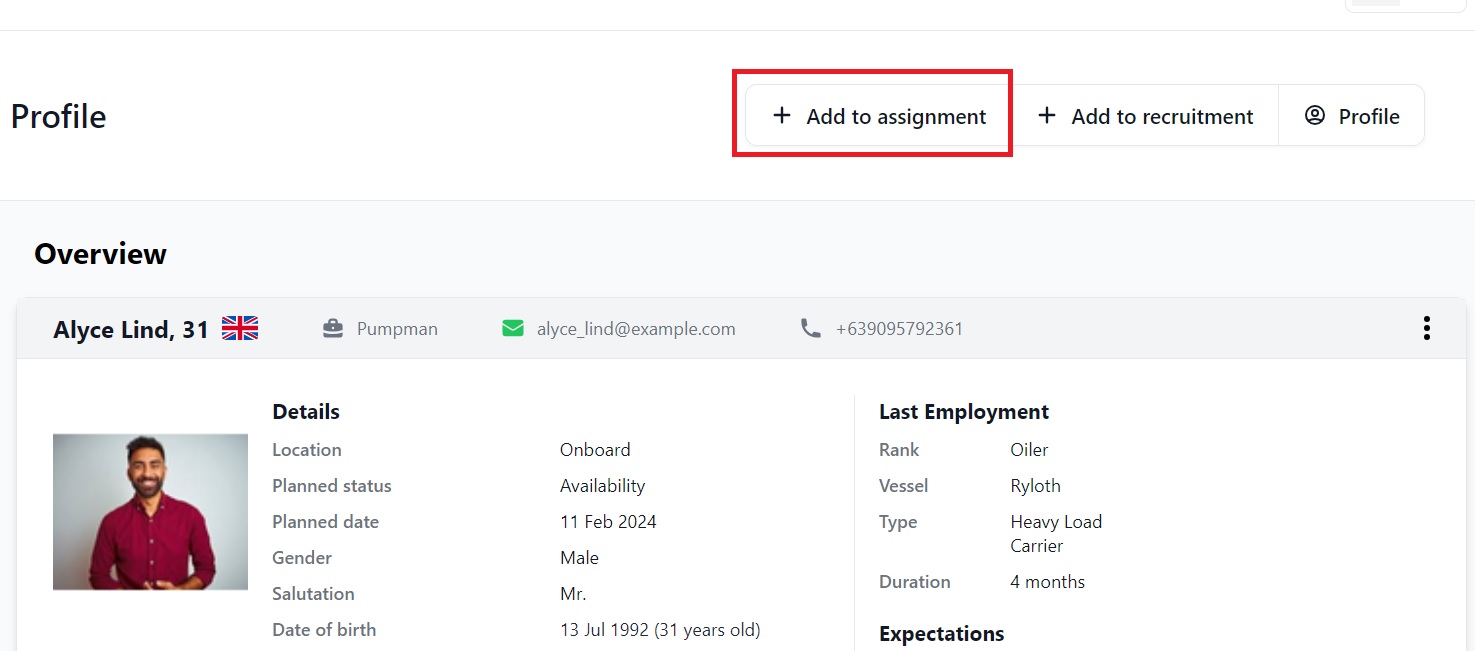
or:
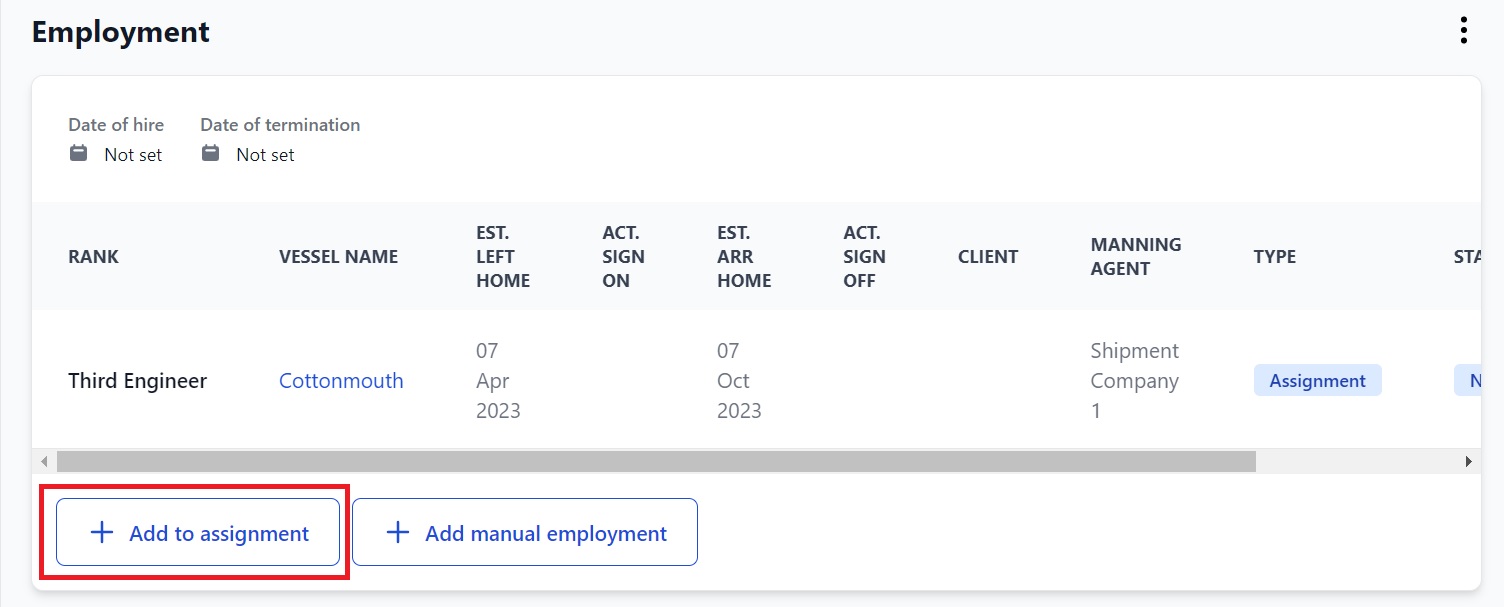
or:
All methods take you to this pop-up box:
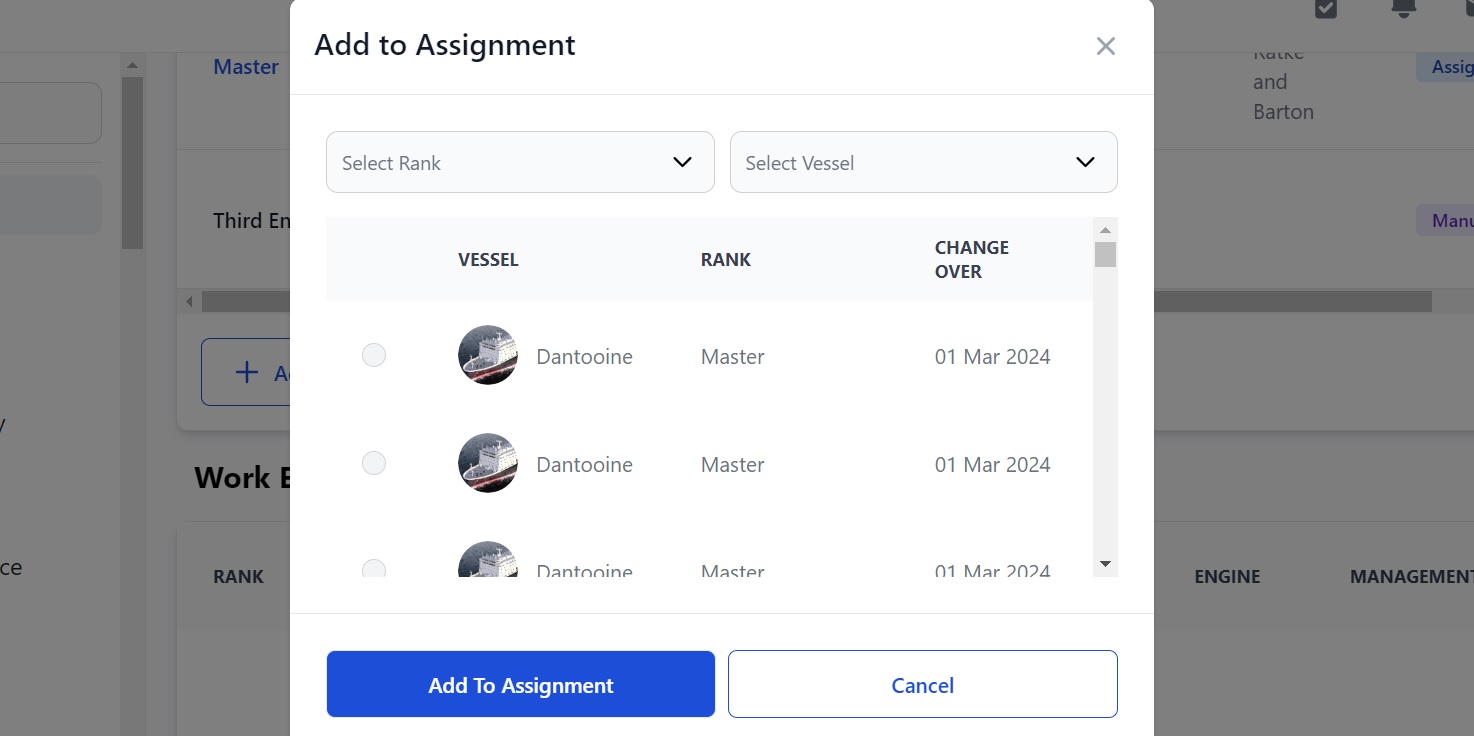
Here you can:
- Use the 2 boxes at the top to find the rank and vessel you are adding the candidate to.
- Click the circle next to the vacancy you want to apply them to, then click Add to assignment and they will be applied to that job.
Adding a candidate to a Recruitment is exactly the same but there is only one way to do so and that is by clicking the Add to Recruitment button at the top of their profile page:
How to add manual employment
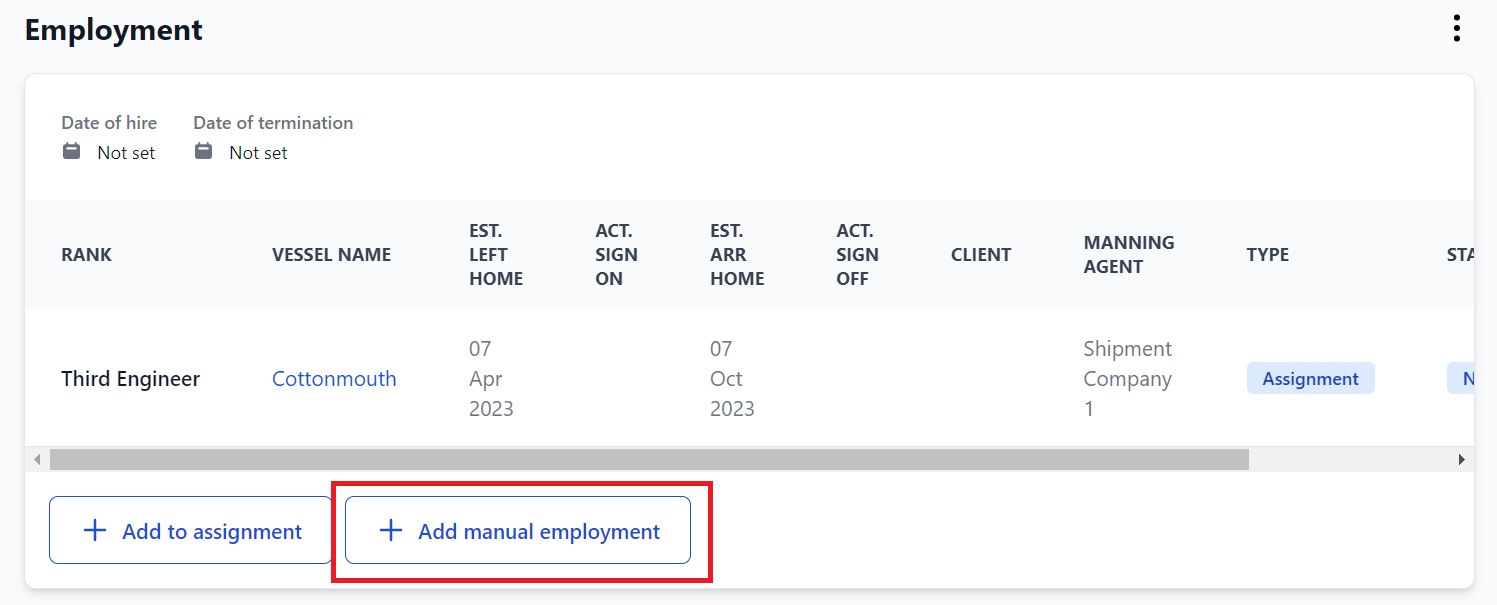
Click Add manual employment at the bottom of the Employment section in a candidate's profile:
That will open this pop-up box:
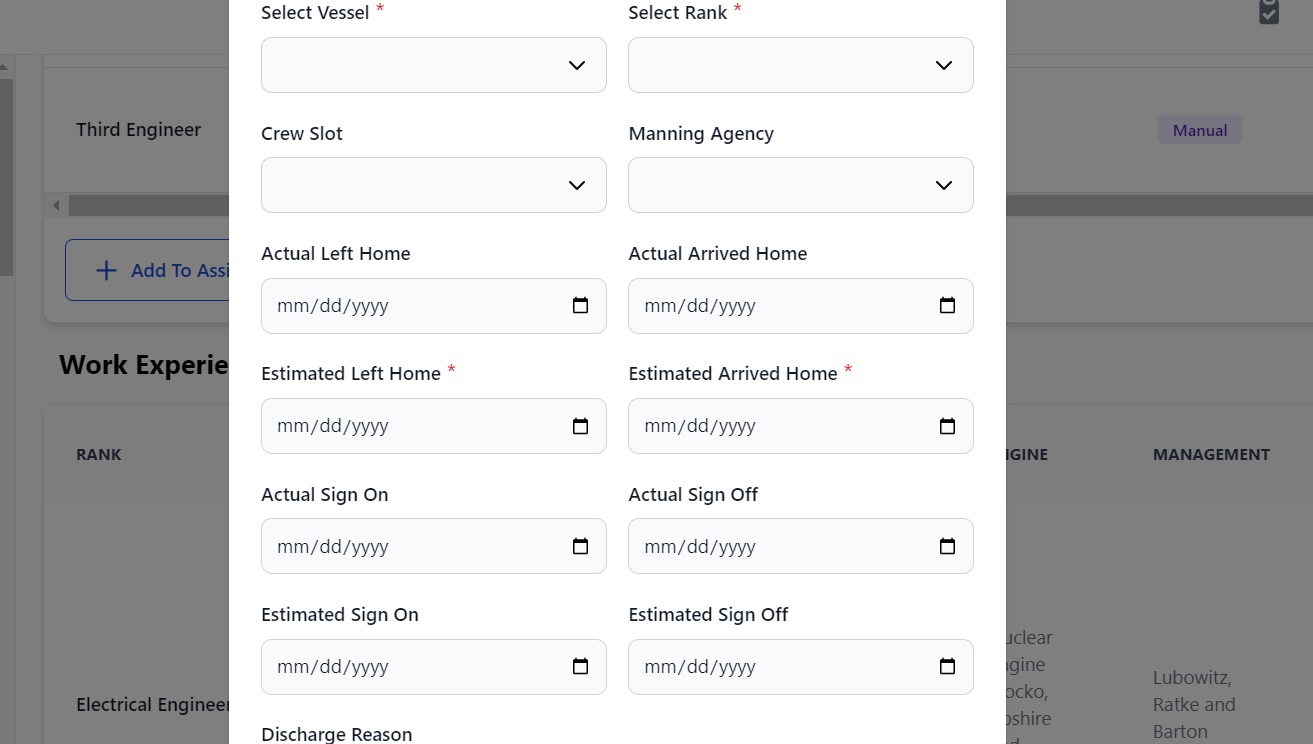
Here you can:
- Select the vessel, rank, crew slot and manning agency.
- Enter the actual and estimated left home and arrived home dates.
- Enter the actual and estimated sign on and sign off dates.
- Enter the discharge reason.
The manual employment will show in the Employment section:

How to filter candidates
Click the funnel icon at the top of the Candidates page:
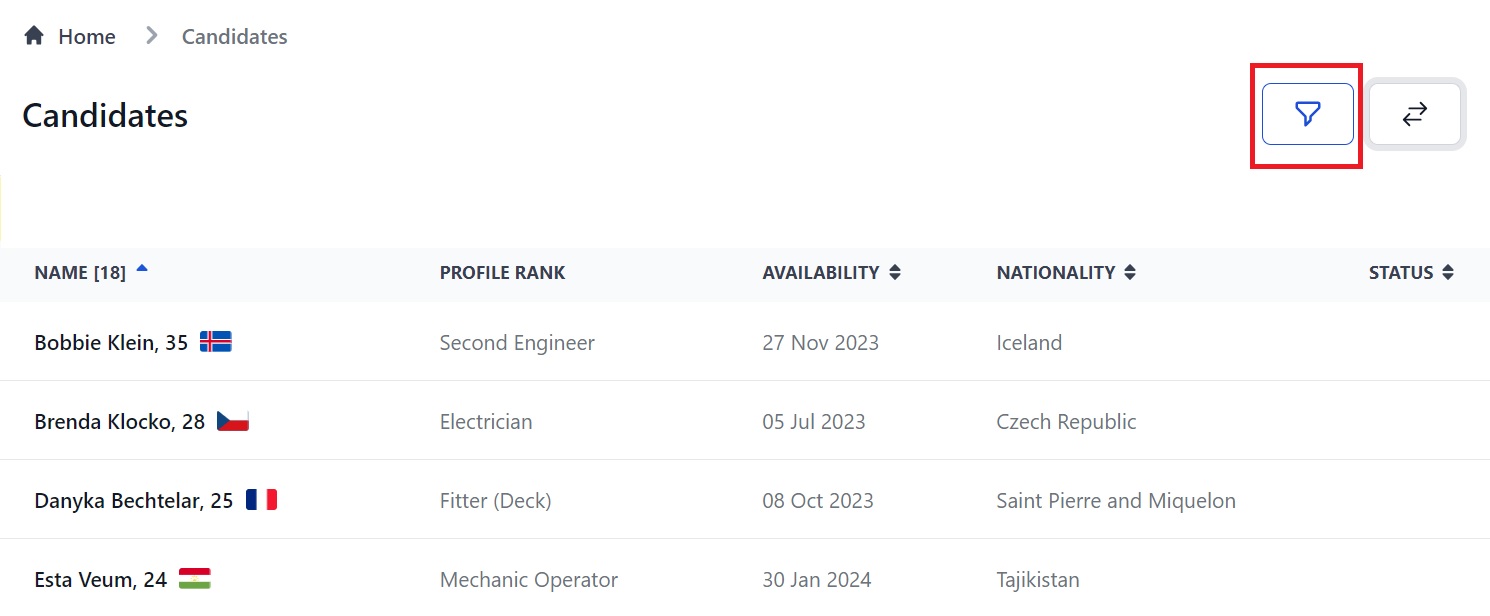
This opens a side panel with the filters. Click the down arrow next to each filter to search by various information:
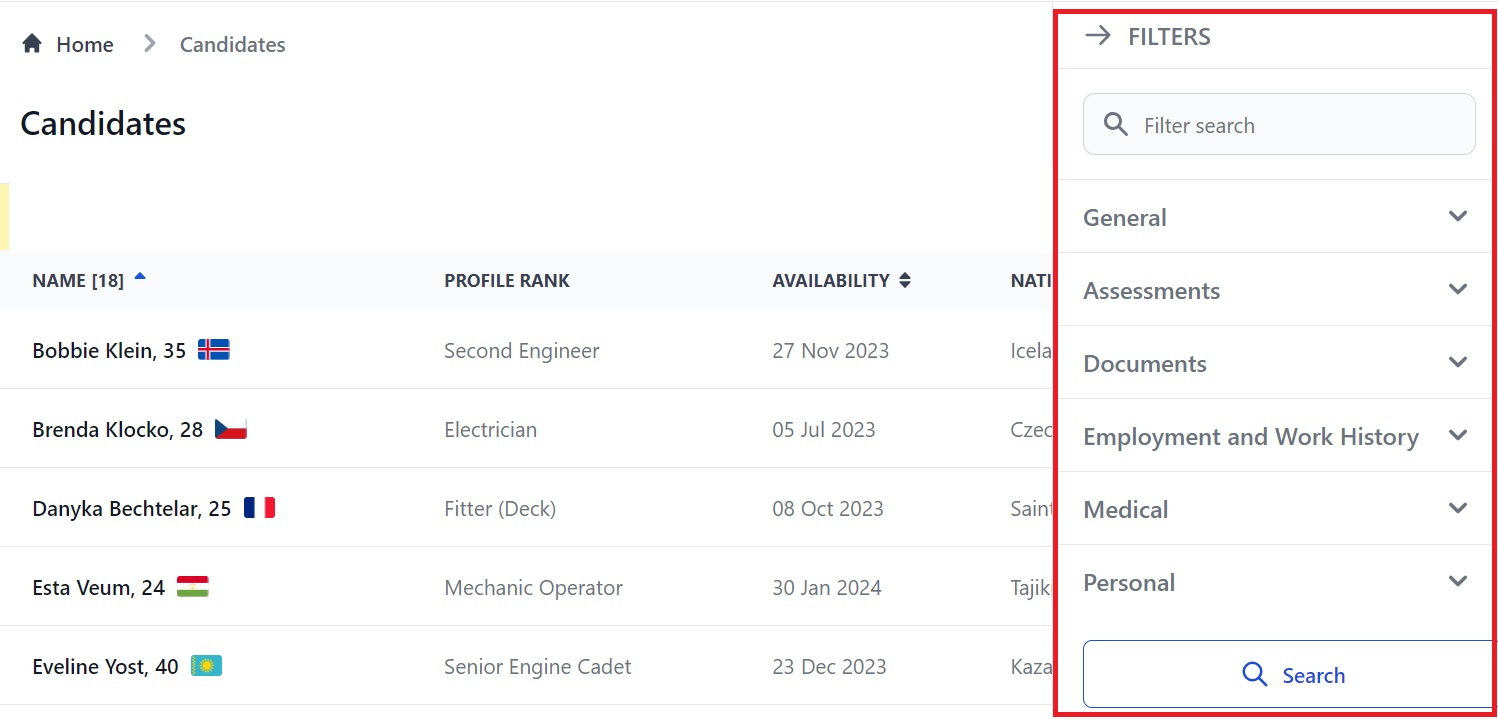
The filters let you search by:
- General: name, email, seafarer pool, rank, manning agent, availability dates, pseudo ID, Martide ID and ex-crew.
- Assessments: assessment type.
- Documents: document type, issuing country, ECDIS type, document number, validity and no document uploaded.
- Employment & Work History: sign on and off dates, estimated arrived home dates, vessel name, vessel and engine type, rank, trading areas, nationalities sailed with and max crew complement sailed with.
- Medical: medical test type and valid until date.
- Personal: home country and airport, date of birth, age, salary expectations, language, nationality, gender, phone number, birth province and country, race and religion.
- Planning: planned between dates, not planned between dates and planned status.
- Status: master status (applicant or rejected)
- Visa: country.
Tip: If you have searches you use a lot, set your search parameters and save the results page in your bookmarks. When you open the page, you'll see the results for the filter you saved.
If you need further help please get in touch here.