A Manning Agent's Guide to Submitting Candidates for Jobs

Our goal is to make Martide’s online maritime recruitment solution and crew planning software as intuitive and as easy to use for manning agencies as possible. We want to make your life simpler when it comes to finding seafarers for your clients' vacant seafarer jobs.
With that in mind, we’ve written this blog post as a 'how to guide' to give you the lowdown on everything you need to know about submitting one of your candidates to a shipowner's job vacancy through the Martide platform.
Don't worry - it's a piece of cake and once you've done it once, you'll wish you'd used Martide sooner!
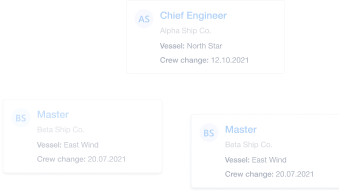
Martide makes it easier for Manning Agents to apply seafarers to jobs
When an employer - so that’s the shipowner, ship manager, crew manager or recruitment officer - chooses your manning agency's services to help them fill a vacancy, our system will give you the opportunity to first review the position before you start checking out the seafarer profiles of potential candidates.
Read more: Why Manning Agents Need to Learn to love Tech
This is how to review a position.
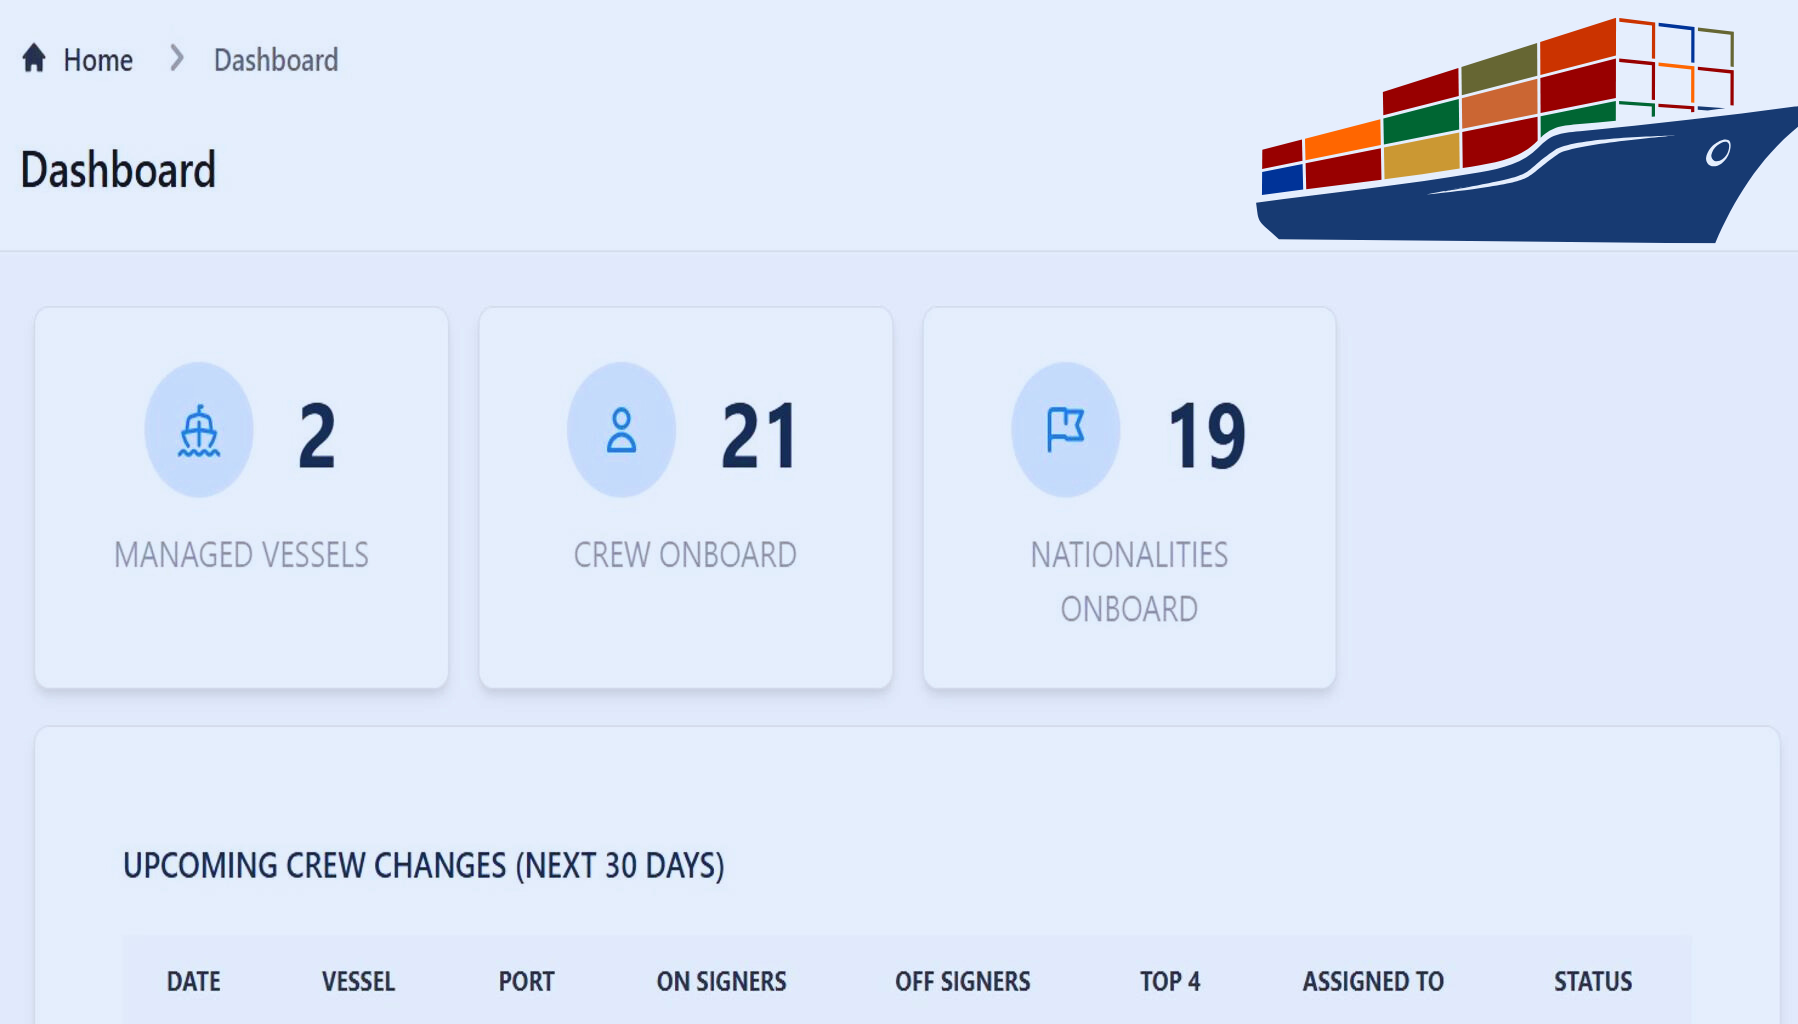
First of all, log in to your Martide account. The first page you see when you are logged in is the Find Job page. This is where you will see all of the positions you have been selected to help find seafarers for.
(Just so you know, if you're elsewhere in our crewing system and you need to go back to the Find Jobs page you can quickly return to it by clicking on Find Job in the side menu:)
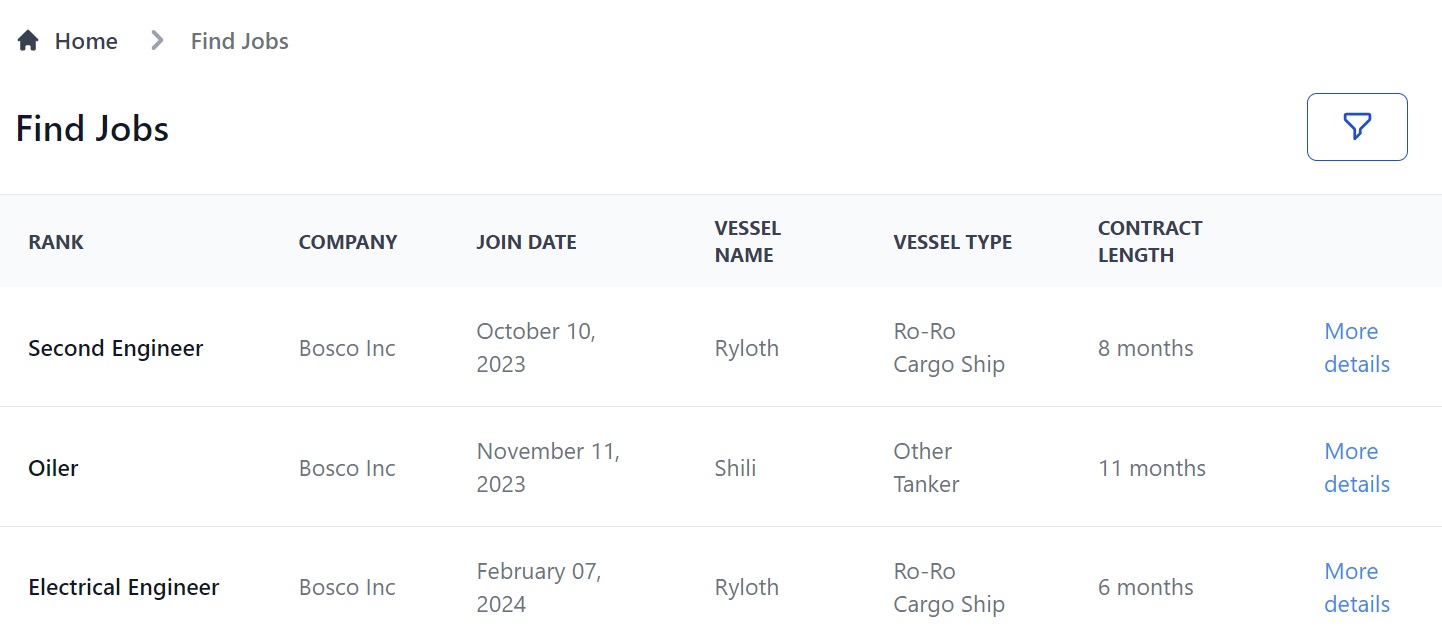
In our example above you can see our (fictional) manning agency has been chosen by an employer (Bosco Inc) to find candidates for 2nd Engineer, Oiler and Electrical Engineer positions.
You can also see the relevant details about the vacancy so that you can select the appropriate seafarer. For example, as well as the rank and the company's name you will also see the join date, the vessel’s name, the type of vessel, and the length of the contract.
You can also filter the vacancies by clicking the funnel icon at the top right of the page.
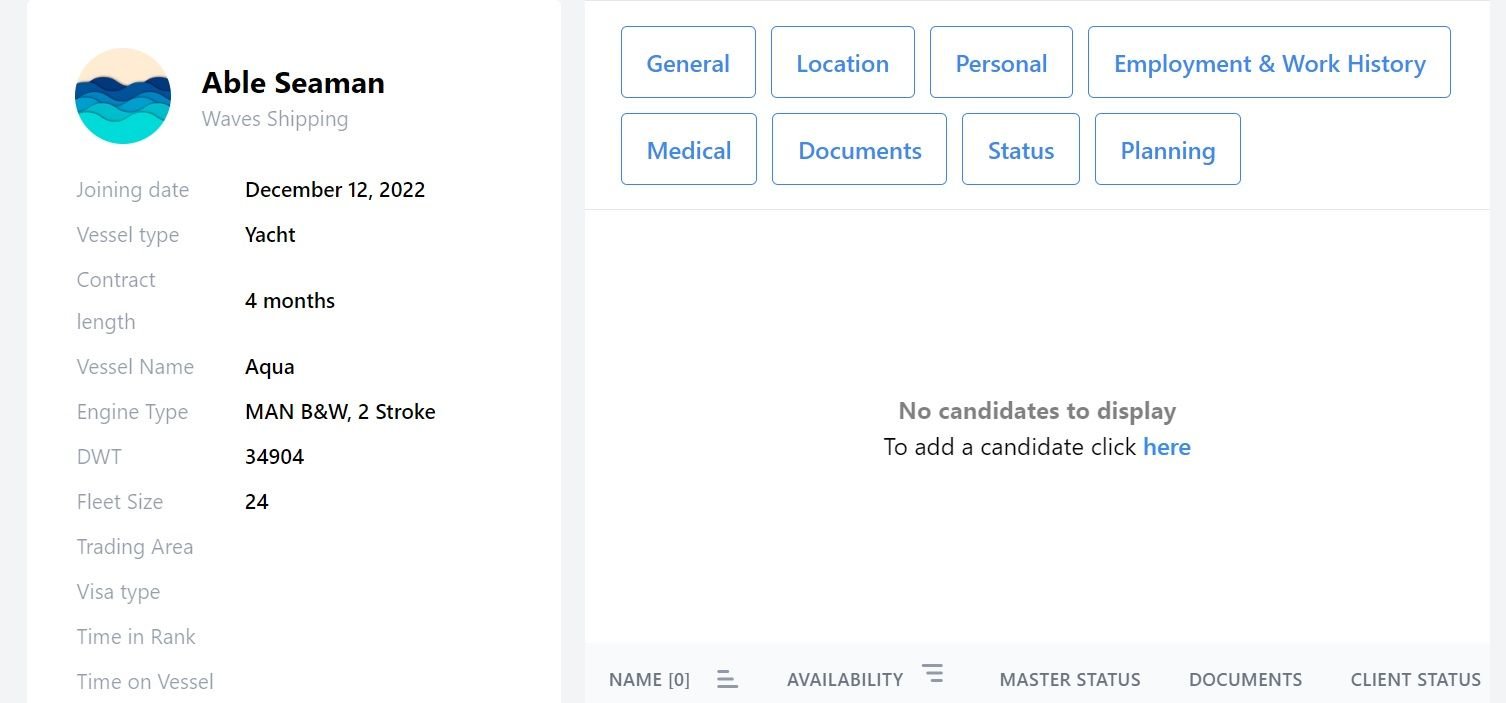
Click on More details to the right of the job to find out more. That will take you to this screen:
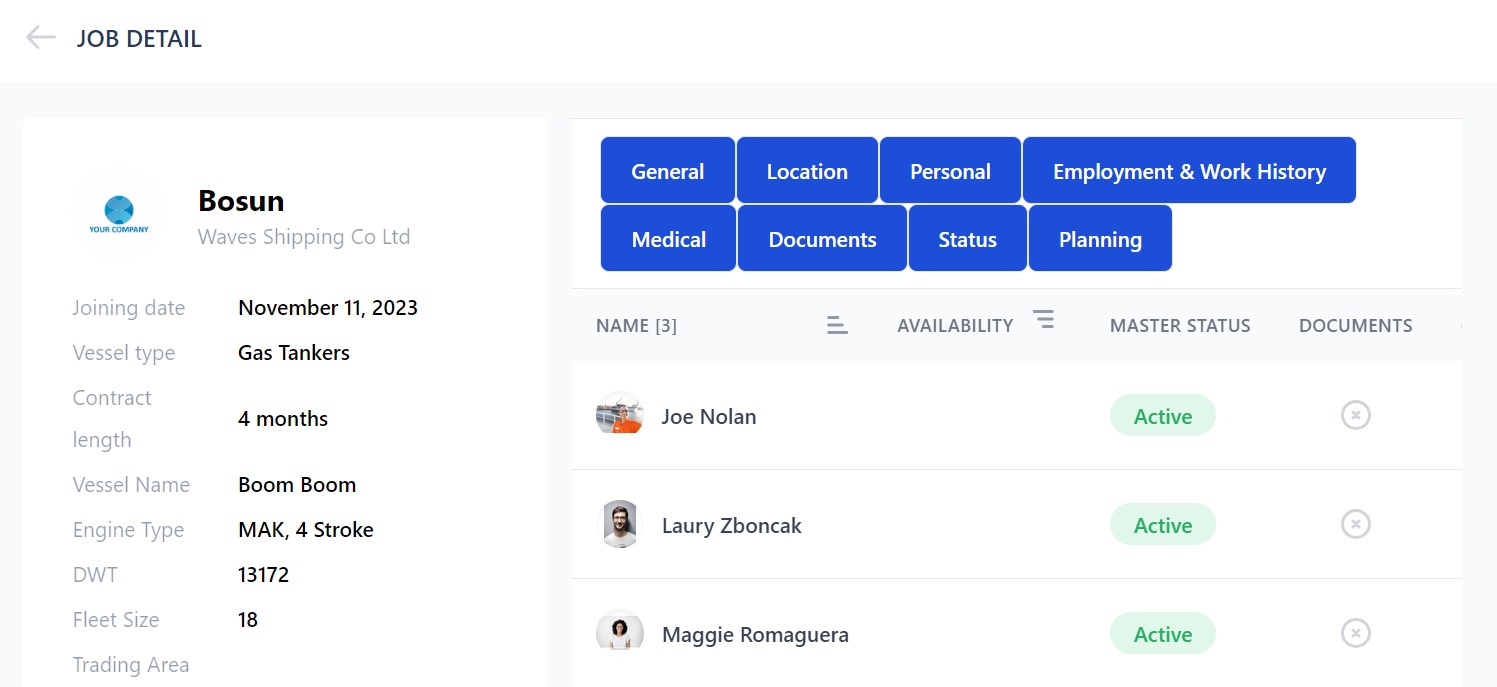
On this page you can:
- See more details about the job, the vessel and the contract on the left.
- See the names of candidates, their availability date, master status, whether or not they have their documents, and client status on the right.
- Filter candidates by General Info (name, seafarer pool, rank, availability etc.), Location (onboard or ashore), Personal Info (age, nationality, language etc.), Employment & Work History (vessel and engine types etc.), Medical (certificate or exam etc.), Documents (number, validity and type), Status (active, retired etc.) and Planning (dates) by clicking the blue buttons at the top.
- Apply a candidate to the job vacancy by clicking the Apply button to the right of their name. (See below.)
- Go to a candidate’s profile by clicking on their name.
- Sort candidates by A-Z or Z-A by clicking the 3 lines next to Name and Availability.
How to add a candidate to an Assignment
In Martide a job vacancy is also called an Assignment. If you have no candidates currently applying for a vacancy and you want to add someone, click the text that says To add a candidate click here:
That will open up a pop-up box like this:
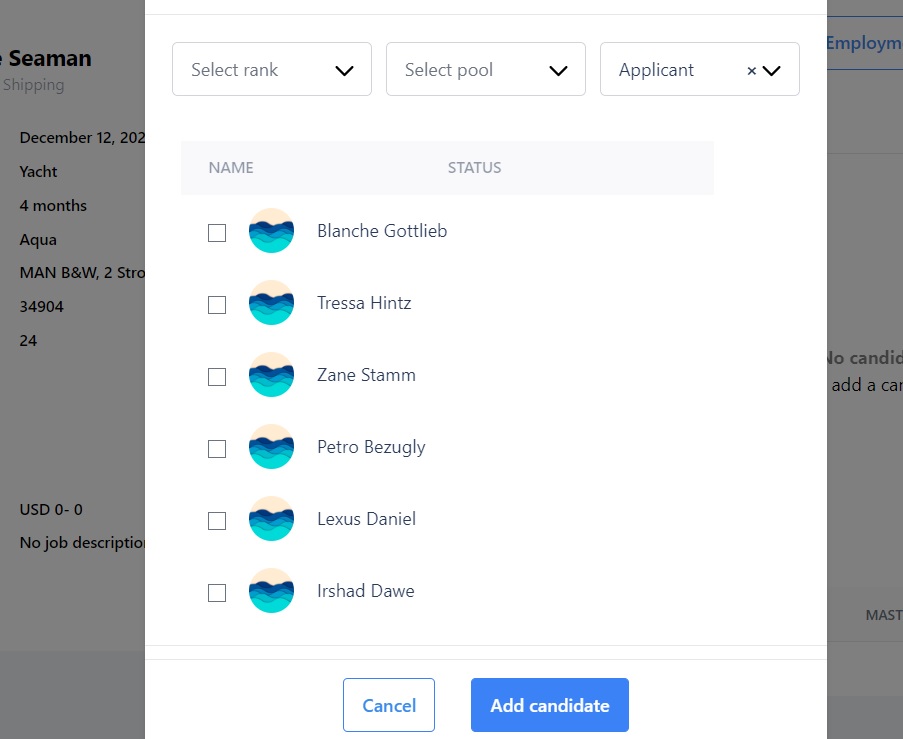
In this pop-up box you can:
- Filter candidates by their rank, seafarer pool or status (applicant or rejected.)
- Check the box next to any candidates you want to apply to the job and click the Add candidate button at the bottom of the pop-up box.
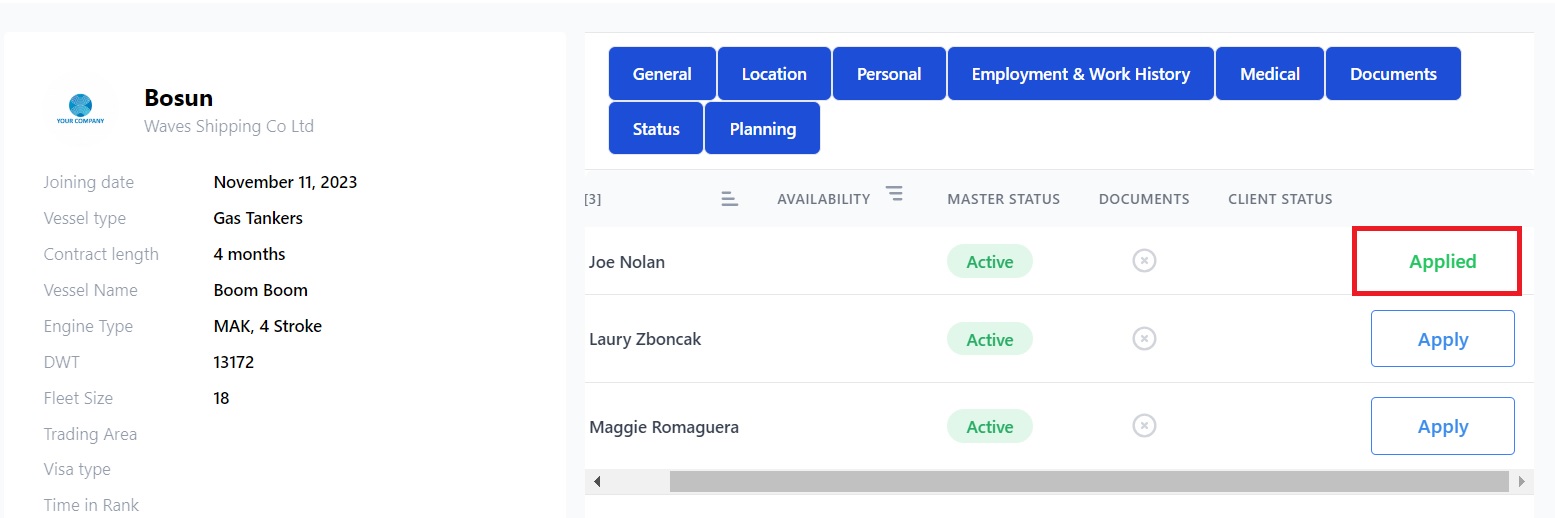
They will now appear on the job details page. Click the Apply button to the right of the candidate to apply them to that job/Assignment:
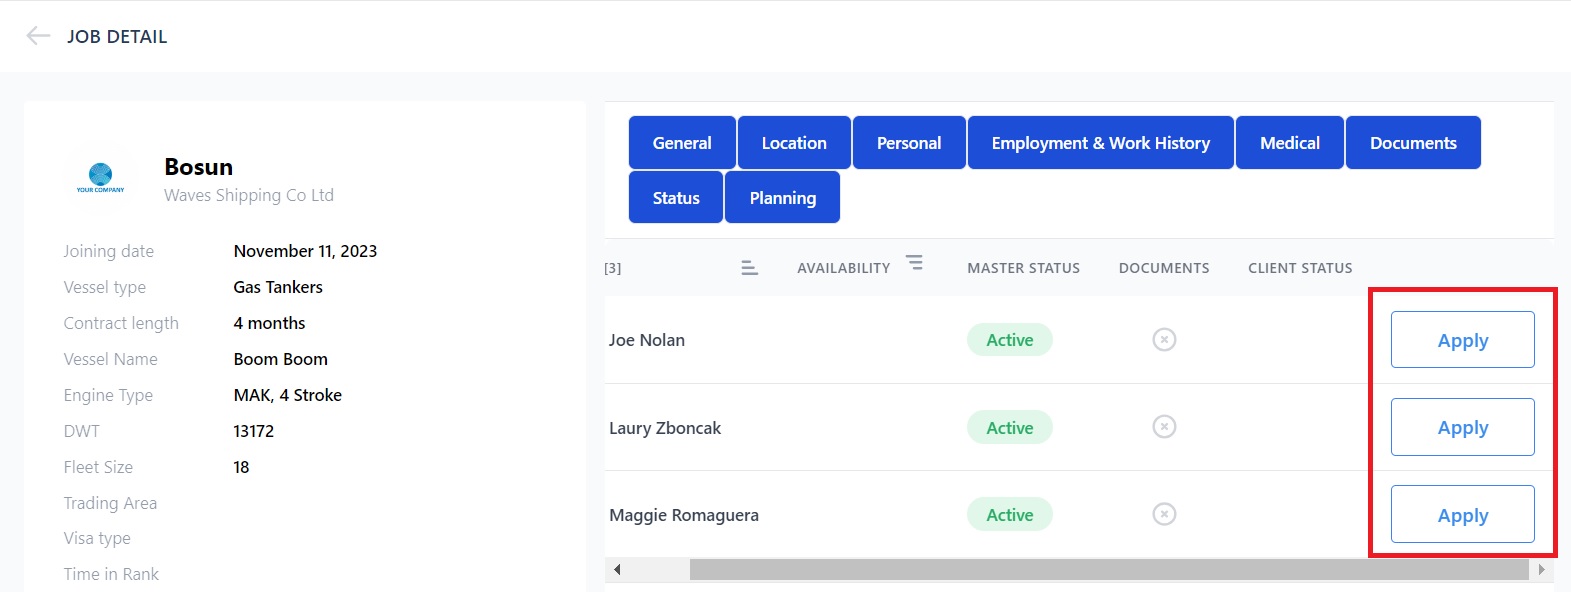
That will take you to this page:
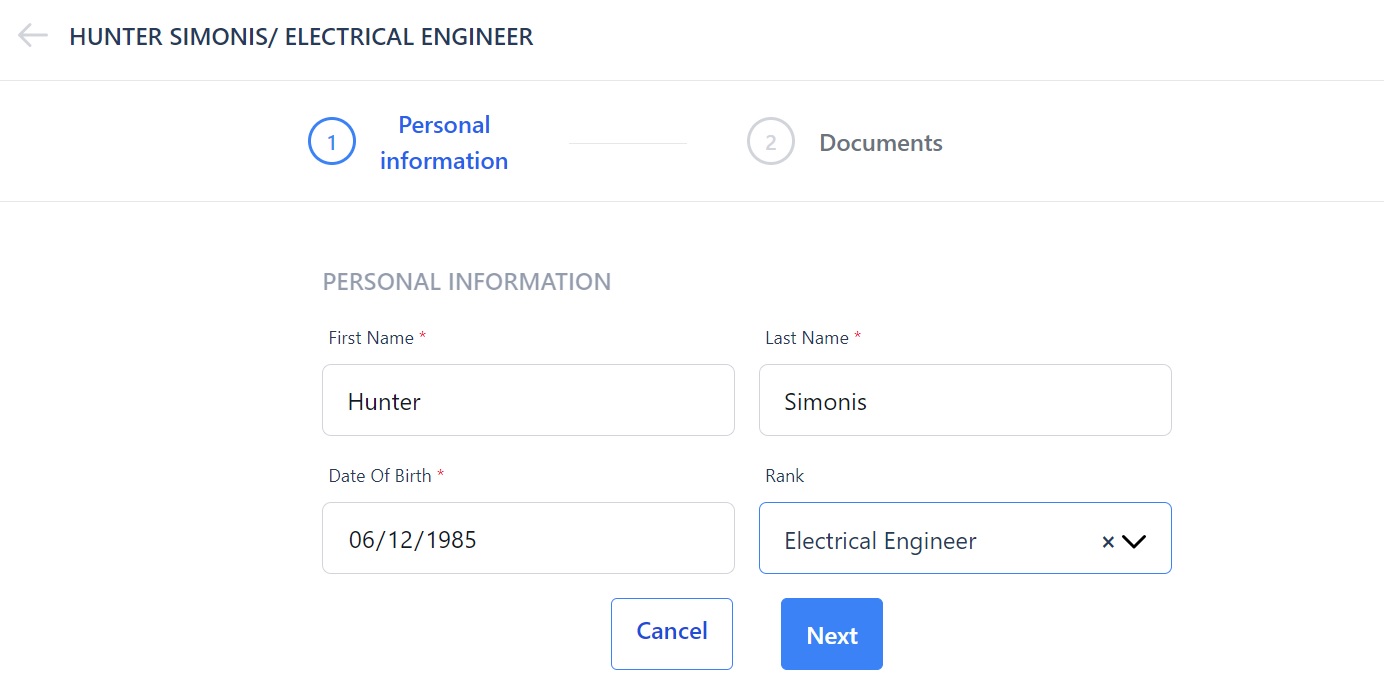
Now you can:
- See the candidate's personal information including their name, rank, and date of birth.
- Select their rank from the drop down menu if it's different.
Click the Next button and you will see this:
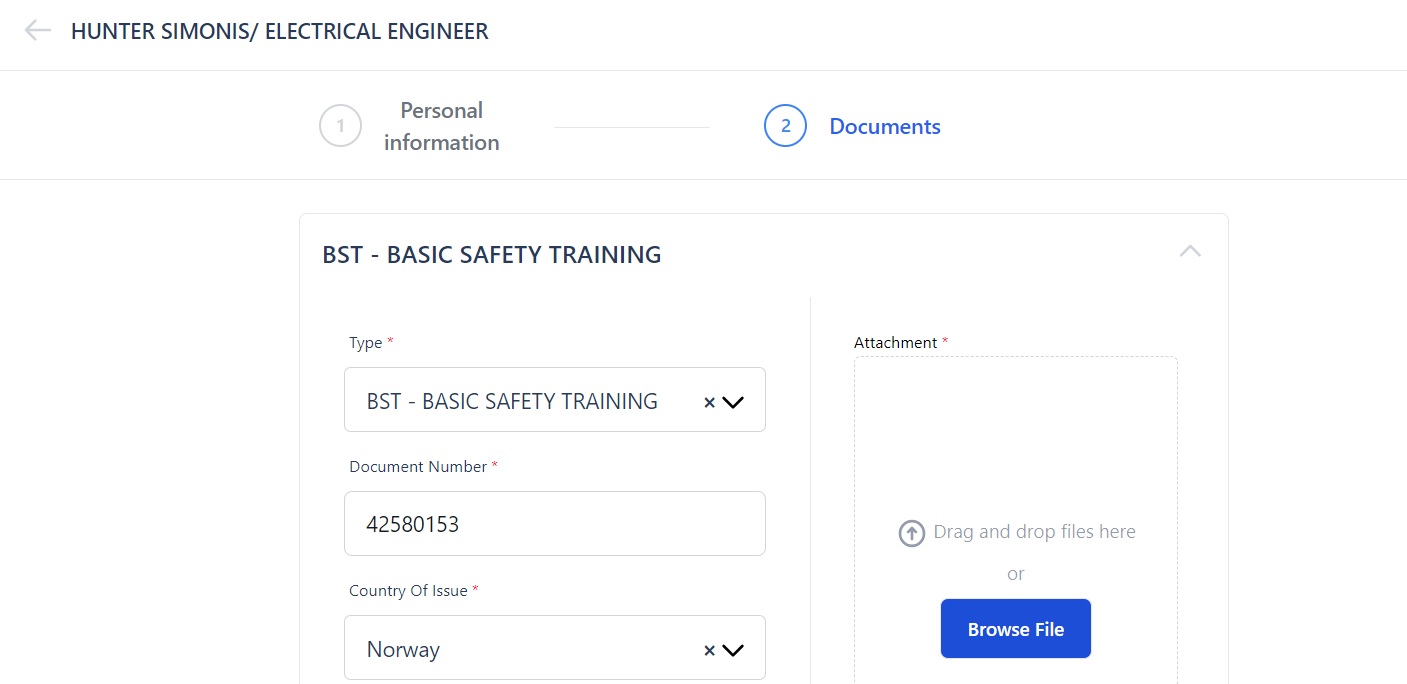
Here you can:
- Scroll down the page to see the documents that the candidate holds.
- Add, change and update any information if you need to.
- Upload copies of the documents.
When everything is in order, click the Apply Seafarer button at the bottom of the page and you will see this pop-up box:
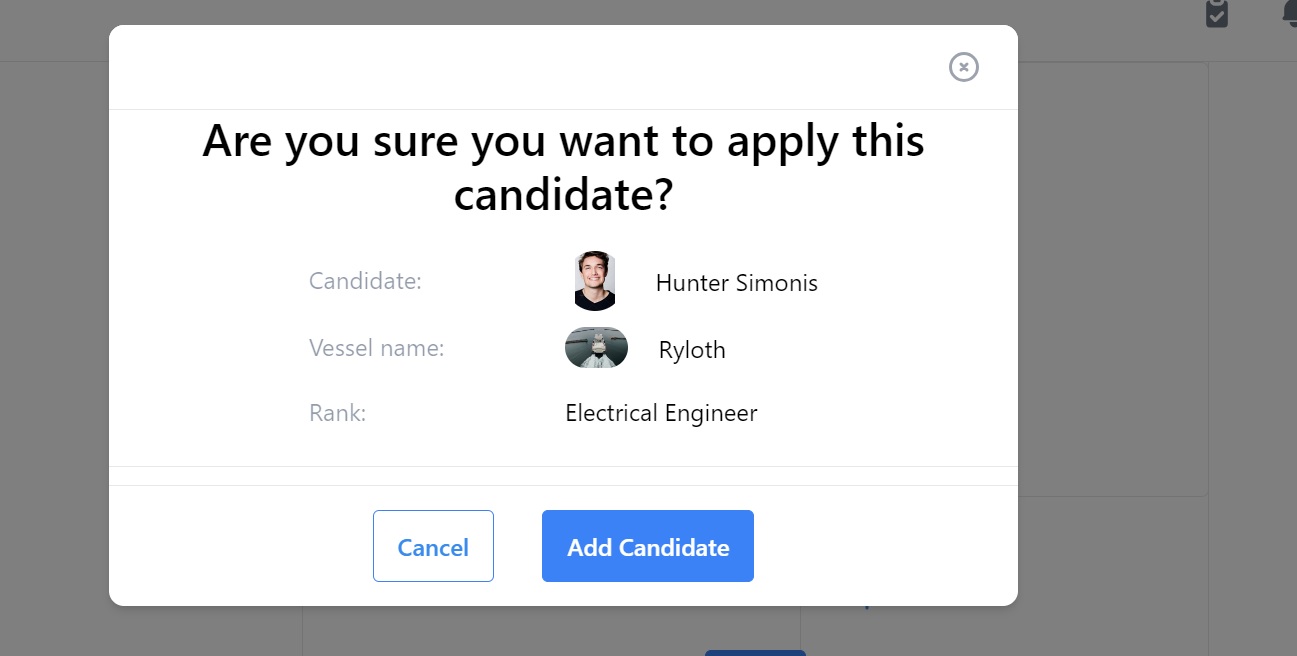
To apply the candidate to that job, click the Add Candidate button. You will go back to the job details page where you will now see that candidate has been applied to the job:
As one of your client's chosen manning agencies, you also have the ability to add new candidates to the system. This is simple to do: first click Candidates in the side menu bar (just under Find Job.) You will be taken to the Candidates page. It looks like this:
Note: This page shows you an overview of all the current candidates in the system. To switch to a list view, click the two arrows at the top of the page:
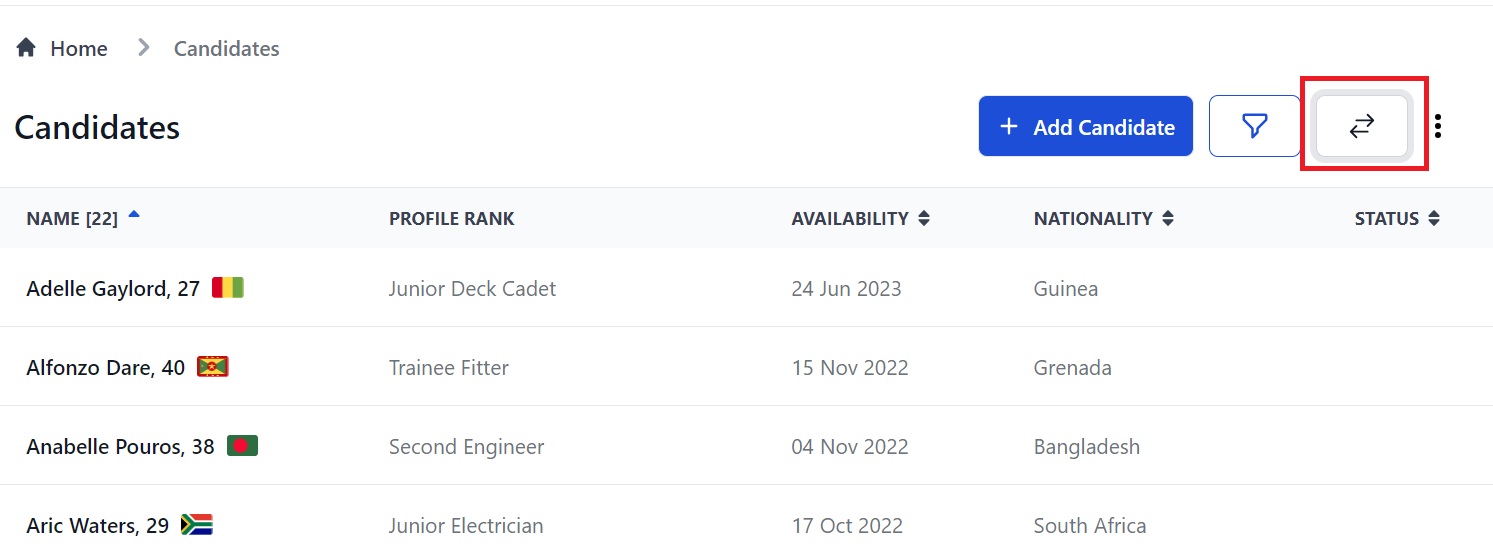
In either view you will see an Add Candidate button at the top of the page.
Adding a candidate is really easy: once you’ve clicked the Add Candidate button, you'll see a pop-up box that looks like this:
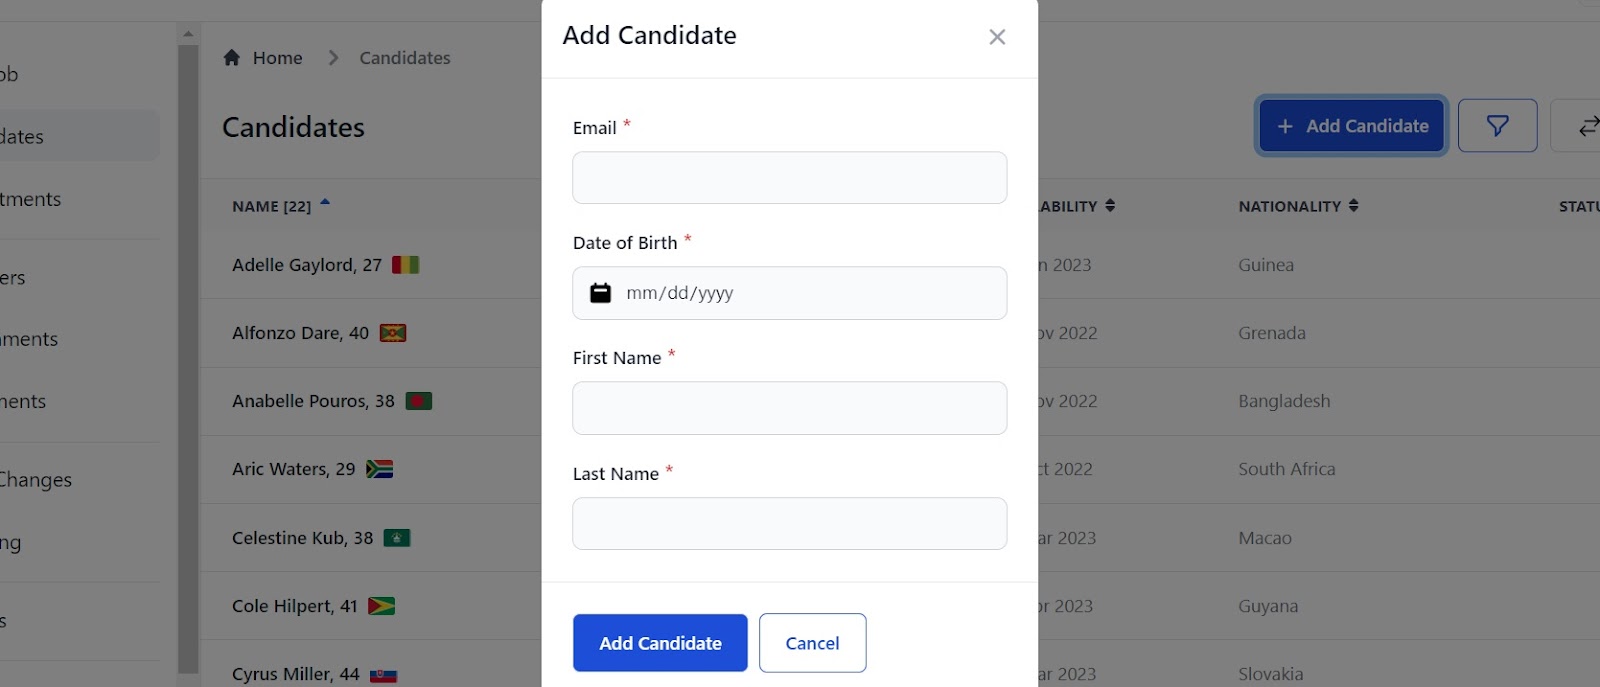
All you need to do is enter the seafarer's email address, date of birth and first name and last name.
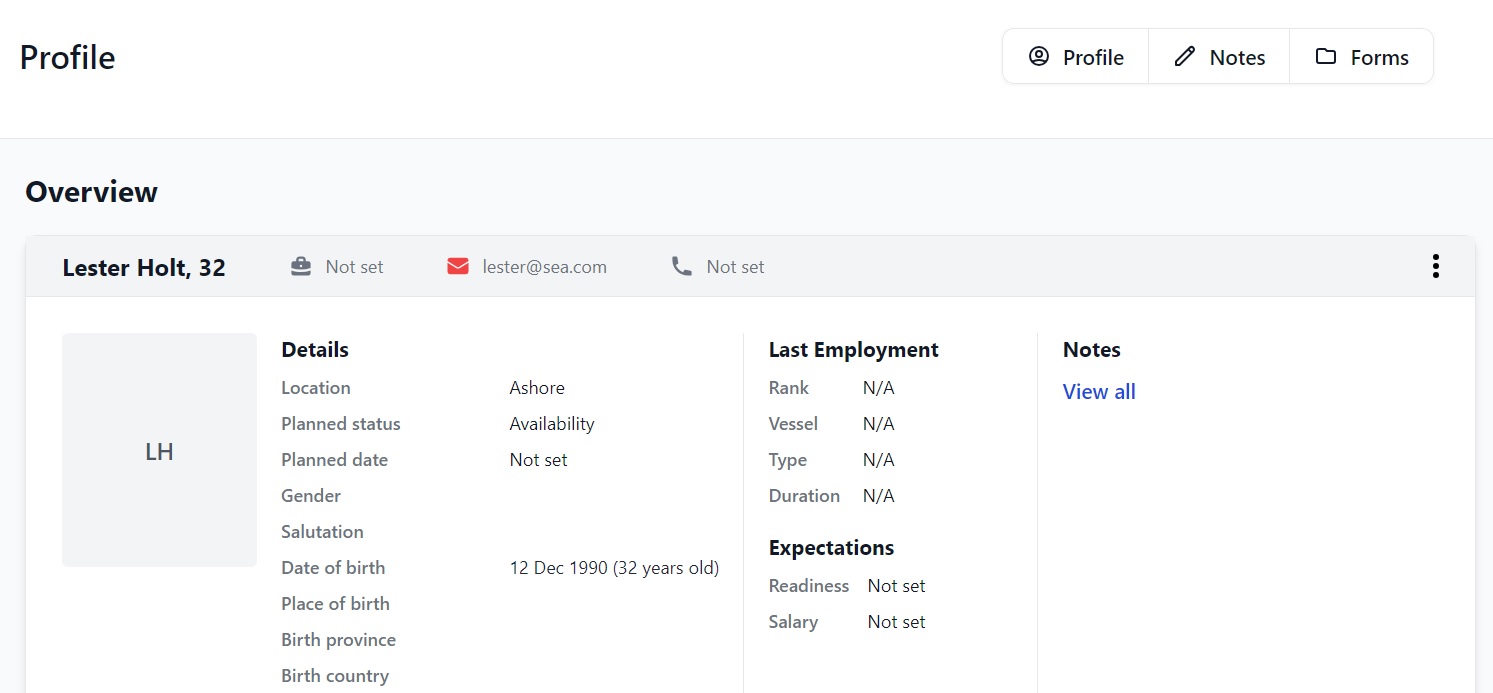
Once you’ve done that, click the Add candidate button at the bottom of the pop-up box and it will create a seafarer profile page for them. You can now fill in their information so that all of their details are complete in the system and they are ready to apply to vacancies.
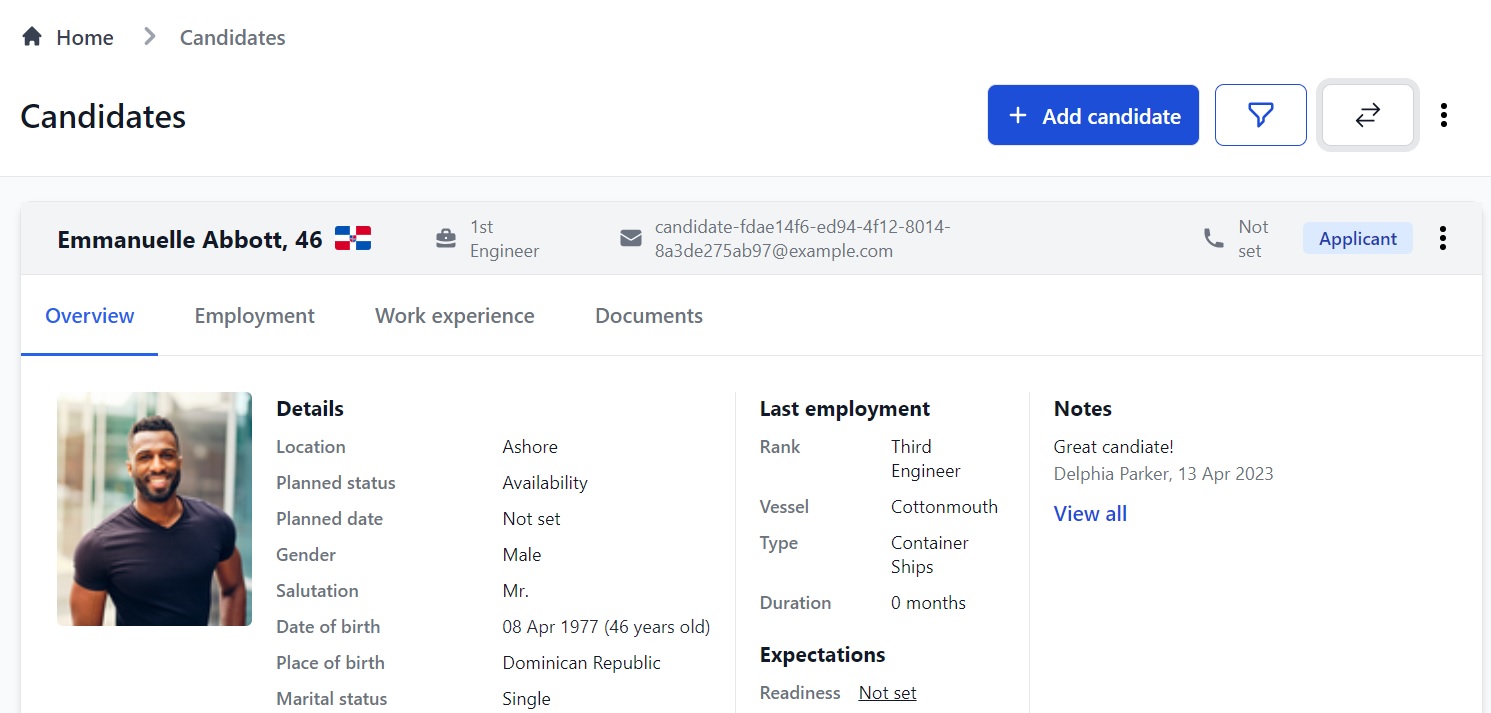
A new profile page looks like this:
When you return to the Candidates page you will be able to see the seafarer in the list of candidates and their status will be Applicant:
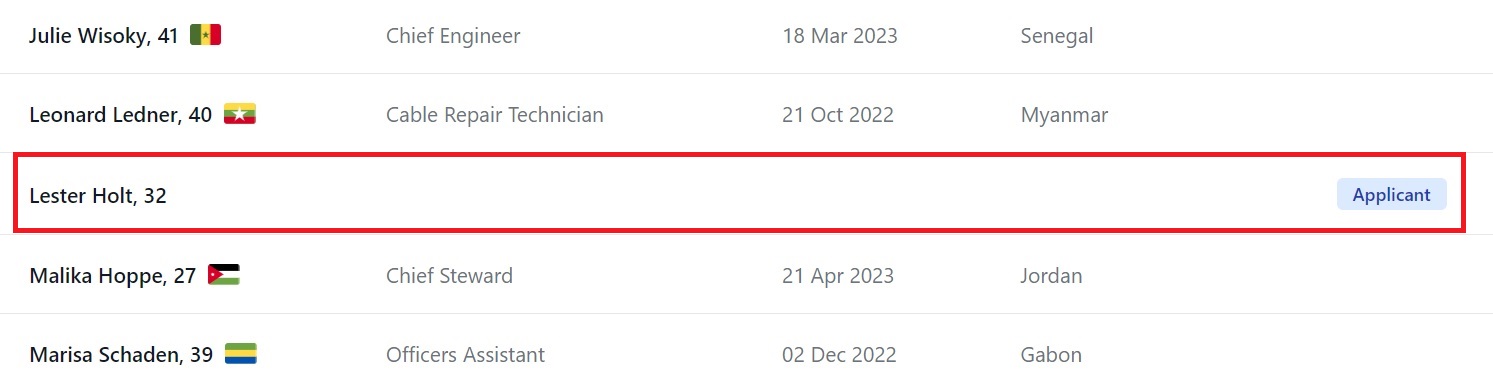
Don’t forget to complete their seafarer profile so that their rank, availability date and nationality show on the main Candidates page:

More support for manning agents
Did you know that as a manning agent, if you need any more help or support when using Martide’s crewing system and maritime recruitment platform, we have an entire Support website containing guides to all of our various features and functions?
From building recruitment processes to advertising your seafarer job vacancies, help is always at hand.
Plus, we also have a help section for seafarers on the Support website, so if any of your candidates want to know more about using Martide, feel free to point them in its direction!
You’ll also find some other useful topics for manning agencies such as how to get started when you first create a Martide account, how to use the messages feature, and how to use our crew planning feature.
Read more: Manning Agent Guide to the Martide Message Inbox
In fact there are a number of great features in Martide that you should know about as a manning agent and provider of crew management services.
And if you haven't already been selected to join Martide's Approved Partner Network we'd love to hear from you so we can tell you more about how we can help you accelerate your business and impress your recruitment officer and crew manager clients even further!
Meanwhile, why not follow us on Facebook, LinkedIn and Twitter / X too?
This blog post was originally published on September 12th 2019 and last updated to reflect changes and upgrades to Martide's maritime recruitment and crew management platform on November 9th 2023.

Eve Church
Eve is Martide's content writer, publishing regular posts on everything from our maritime recruitment and crew planning software to life at sea. Eve has been writing professionally for more than two decades, crafting everything from SEO-focused blog posts and website landing pages to magazine articles and corporate whitepapers.
UK