Get Started
Read this if you've just created a Martide account and want to know how to get started using our maritime crewing software. Log into your Martide account.
Complete your profile
Click the circle with your initials in it and your name in the drop down menu. You will see this page:
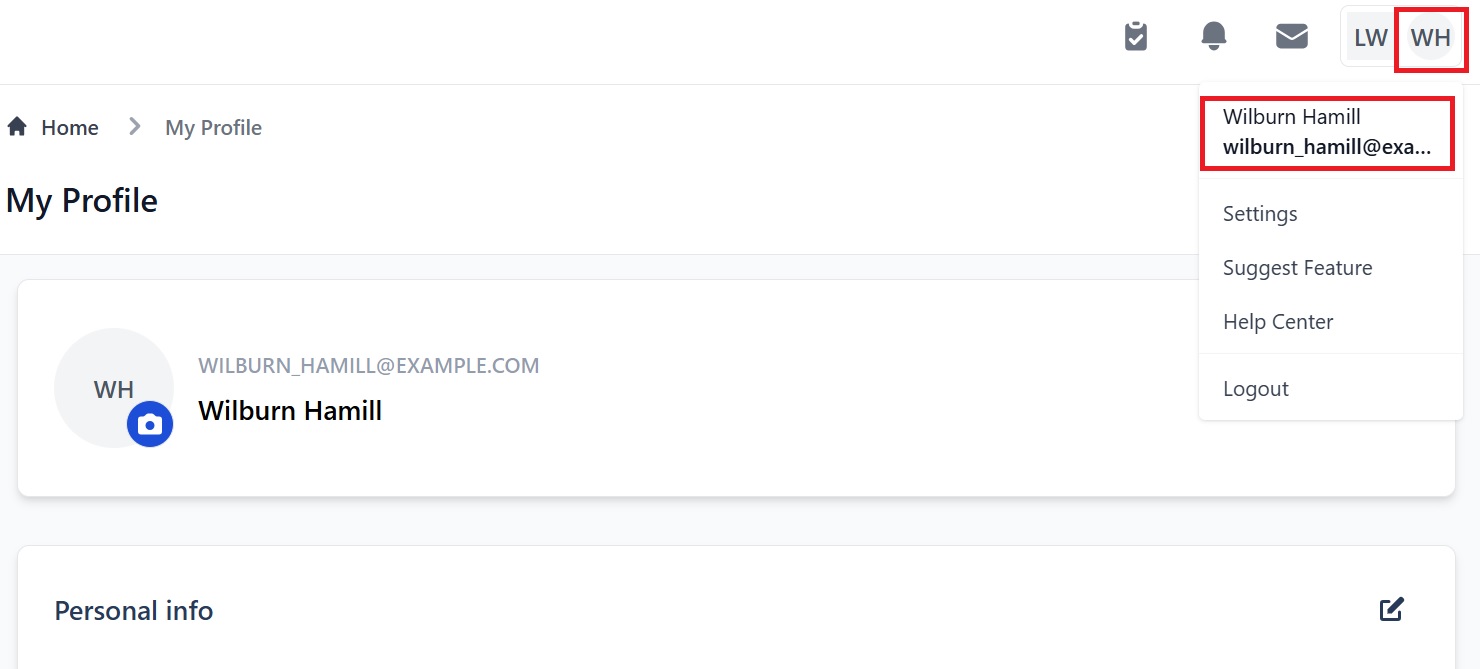
Here you can:
- Click the camera icon to upload a profile picture.
- Enter or edit your name and position and set your time zone.
- Change your password.
- Edit your email address.
Add your company’s information
Click My Company at the bottom of the menu on the left. You'll go to this page. At the top you'll see headings:
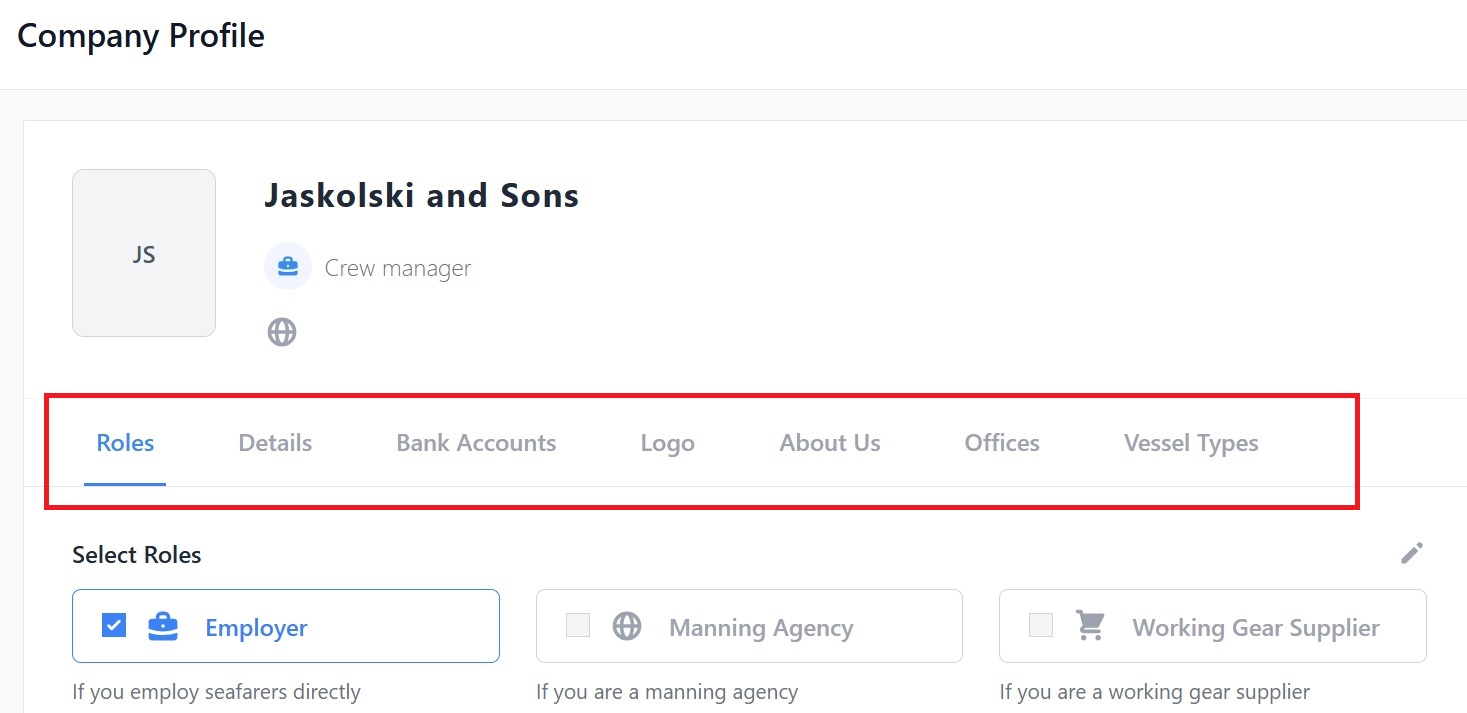
Depending on what your company does, you will see different headings. Our example is for a Crew Manager/Employer so we can see 7 headings: Roles, Details, Bank Accounts, Logo, About Us, Offices and Vessel Types. Click a heading to go to that section.
Note: There are other sections on the page but the headings take you to the main ones.
We will take you through the Crew Manager version but the basics are the same for all companies.
To edit a section, click the pen icon on the top right of that section
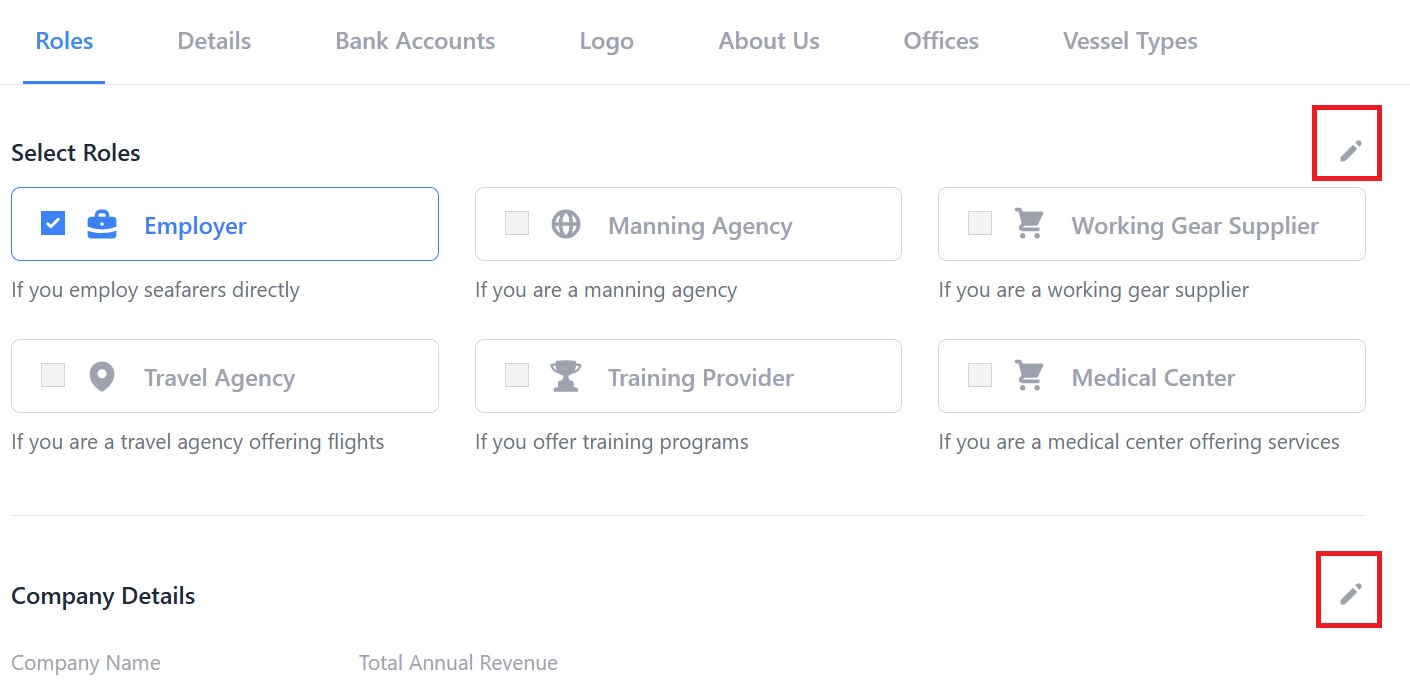
In the Roles section (see above image) select your company's role: Employer, Manning Agency, Working Gear Supplier, Travel Agency, Training Provider or Medical Center. You can select more than one, i.e. if you're an employer who offers training.
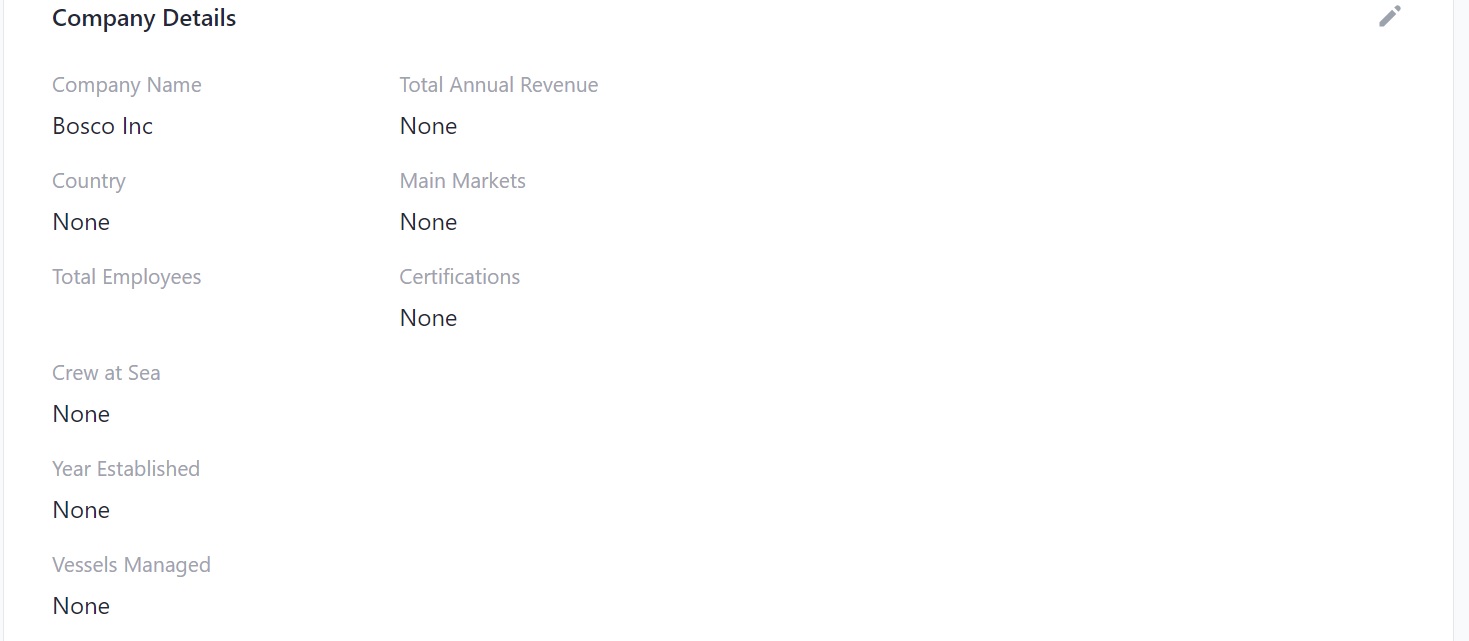
In the Details section (see image below) add your company's name, revenue, country, main markets, number of employees, crew at sea, certifications, year established and number of vessels managed.
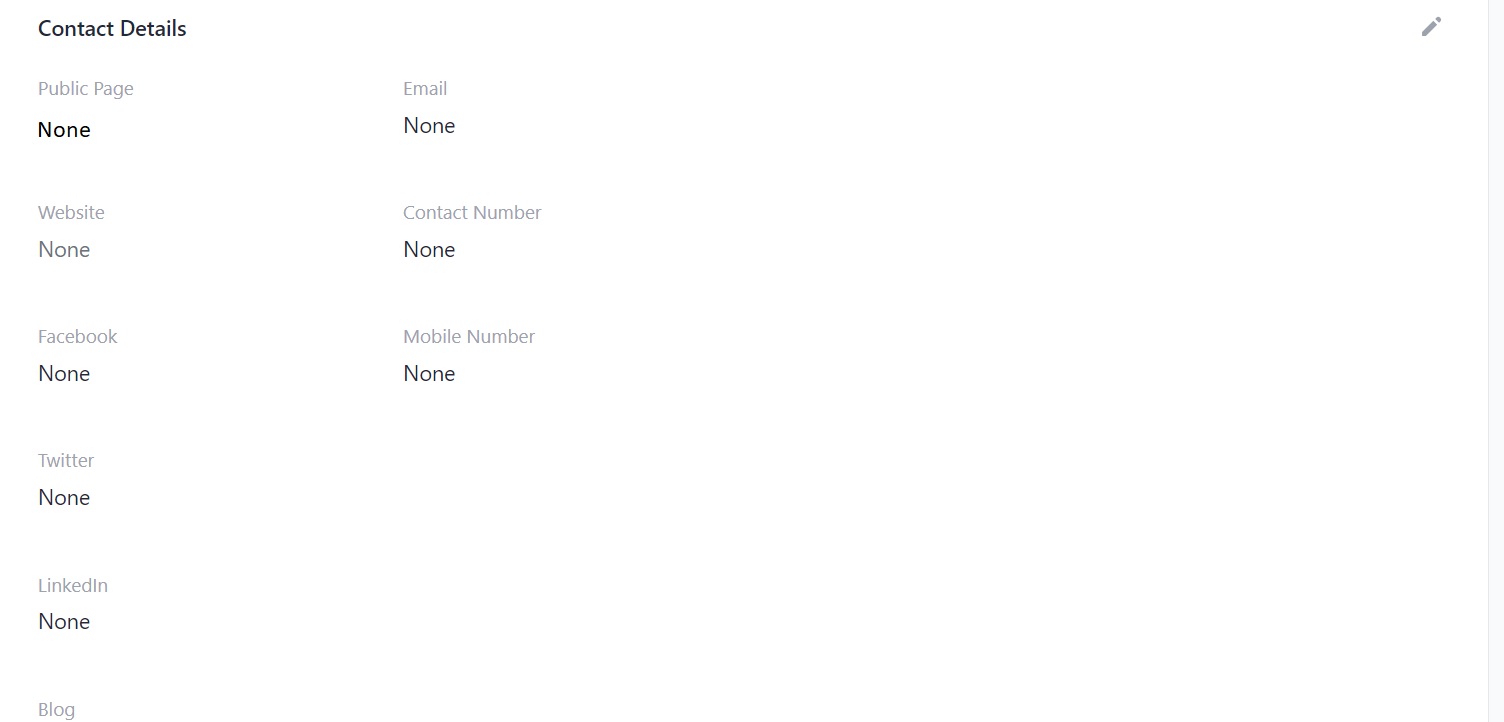
In the Contact Details section (see image below) add your website, email address, contact number, mobile number, and links to your social media accounts and blog.
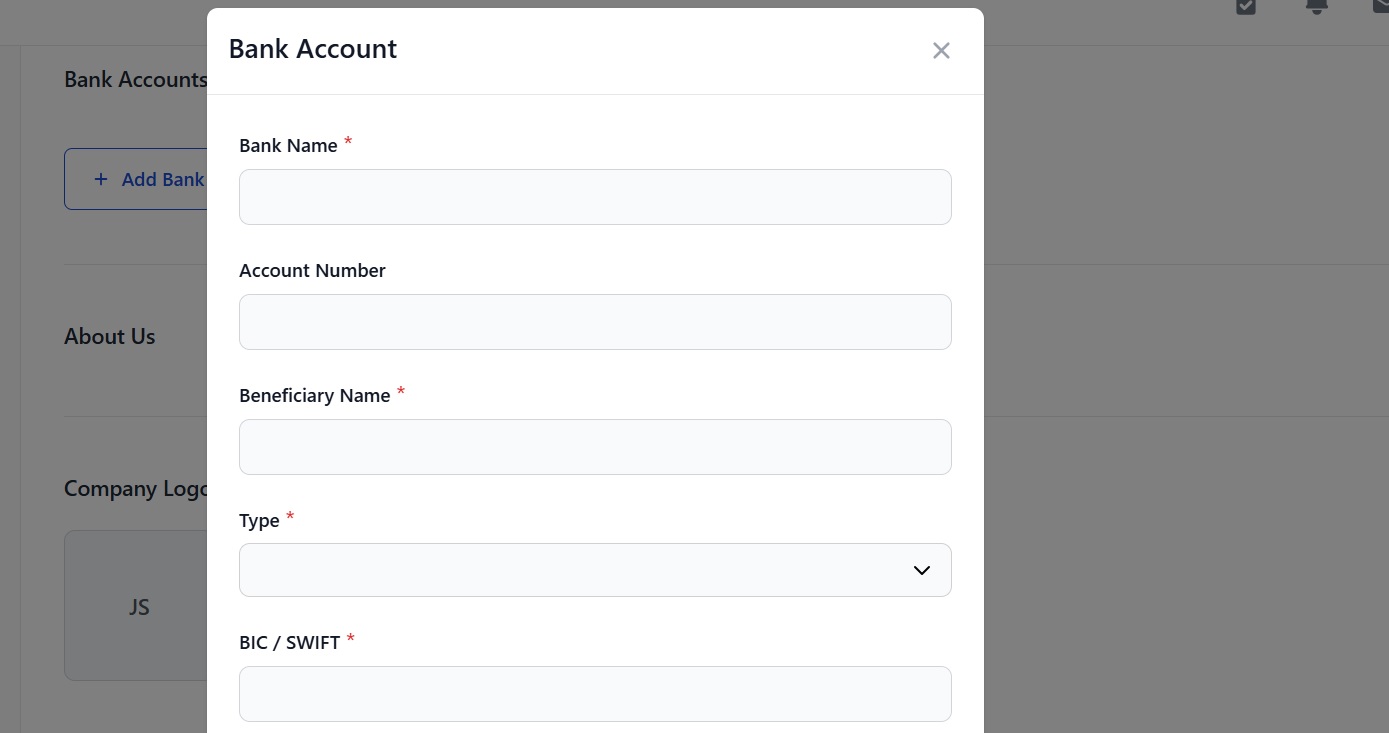
In the Bank Accounts section (see image below), click the Add Bank Account button and you will see a pop-up box where you can add your bank details. Add as many accounts as you need.
The ret of the sections are self-explanatory:
- The About Us section has a box for your company's About Us bio.
- Upload your logo In the Company Logo section.
- In the Offices section, click the Add Office button to enter details about your office(s), including the type (primary, tax, billing etc.)
- In the Vessel Types section, click the Add Type button and select the vessel types you manage.
- In the Clients section, click the Add Client button to enter your clients' names and upload their logos.
- In the Our Team section, click the Add Team Member button to enter your team members' names and their job roles.
- In the Testimonials section, click the Add Testimonial button to enter the name and position of the person who has written you a testimonial. You can also upload documents or logos here.
Read a full guide to creating your Company Profile here.
Create User Accounts for your team
To create logins for your coworkers click Settings in the menu under your profile picture side and select User Accounts:

You will go to this page:
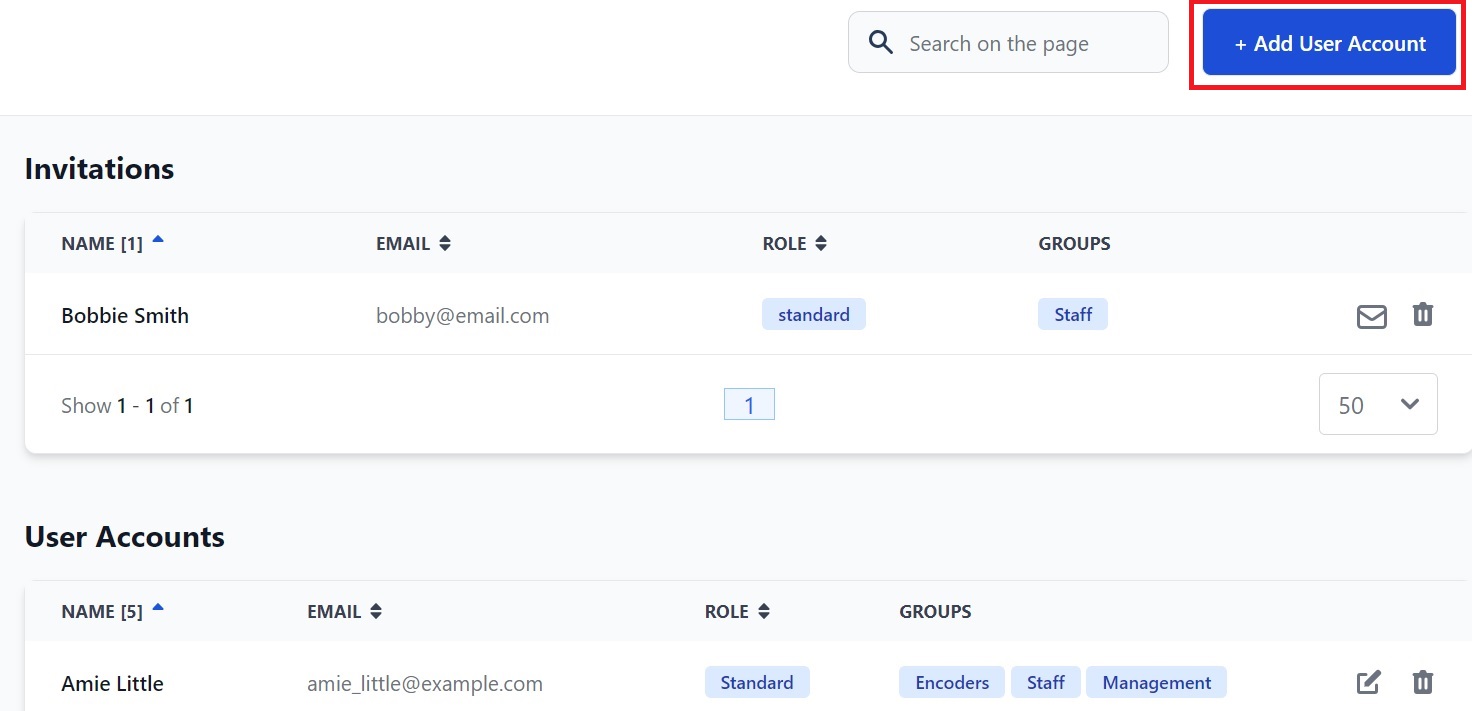
Here you can:
- Invite Users to Martide by clicking the Add User Account button.
- See the Users you're still waiting to respond, and your current Users.
- Click the envelope icon to send invited users an email to remind them you're still waiting for them.
- Edit and delete current Users and delete invited Users.
- Sort Users alphabetically by clicking the arrows next to Name, Email and Role.
Read a full guide to adding User Accounts here.