Shipowner & Crew Manager Guide to Martide's Clients Function

If you’re a shipowner or crew manager who offers crew management services to your clients, you’ll need to know how to use our Clients function.
This handy feature lets you give your client as much, or as little, control as is mutually agreed upon over your maritime recruitment process - or in Martide terms, your Recruitment Pipeline.
Under normal circumstances if you are offering crewing services your client can see, but not edit or approve, the Pipeline. The Client function lets you override this so you can offer them a more hands on approach to management.
This can be at any step in the Pipeline, or just at the end when it comes to making the final call on whether or not to hire a candidate.
USP alert: Enabling the Clients function is a great selling point for any shipowner or crew manager who offers crew management services to clients within the shipping industry.
Here’s how to use Martide's Clients function
To get started log in to Martide and click on Settings under your profile icon and then click on Clients.
Next you’ll be taken to your Clients main page - that looks like this:

There are a few things you can do on this page.
You can see who you’ve already added as a client company, create a new client and filter your clients alphabetically.
In our example we just have 4 client companies but if you have lots, it will make it easier to find who you're looking for by clicking on the little pyramid type icon next to 'Name'. The default sort setting in alphabetically A through Z but if you click on the icon it reverses the order so you can search Z through A.
It’s really easy to add new clients to the system. Simply click on the blue Add client button in the top right corner. (See the image above.) You will then see a pop-up box that looks like this:
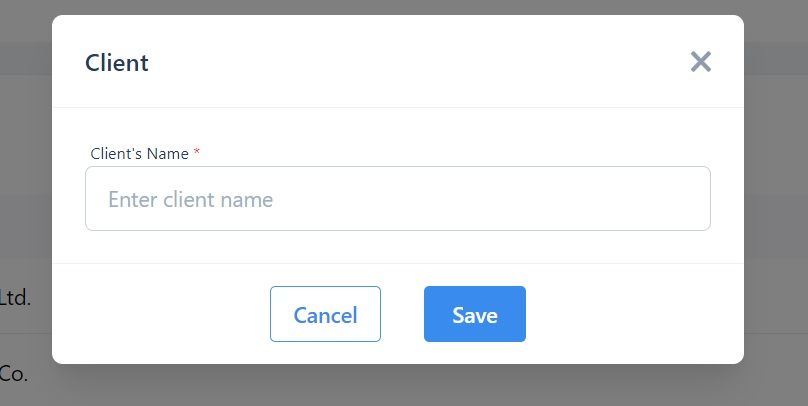
To add a company as a new client simply enter their organization's name and click save. See - we told you it was easy!
After that you will want to add a little more information about your client so that the different functions and features in Martide's system all work together cohesively. Here's how to do that.
How to add information about your client
First of all, click on the little arrow to the right of the client that you want to add information to:

You will then see a page that looks like this:
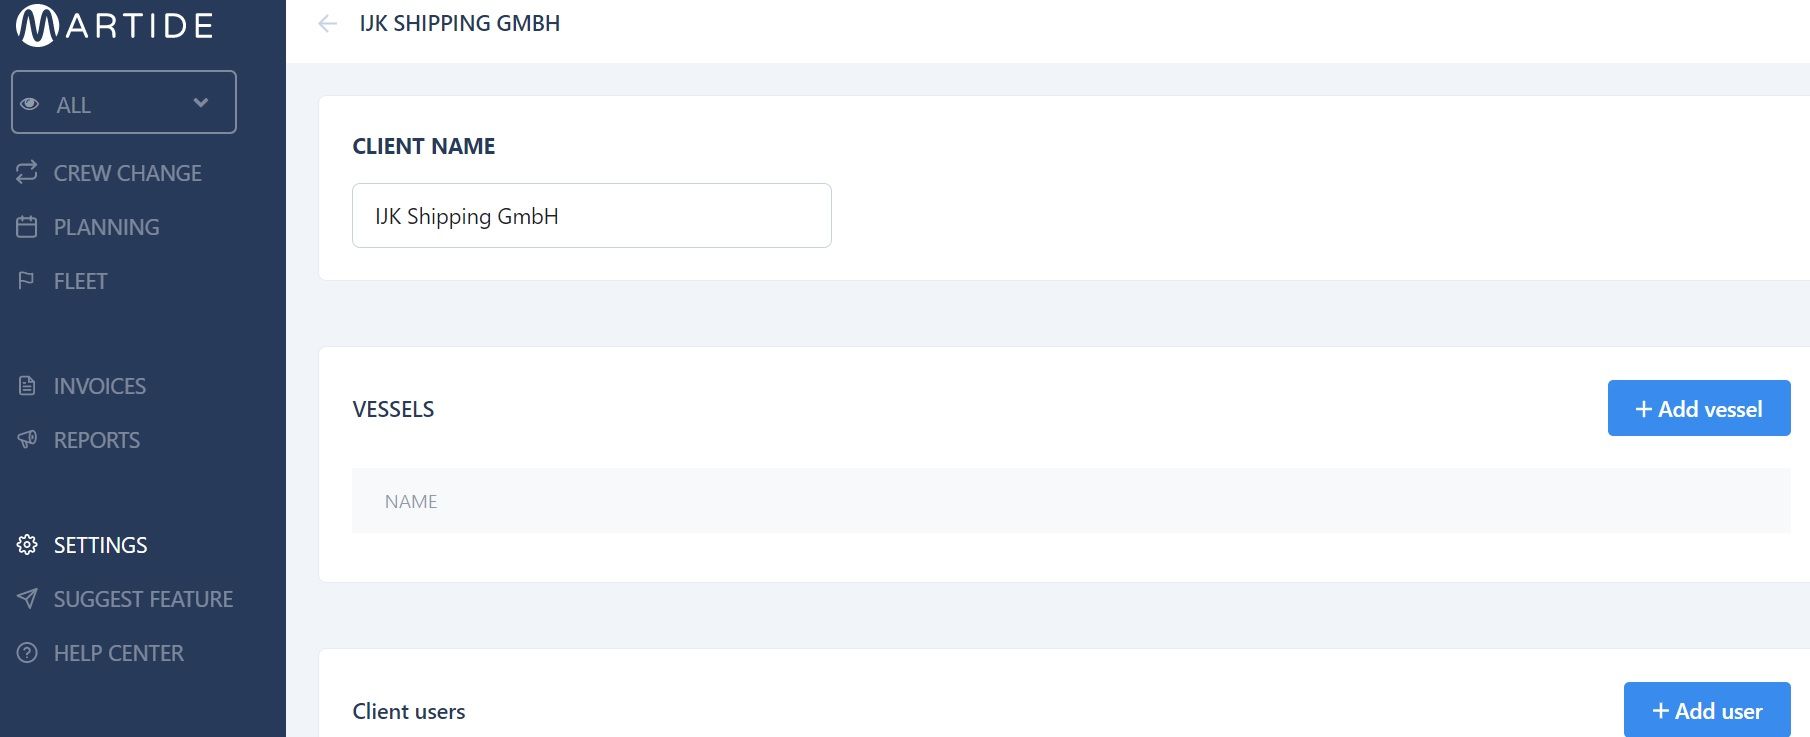
And if you scroll down the page a little further you will see where you can add your client's vessels, invite your client's users to join you, view your client's pending users and send them reminders to create an account, and view and edit your client's current users.
How to add a client's vessels
While you're in the client's profile page, click the blue +Add vessel button in the Vessels section:

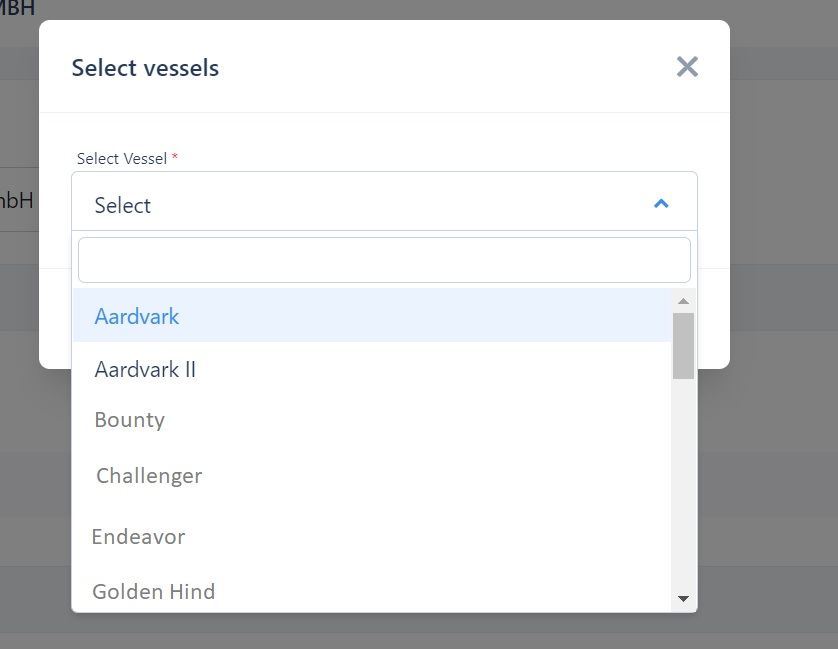
You will then see this pop-up box from where you can select the client's vessels from the drop-down list:
How to add a client's users
Still in the client's profile page, click the blue +Add user button in the Users section which you'll find just below Vessels:

You will then see this pop-up box where you can add the name and email address of your client's users that you want to add:
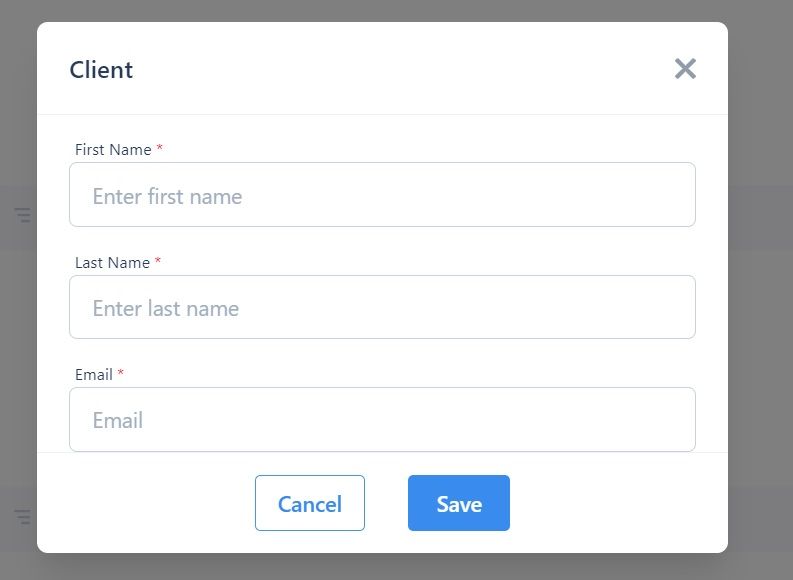
When you click save, an email invitation to create a Martide account will be sent to the user. It's super quick and easy for them to create an account - they just need to enter a password, confirm the password and that's it!
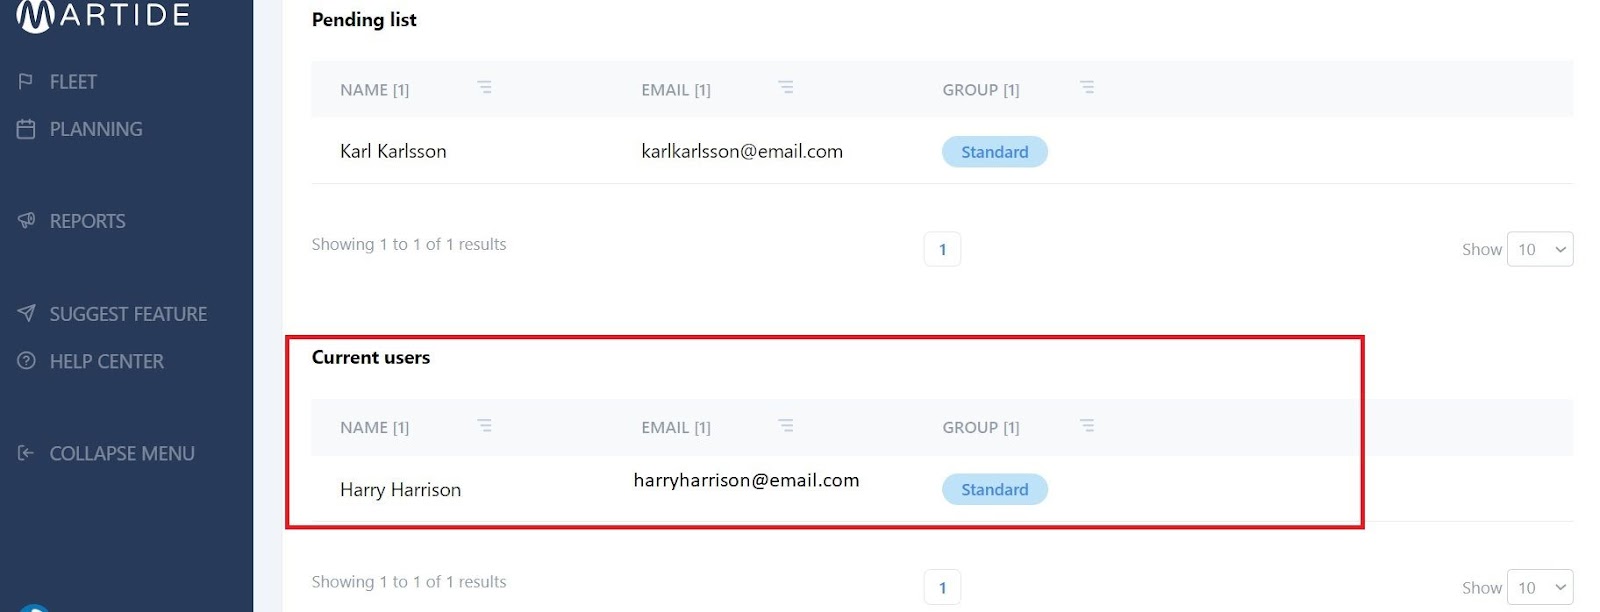
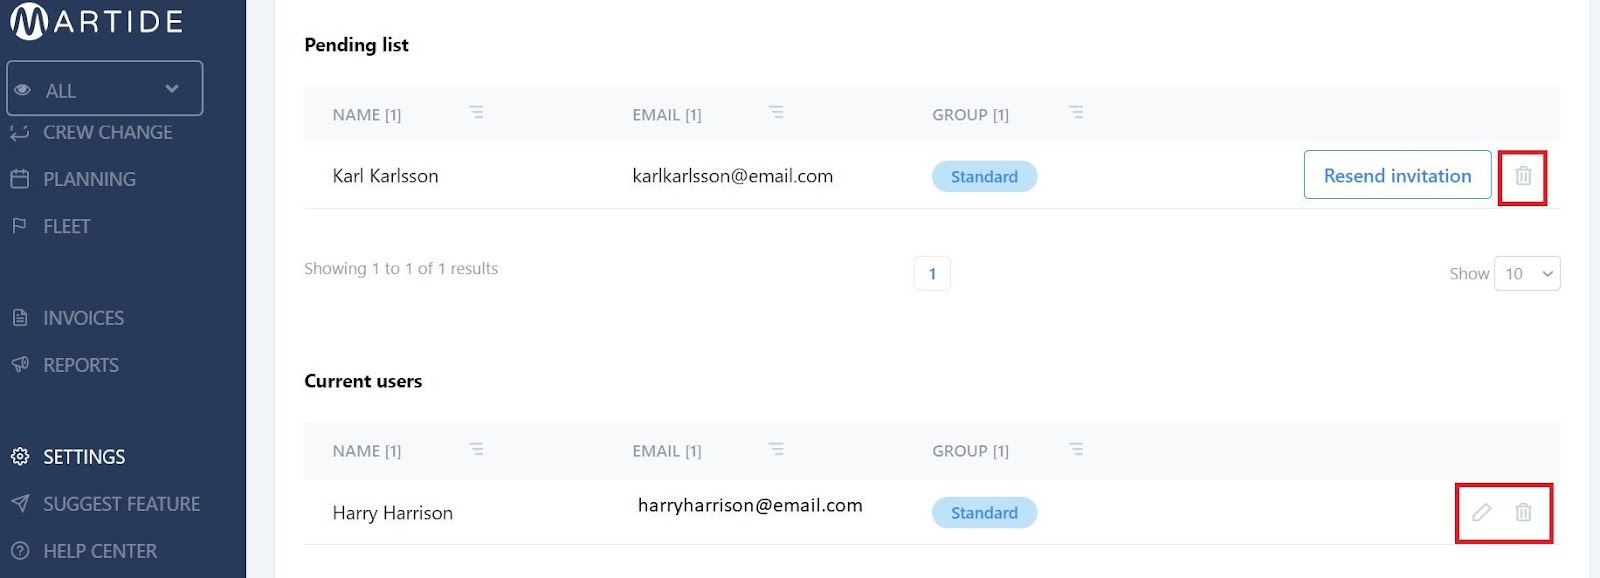
While you are waiting for them to create an account, the user will appear in the Pending list and you can send them a gentle reminder that you're still waiting for them to join you by clicking the Resend invitation button at any time.

Once your user has created an account with Martide, they will disappear from the pending list and appear in the Current users section:
When you've finished making changes to the client profile page, click the blue Save button at the bottom.
How to filter, edit, and delete users
If you have a lot of users in the system you might want to filter them to make it easier to find them. To do this, click the little 'pyramid' icon next to Name, Email or Group in either the pending list or in the current user sections:
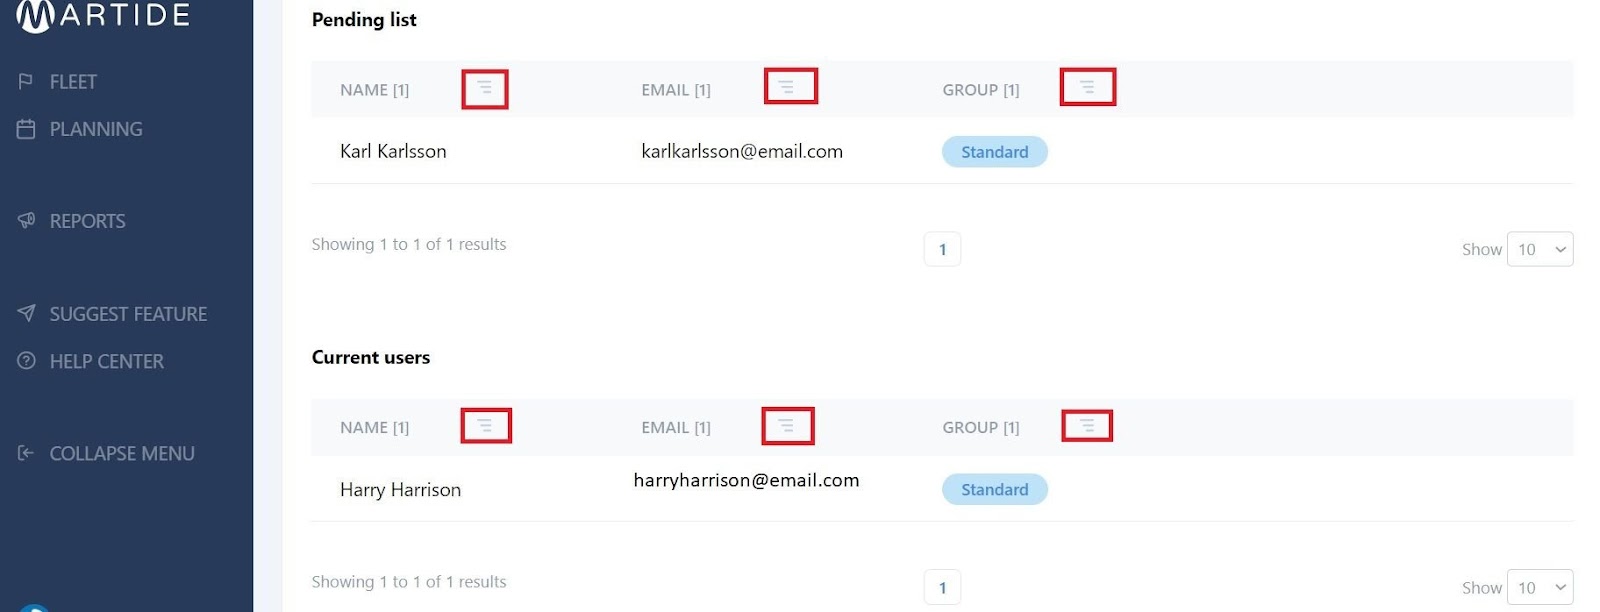
This will sort your people alphabetically. The default is A through Z but you can change this to Z through A. This filter also works on the main Clients page which is also handy if you've lots of companies you work with.
To edit a current user click the little pen icon next to their name. To delete a pending user or a current user, click the trash can icon.
Handy hints for the Clients function
For everything to work seamlessly, your client will need to have created an account with Martide so their vessel(s) appear in the drop down box.
When you want to give a client access to the Pipeline you need to make sure the Outsource Client function is turned on. You will see this option when you add a new Stage to the Pipeline.
Read more:Shipowner & Crew Manager Guide to Maritime Recruitment Pipelines
For example, if you want a client to take care of booking travel for your hired candidate, when you add the Flights Stage to your Recruitment Pipeline make sure Outsource Client is showing green - this indicates it is turned on.
It really is as easy as that - and it’s a feature that your clients will definitely appreciate. Best of all, it still allows you to retain as much control as you wish to have over your maritime recruitment pipelines.
This blog post for employers using Martide about using the Clients function for easier maritime recruitment and crew management is a version of a step-by-step how to guide that can be found in our support pages for shipowners and crew managers.
Our aim at Martide is to provide you with the greatest support possible. And also with the best talent pool of seafarers through our maritime recruitment services while offering you streamlined processes through our customizable Software as a Solution.
If you'd like to know more about how we can help reduce your time to hire, help you meet crew change over dates with less stress, and give you access to a global network of audited manning agents, get in touch with us today!
PS - don’t forget to tell your crew to download our seafarer job app for iOS or Android from the Apple App Store or from Google Play!
This blog post was originally published on September 9th 2019 and updated and republished to reflect changes in our platform on March 9th 2021.

Eve Church
Eve is Martide's content writer, publishing regular posts on everything from our maritime recruitment and crew planning software to life at sea. Eve has been writing professionally for more than two decades, crafting everything from SEO-focused blog posts and website landing pages to magazine articles and corporate whitepapers.
UK
