What is the Best Crew Management Software Solution?

If you want to know what the best crew management software is to help you run your maritime recruitment and crew planning operations more efficiently, you’ve come to the right place. In this post we’re going to take a look at the essential features of crewing systems that really work.
Whether you’re a small to medium sized shipowner or ship manager, a crew manager, recruitment officer, or manning agent working in the maritime industry with offshore vessels, we have the lowdown.
How to find the best maritime crew management software
There are a number of boxes you need to check when you’re looking to implement a new crew management system. And, crucially, you need to make sure you choose the right maritime software that suits your specific needs.
Top tip: It’s always a good idea to make a short list and narrow it down by taking advantage of those software companies who offer free demos to potential customers first.
There are many crew management software solutions out there that promise to make maritime recruitment easier and crew planning more efficient, but they are not all built equally and what works for one of your acquaintances in the shipping industry might not necessarily be the right choice for you, so do pick carefully.
It’s also a good idea to write down a list of what your team is having trouble with at work and making sure that the crewing system you choose supports those needs.
In general, a lot of crewing software will offer the same basic functions - but the best crew management and maritime recruitment systems will have some neat add-ons that really make the difference to your day!

What are the basic functions of a good crew management system?
For a start you need your crew software to cover the essentials. In our opinion these are:
- You need to be able to easily manage your existing crew onboard your vessels
- You also need to be able to manage candidates for your seafarer job vacancies quickly and easily
- If you’re an employer / shipowner / ship manager, you will want to be able to manage and coordinate with your manning agents
- You need to be able to store your data centrally and securely so you can access seafarer and candidate information with just a few clicks of the mouse
When it comes to maritime recruitment there are some other necessary features that we think you should demand from your new recruiting software:
- You need to be able to source qualified seafarers who are the right fit for your jobs
- You must be able to track your candidates throughout the recruitment and hiring process
- Ideally, you will want to be able to post your jobs for free
- A good maritime recruitment software solution will enable you to schedule interviews
With regards to crew recruitment, management and planning, most software solutions will allow you to do all of the above. But what are the added extras that really make a crewing system exceptional?

Features offered by the best crew management and recruitment systems
If you’re going to the time and effort of researching and then implementing a new process for your recruitment and crew planning operations, you may as well choose a system that goes above and beyond.
After all, why settle for second best?
Also bear in mind that, often, staff will resist change and you might have to convince them that the new processes are for the greater good.
There are ways to ensure that your employees love your new crewing software, but you need to make sure you’ve picked the right one in the first place.
For your maritime recruitment officers, look for features that make their lives easier, such as:
- Access to an audited, worldwide network of manning agents. Searches that use keywords and filters to quickly find the right applicants.
- The ability to customize your recruitment pipeline. The option of outsourcing all or part of the recruitment process to accredited manning agents.
- A system that lets you apply your own seafarers as well as letting manning agents put forward the best, pre-screened candidates from their databases.
- A simple application via the web or an app that allows seafarers to apply directly to you.
- An option to assign ex-crew members already in the database to vacancies without going through the entire recruitment process again.
- The power to create, sort, segregate and filter seafarer talent pools.
Anyone working in crew management or planning will also be delighted by features such as:
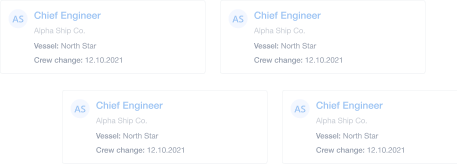
- Highly visual, color coded and easy-to-use planning calendars that let you see at a glance exactly what is happening with any given vessel or seafarer
- Real-time synchronization for the calendar so everyone is on the same page
- A free mobile app for seafarers that lets them check when their next crew change is
The very best crewing systems will also allow managers and employees in every department to streamline their day-to-day operations with other functions such as:
- The ability to divide teams into groups or assign individuals roles to delegate tasks
- A built-in messaging system that allows a 360 degree view of all messages thanks to the team inbox
- A broadcasts feature that lets you send mass messages to seafarers or other companies
- Access to seafarer and candidate profiles which contain personal details, sea service, physical specs, next of kin, banking info and copies of certificates and documents
If this all sounds like a lot, it’s because it is! And what’s more, Martide offers all of these features and more in our custom built software solution for the maritime industry.
We help small to mid-size shipowners and ship managers run both their maritime recruitment and crew management and planning operations more smoothly and efficiently - and with a lot less stress.
Read more: What is a Data Gap & How Can a Crewing System Close It?
We also need to mention security, as we know that this is of paramount importance to all business owners and managers in our tightly controlled industry.
All of your seafarer data, certificates and HR documentation are securely encrypted in our secure database and stored in Google’s cloud. We are ISO 9001 accredited and are MLC 2006 certificate holders.

And best of all, we are compatible with other crew management systems, HR, and recruitment software, meaning we’ll fit in nicely with any other company’s systems that you’re already using.
What should you do next?
If you’re looking to upgrade your operations and are looking for the best crew management and planning system and maritime recruitment software, talk to us.
We offer free no-strings attached demos so you can see how we work. Get in touch with us today and schedule your demo at a time that suits you.
And don’t forget to tell your crew to download our seafarer job app for iOS or Android from the Apple App Store or from Google Play either!

Eve Church
Eve is Martide's content writer, publishing regular posts on everything from our maritime recruitment and crew planning software to life at sea. Eve has been writing professionally for more than two decades, crafting everything from SEO-focused blog posts and website landing pages to magazine articles and corporate whitepapers.
UK