Data Templates
What are Data Templates?
When you create a Recruitment vacancy you need to add info about the vessel, budget and contract. You then need to add your requirements for the vacancy. These requirements are in a Data Template.
This means you need to create a Data Template before you create a new job vacancy.
You only need to create each Data Template once: when you create a vacancy, select the relevant Data Template.
How to create a Data Template
Log in to your Martide account. Click Settings in the drop down menu under your profile icon in the top right corner and then on Data Templates. You will see this page. Our example already has two Data Templates:
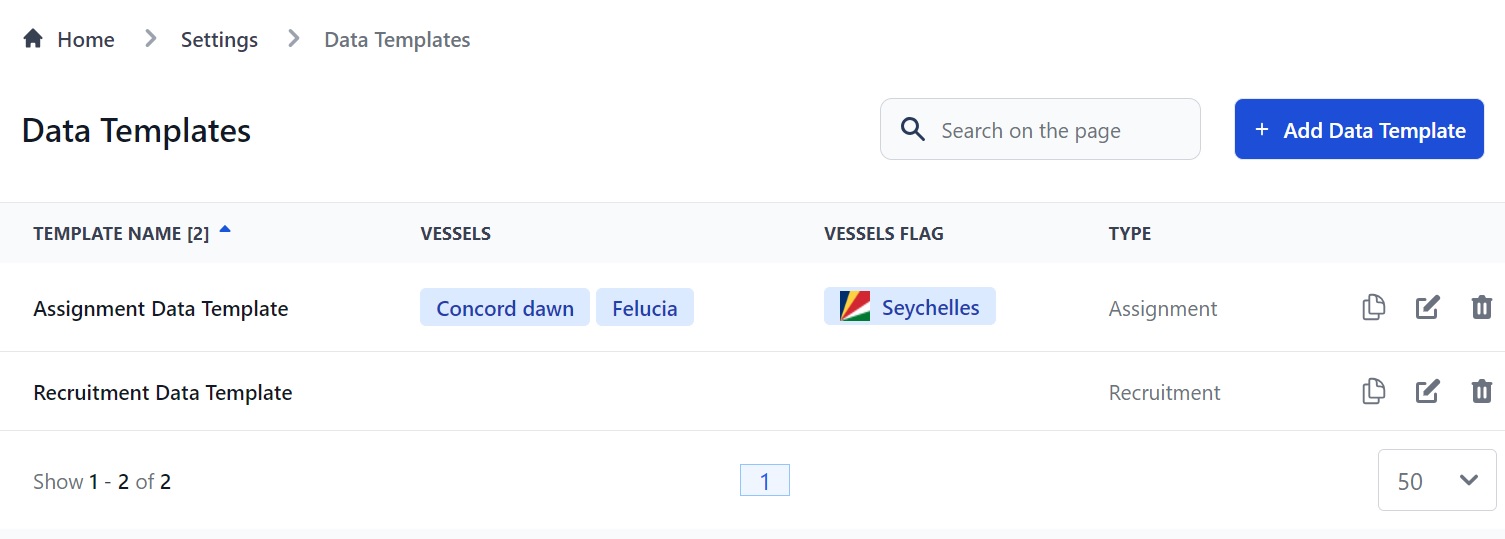
Here you can:
- Look for a Data Template in the search bar.
- Create a new Data Template by clicking the Add Data Template button.
- Edit or delete a Data Template by clicking the pen or trash can icons.
- Copy a Data Template by clicking the documents icon.
A note about Data Templates for Recruitments and Assignments
Data Templates are filled in is slightly differently, depending whether they're for a Recruitment or an Assignment. The difference is:
Recruitments: created to add seafarers to the database so you can potentially hire them in the future.
Assignments: created to hire a seafarer for a contract on a vessel at a set date.
We will explain both versions below.
How to add a Data Template for a Recruitment
Click the Add Data Template button at the top of the page. You will go to this page:
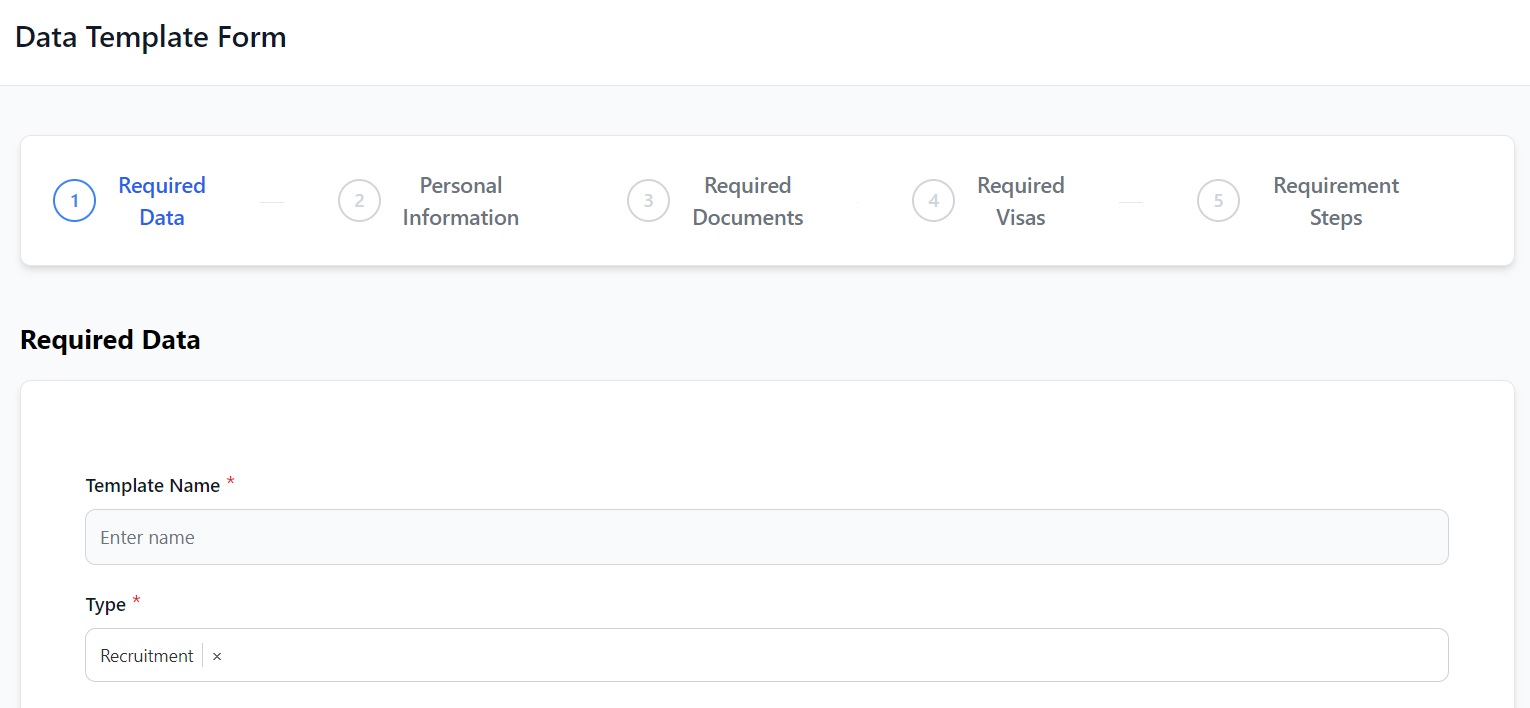
Here you can:
- Add the Data Template’s name.
- Select the type of template: Recruitment or Assignment.
Click Next and you will go to Personal Information where you can select the info you want a seafarer to have added to their profile before they can apply for the job. For example:
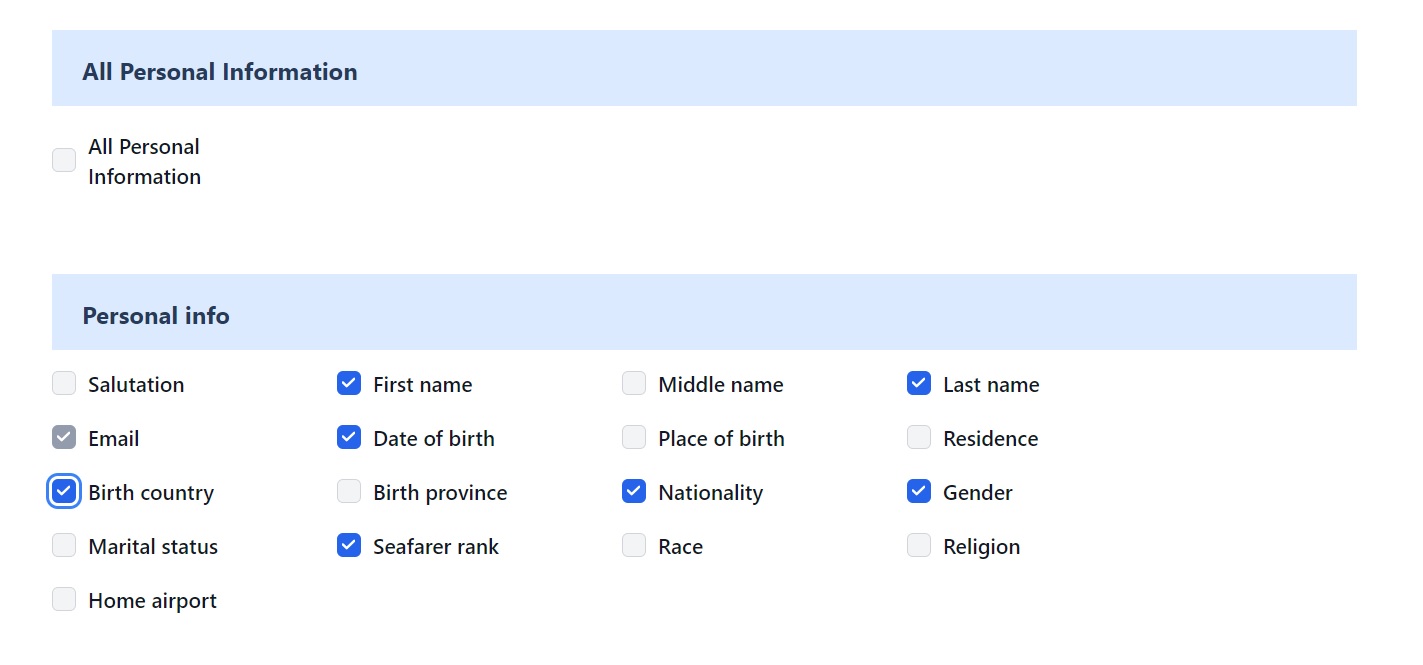
Personal Information includes their details, work experience, education, languages and more. Check the All Personal Information box at the top if you want everything to be completed before they apply.
Click Next and you will go to Required Documents where you can select the documents, endorsements and certificates specific ranks must have to be able to apply for the job:
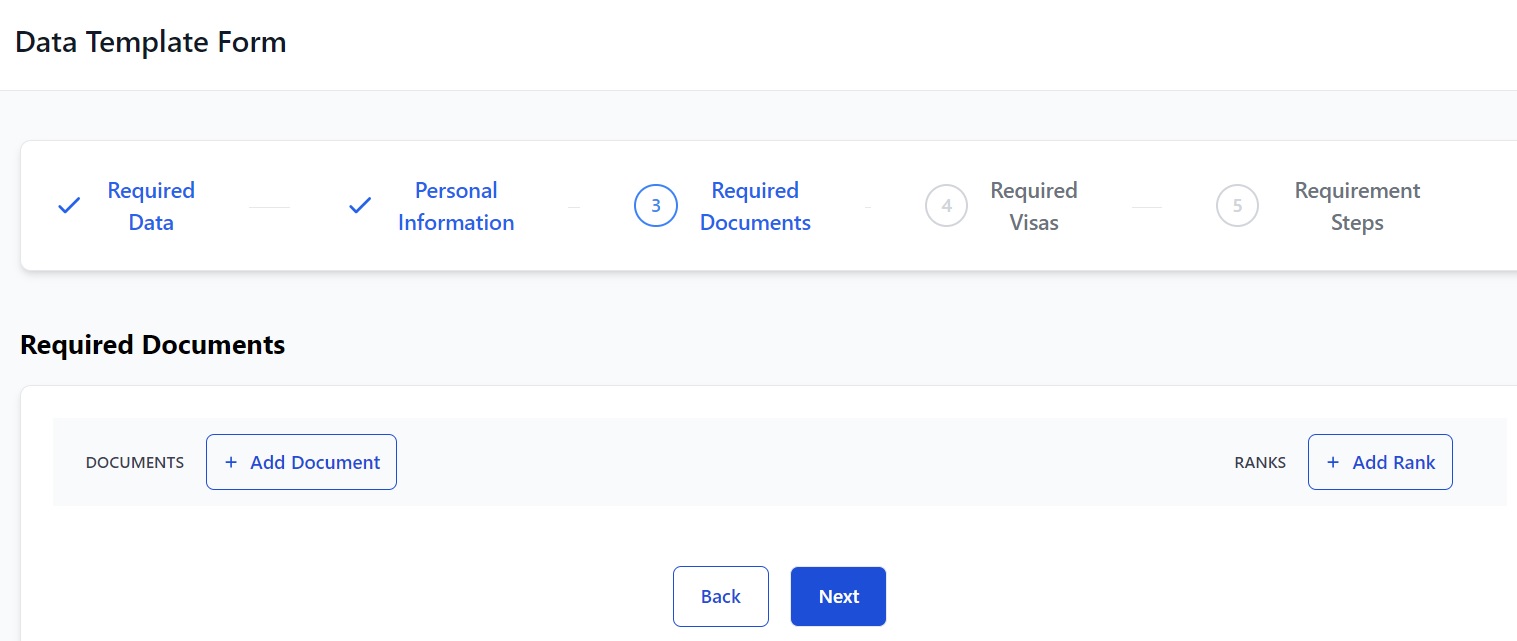
When you click Add Document you will see this:
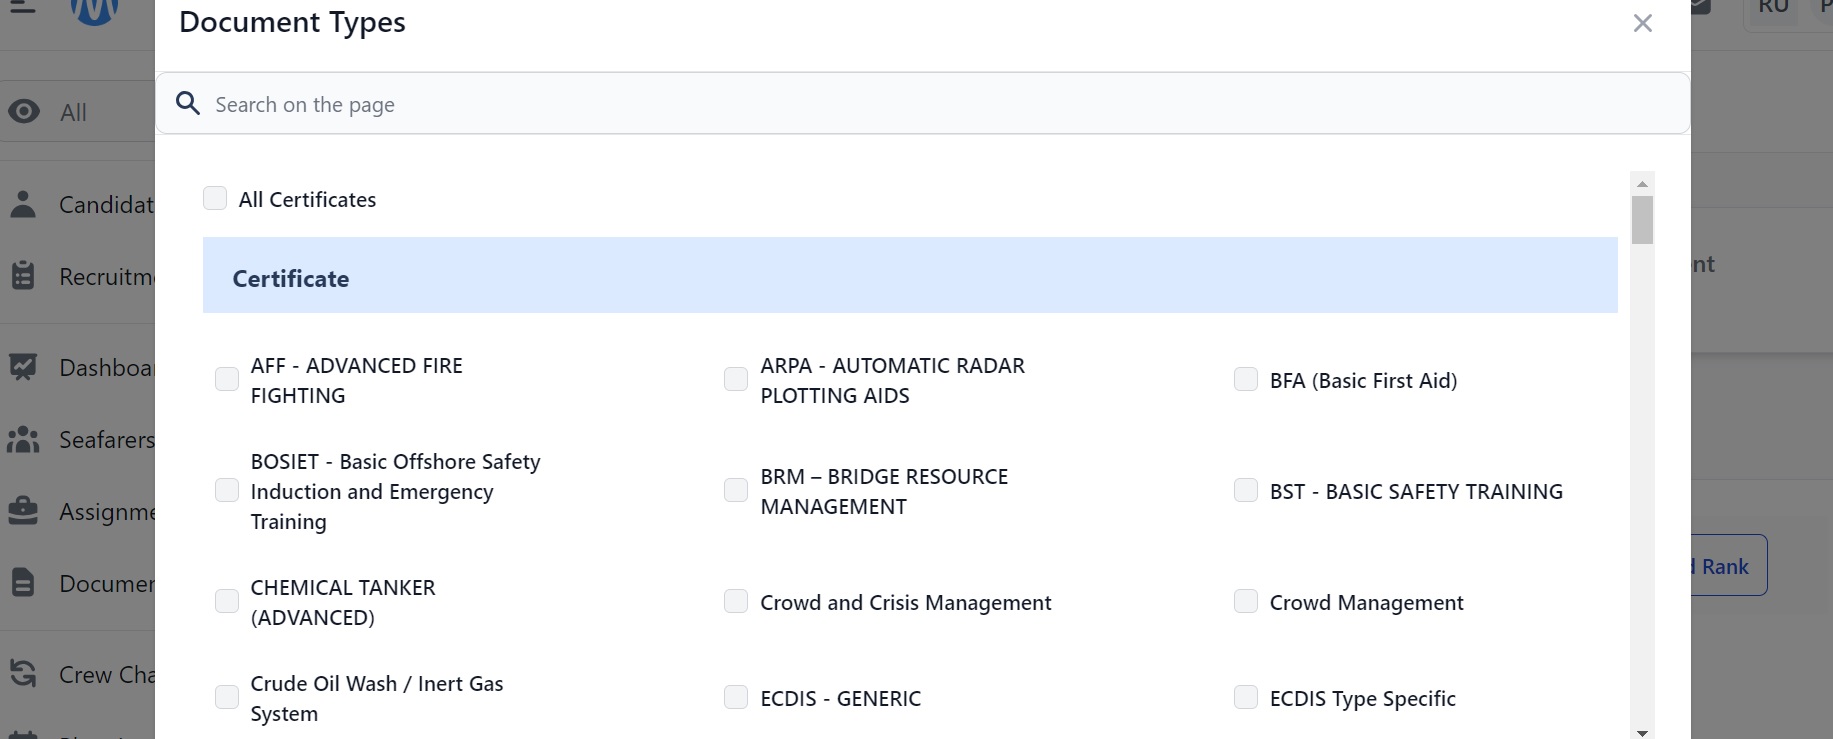
Check the box next to a Document and click Save to add it as a requirement for the Data Template. If you require all documents/certificates/endorsements, check the boxes at the top of each section.
You can look for documents using the search bar. When you save your documents you will see something like this:
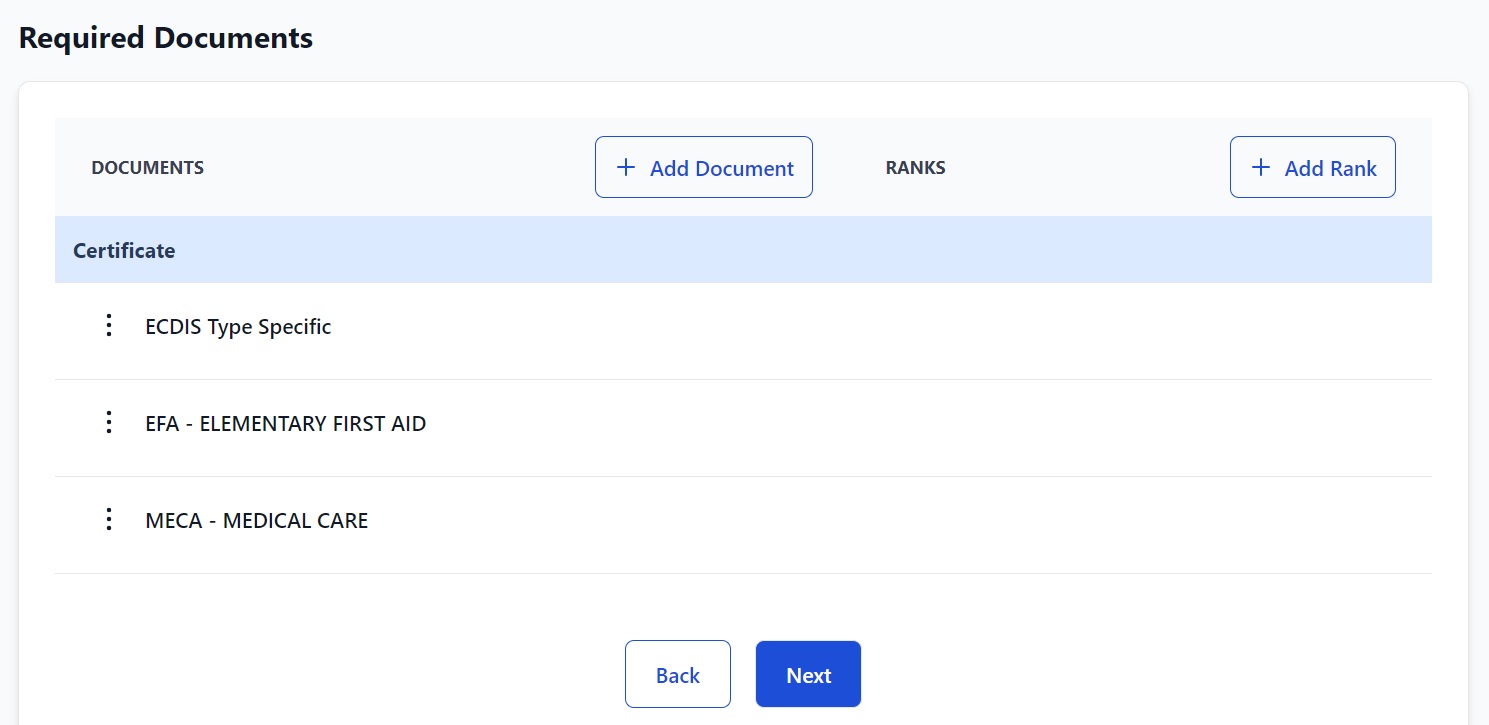
Next, click Add Rank and you will see this:
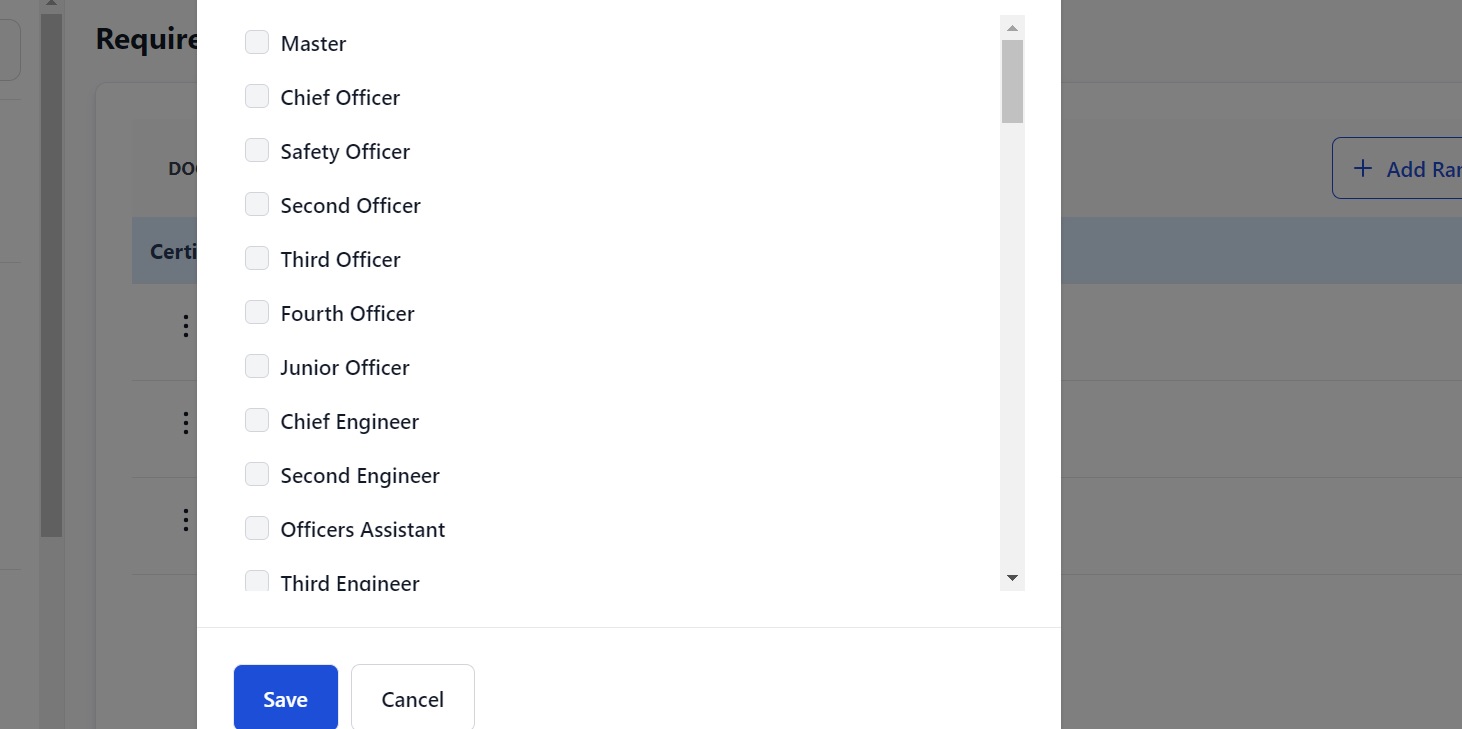
Select the Ranks you want to use this Data Template for. Click Save and your page now looks something like this:
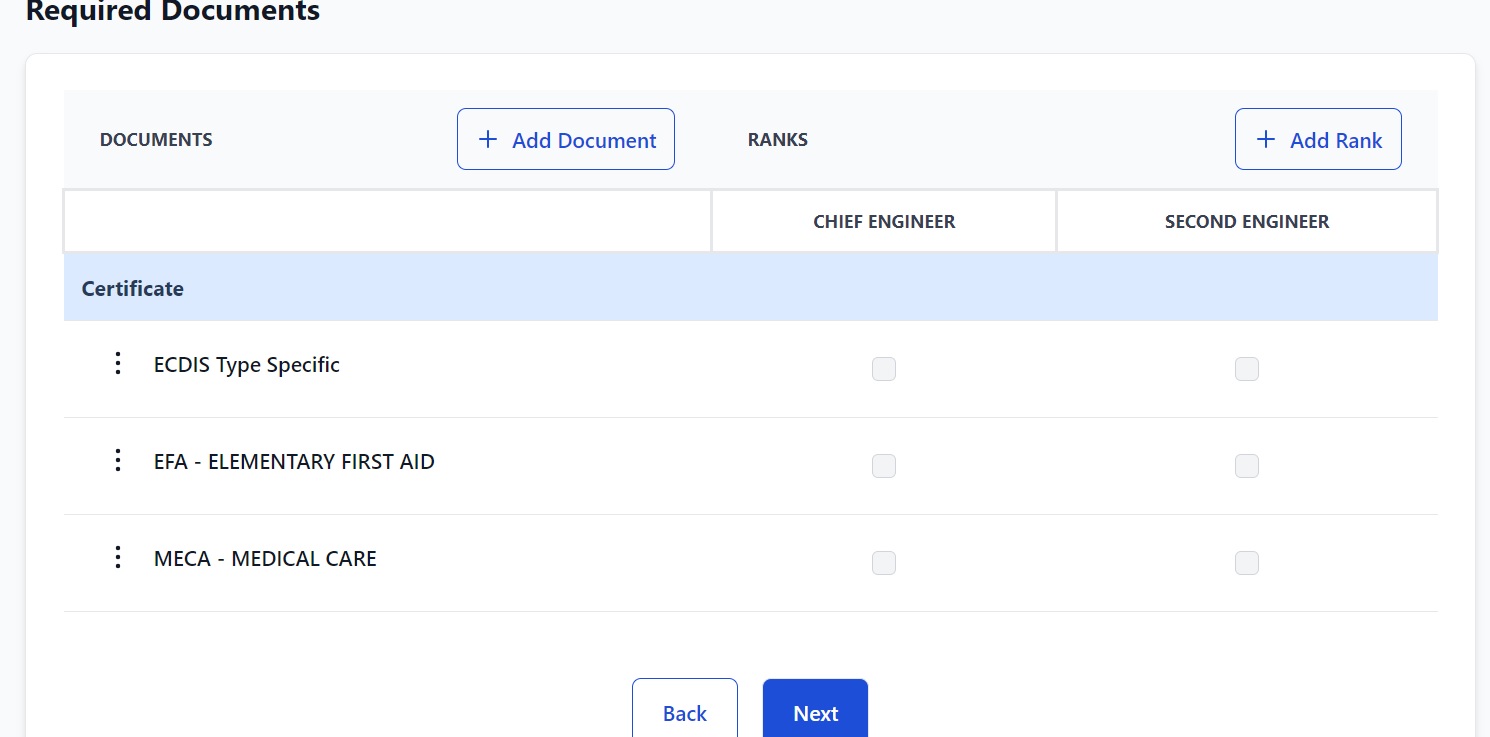
Add as many Documents and Ranks as you need.
Now you can specify which documents you want which rank to hold. Check the box under the rank and next to the documents you want that rank to hold:
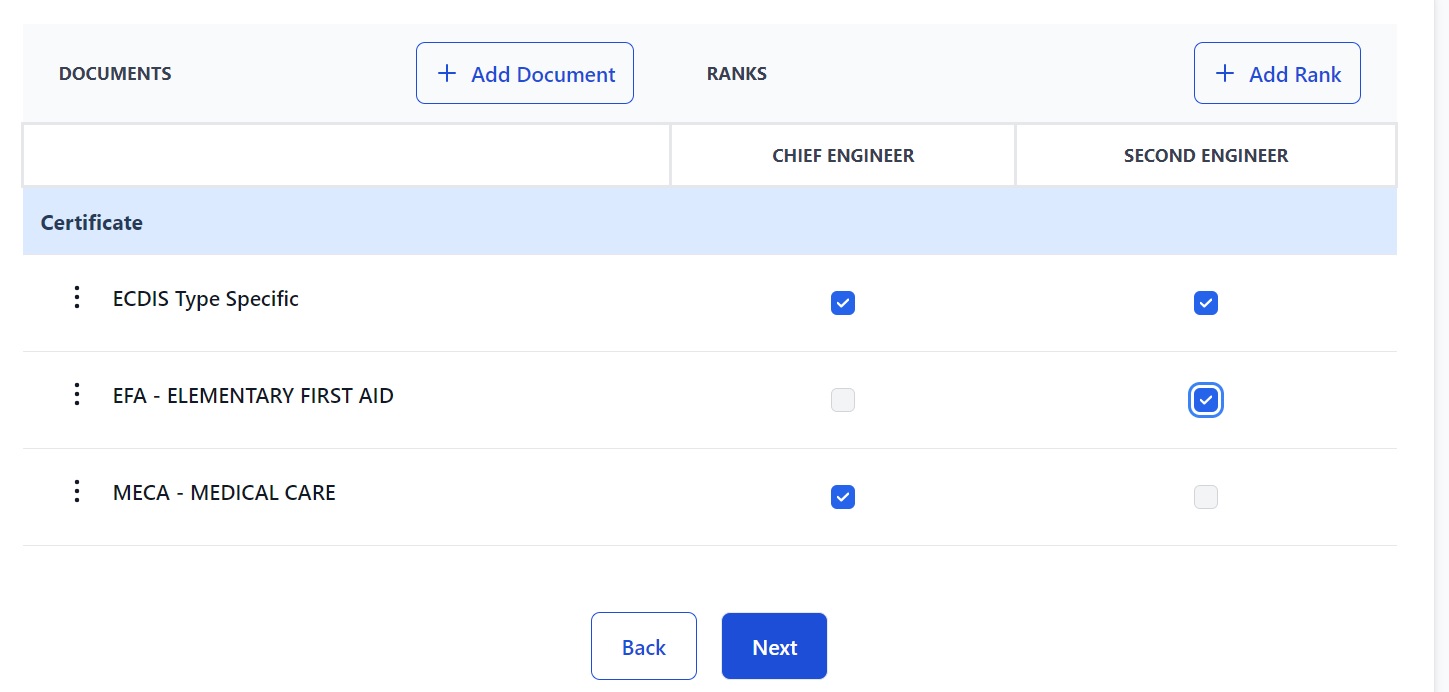
When you've finished click Next and you will go to Required Visas:
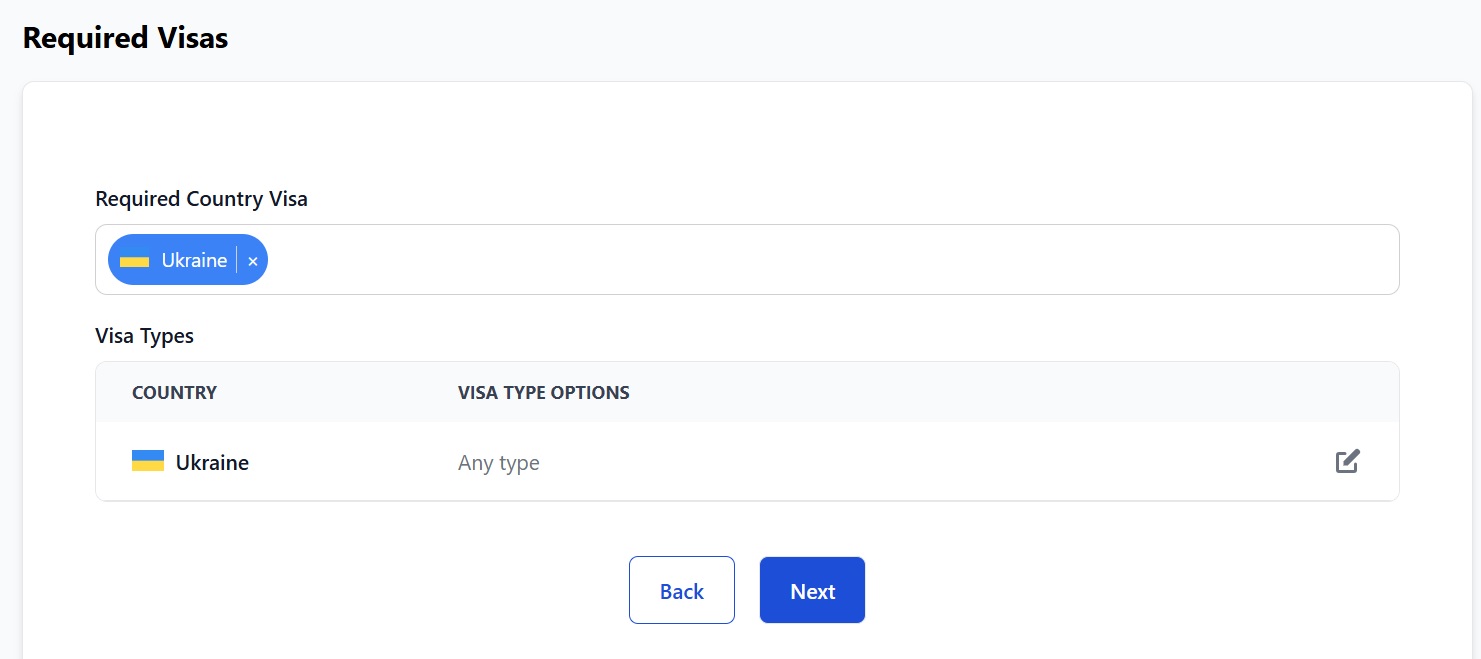
Select the country of the visa that you need anyone applying for this vacancy to hold. In our example we’ve selected Ukraine. A box will then appear below where you can select the type/types of visa you need them to have: i.e. tourist visa, business visa etc.
When you've finished click Next and you will go to Requirement Steps:
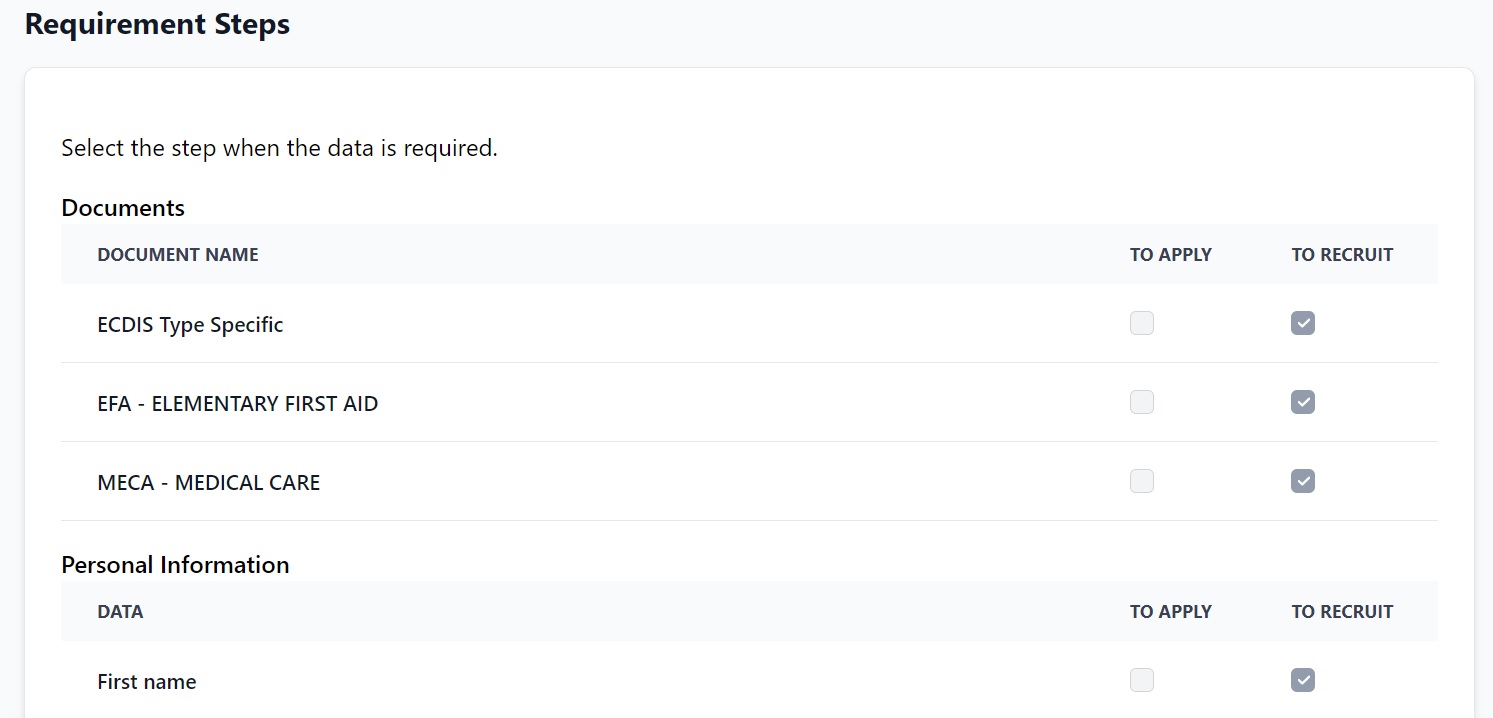
All the Required Data is needed to hire a seafarer and the To Recruit boxes are checked as default. You can decide if you want requirements to be met by a seafarer so they can apply for the vacancy.
For example, you don't need a seafarer's blood type for them to be able to apply so you can leave that as a requirement at the To Recruit stage, but you might want to know their nationality and the documents they hold. If so, check the To Apply boxes where needed:
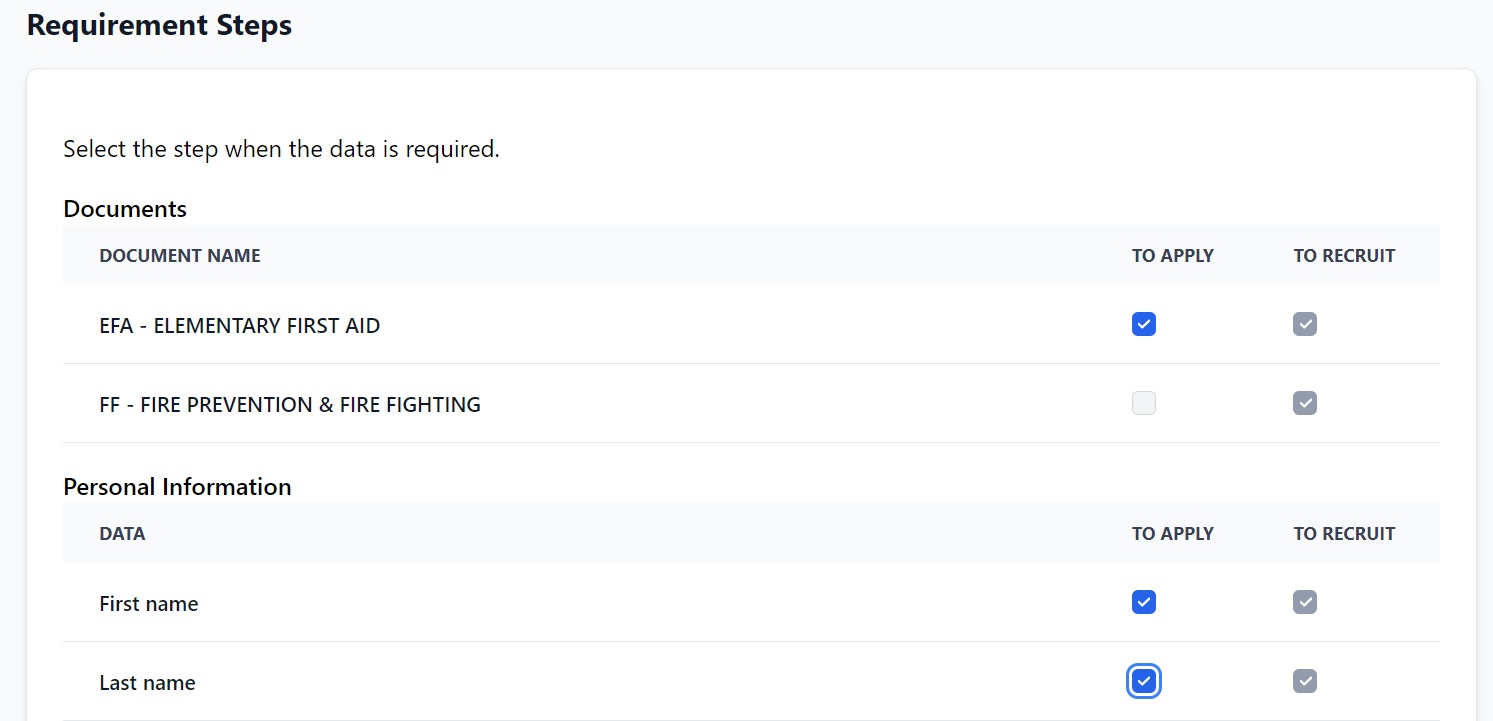
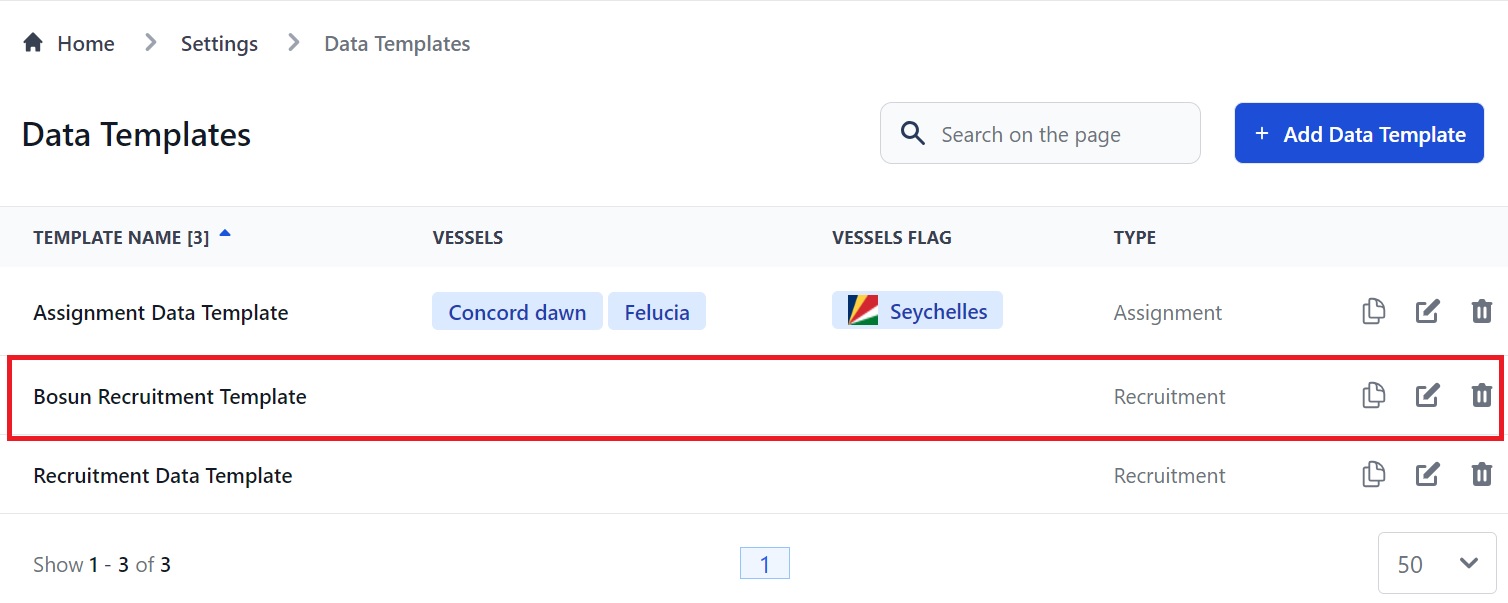
When you've finished, click Save. You will return to the main Data Templates page and you will see your template in the list:
How to add a Data Template for an Assignment
Click the Add Data Template button on the Data Templates page and enter the name of the template. Select Assignment as the type. You will see a drop down menu with your vessels:
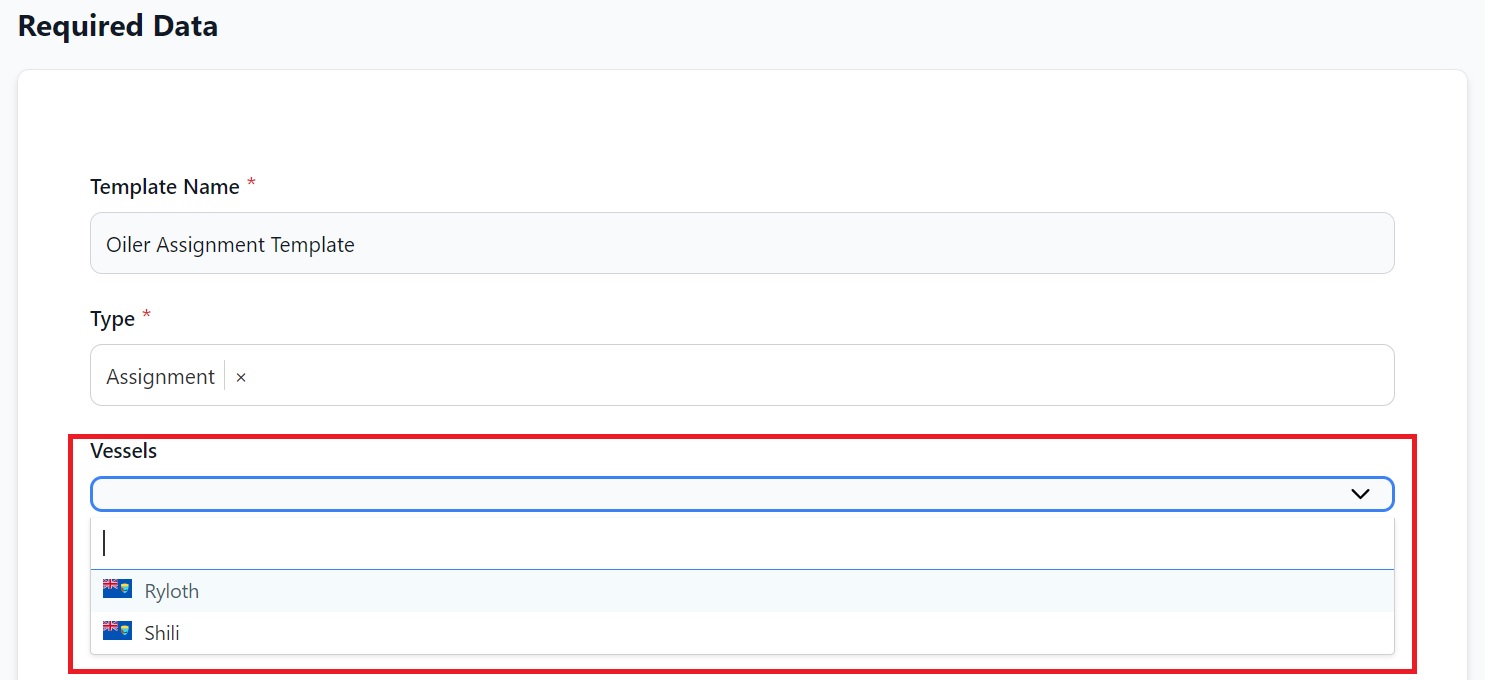
Select one or more vessels that you are hiring for. The rest of the process is exactly the same as adding a Data Template for a Recruitment.
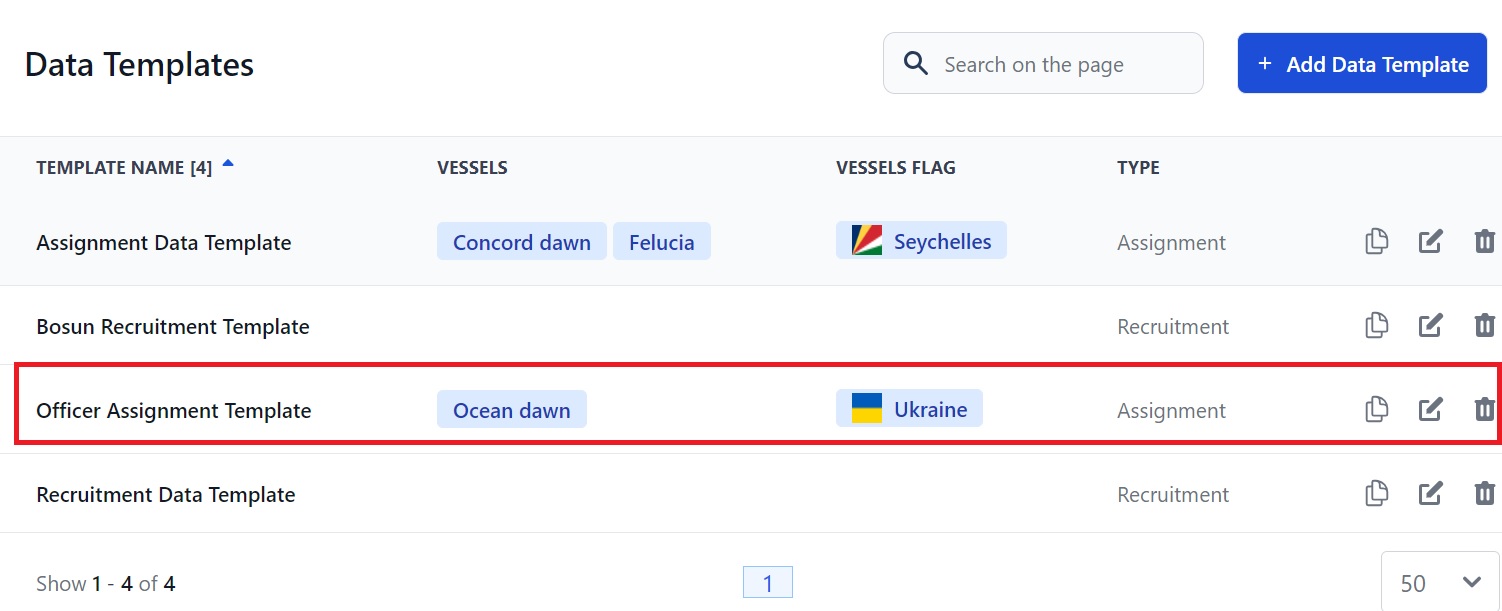
When you save the Data Template it appears on the main page, with the flag of the vessel that is assigned to it:
How to add Alternative Documents
When you post a vacancy on Martide you need to specify which documents you need a seafarer to hold before they can apply or be recruited. Alternative Documents lets you override that.
This lets you consider candidates who may hold different, but still relevant, certificates.
As seen above, when you create a Data Template and add your documents, it looks like this:
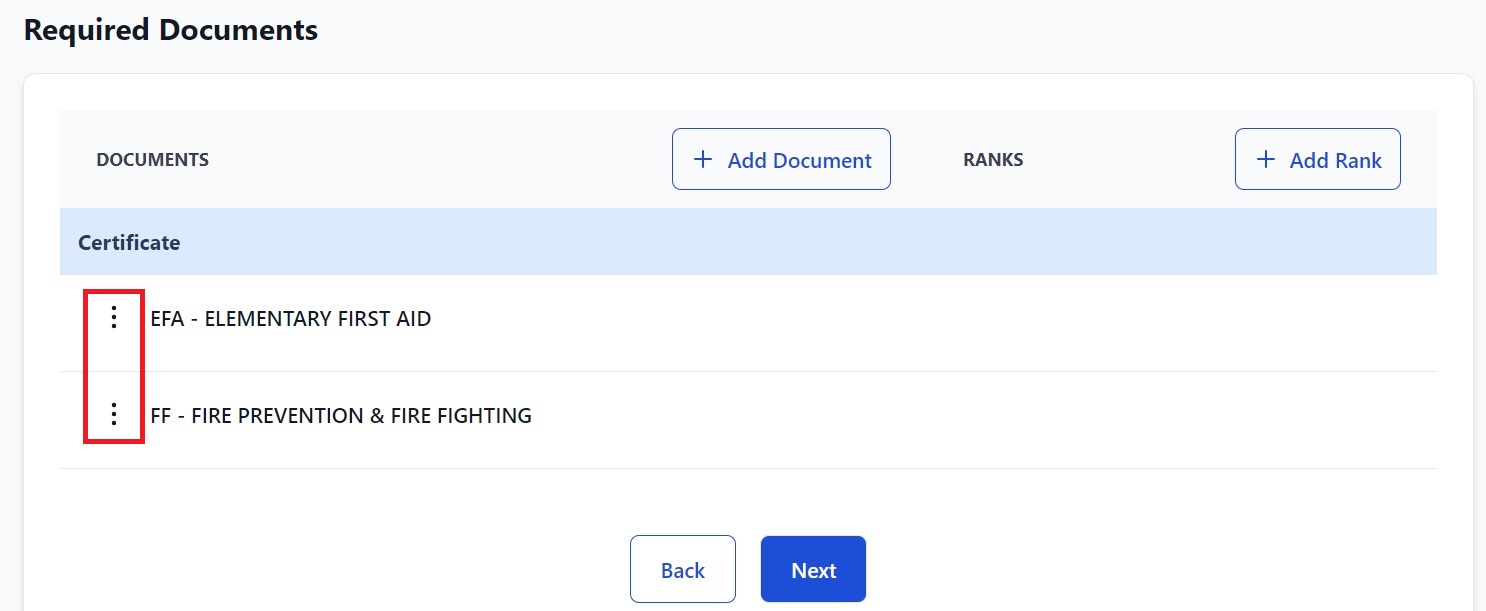
To add an Alternative Document, click the three dots next to a document's name. See above.
That opens the document pop-up box that we saw earlier. Select the document(s) that you will let a seafarer use instead of your original document(s).
For example, we specified a candidate should have Elementary First Aid to apply for our vacancy, but if someone suitable applies who doesn't hold an EFA certificate but they DO hold Basic First Aid, they can still apply.
Click Save and you will now see this:
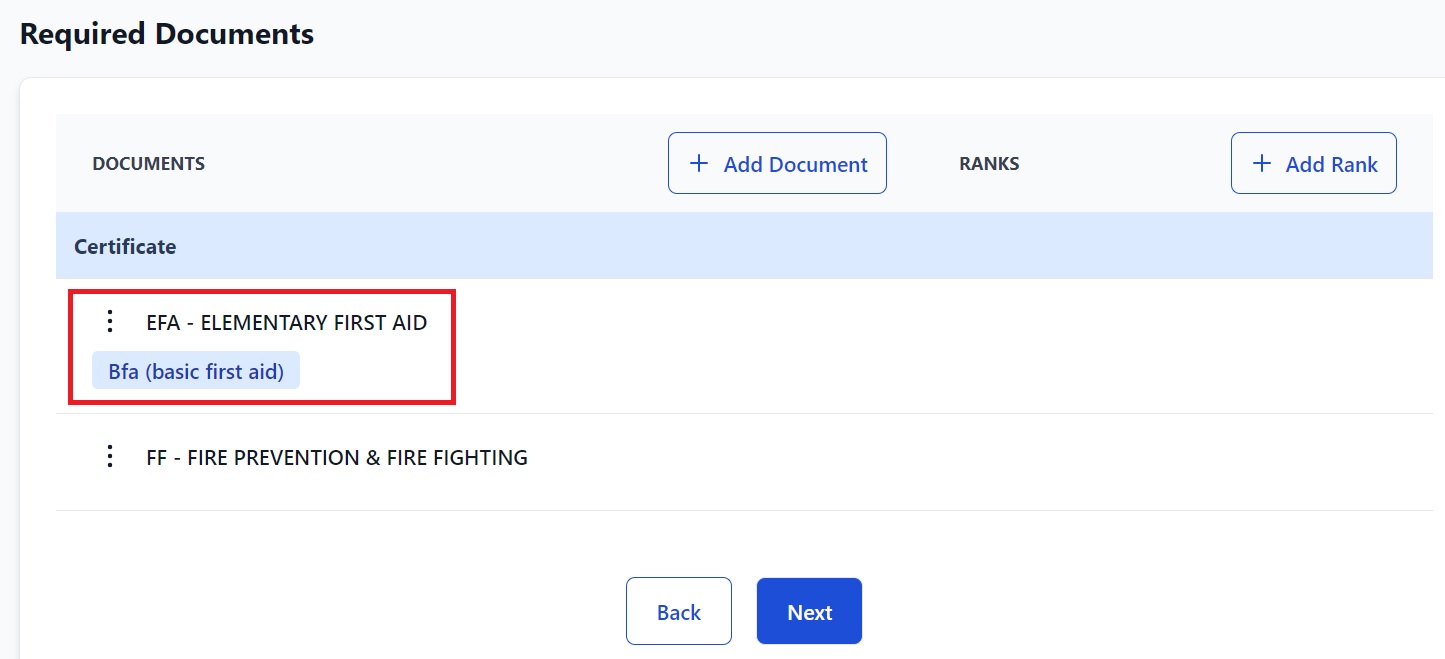
How to edit or delete a Data Template
To delete a Data Template, click the trash can icon next to it. To edit a Data Template, click the pen icon next to it:
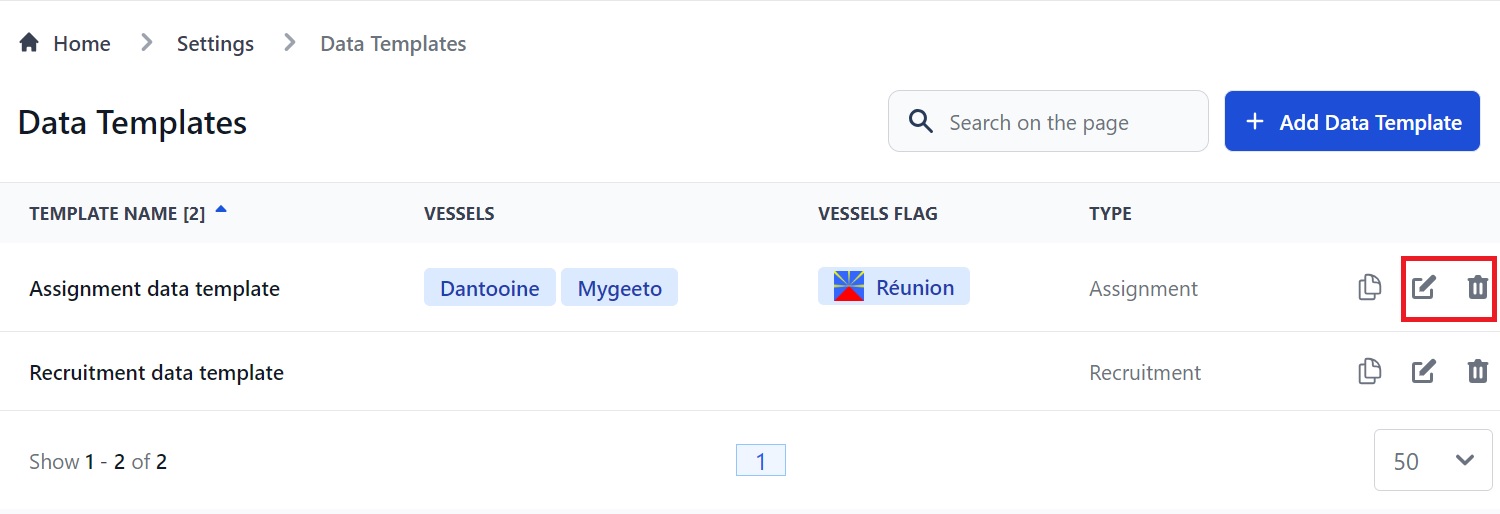
You’ll be taken back to your template. It’s very similar to creating a new entry and you can add or remove any of the information.
How to copy a Data Template
If you want to use identical or similar requirements for a new Data Template, to save you time, you can copy an existing template. For example, perhaps your AB and OS vacancies have similar requirements. To copy a Data Template you've already created, click the documents icon next to the template you want to copy:
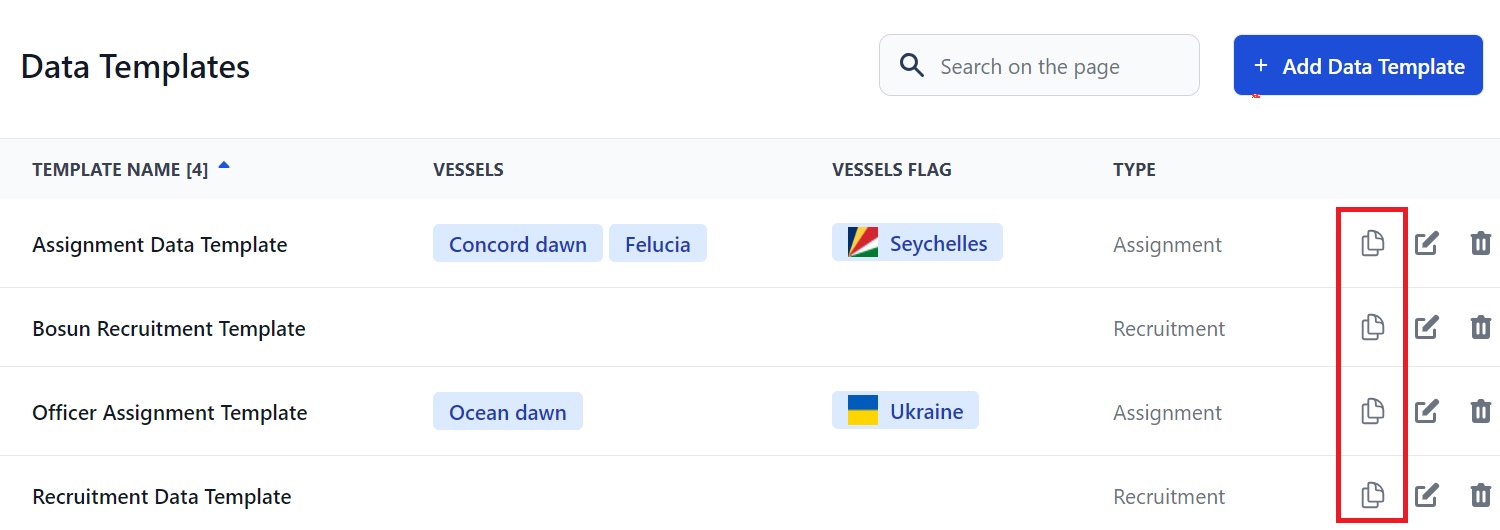
You will see this pop-up box:
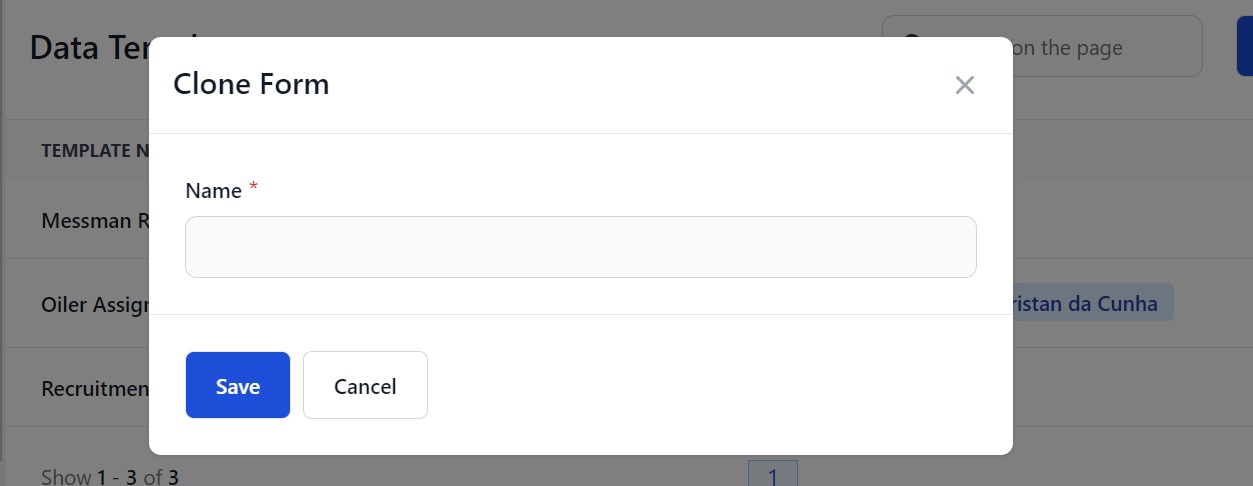
Type the name of the new template you want to create into the box. Click Save and your new template will appear on the main Data Templates page.
All the information and documents are the same as the original template. To change anything, click the edit icon.
Note: If you have copied an Assignment template you will also need to add your vessels.
If you need any other help, please contact us here.