Vessels
The Vessels page is where you can see information about your fleet. Log into your Martide account and click Vessels in the menu on the left. You'll go to this page:

Here you can:
- Add a new vessel.
- Filter your vessels by technical manager company, vessel role assignees, vessel name, vessel status and flag by clicking the funnel icon at the top. This will open a side panel with the filters in it.
- Download an Excel spreadsheet of your vessels' names, IMO, names of the Master and Chief Officer, and the engine type.
- See a vessel's name, flag, IMO, if the vessel adheres to the MLC, the number of crew, Master and Chief Engineer, and status (active etc.)
- Click a vessel’s name to go to its profile page.
How to add a new vessel
Click the Add Vessel button at the top of the page. You will go to this page:

Here you can:
- Upload an image of your vessel or a logo.
- Enter the vessel's details: name, technical manager's flag, IMO, number of TEU, MMSI, and management start and end dates.
- Add the vessel's contact information, including the role and the name of the person from the drop down menus.
- Add a vessel custom contact.
- Add the vessel's email and sat phone number.
- Add a note for the emergency contact.
- Add the vessel's specifications: vessel type, ECDIS, flag, trading pattern, special equipment, year built, call sign and cargo.
- Add the vessel's dimensions: length, width and gross tonnage.
- Enter details about, and upload, the vessel's documents.
- Select the billing contact.
A note about contact details
Contacts are Crew Operator, Technical Superintendent, Designated Person Ashore, Procurement Officer, Vessel Operator and Payroll Officer. When you select a User for a role, the relevant Pipeline stage will be assigned to them and the system will send them a notification to let them know. You can also add custom vessel roles if you need them.
Save your vessel and you will see this page:
Here you can view Vessel Details, Crew, Onboard, Working Gear, OCIMF (if the vessel is a tanker), Matrix and Rotation by clicking the tabs at the top. We will explain each tab below.

Vessels Details tab
On the Vessels Details tab you can:
- See all the details you entered when you added the vessel.
- Edit details by clicking the pen icon in each section.
- Add more info such as your vessel's email login and password, more vessel specifications, engine specs, last position, and previous vessel names and managers.
- Upload copies of your vessel's documents by scrolling down to the Documents section and clicking the Add Document button.
- Add Vessel Custom Fields if you want to add specific information about this vessel to its profile.
Crew tab
Click the Crew tab and you will go to this page:

Click the pen icon in the Currency section to enter your budget and select the currency from the drop down menu.
To set your planned crew, click the pen icon in the Planned Crew section. You will see this:

All ranks will start at 0. Set your planned crew numbers by clicking the plus and minus signs.
Onboard tab
Click the Onboard tab and you will go to this page:

Here you can:
- See who is onboard including their rank, name, nationality, actual left home and actual sign on dates, and estimated arrived home date.
- Filter the onboard report by date by clicking the Report Date button.
- Sort seafarers by rank, name, nationality or date alphabetically or numerically by clicking the arrows next to their headers.
- Download the onboard report as an Excel spreadsheet by clicking the download arrow at the top.
- Use the Document Assembly feature to create an onboard report by clicking the download arrow at the top.
- Go to a seafarer's profile by clicking on their name.
Working Gear tab
Click on the Working Gear tab and you will go to this page:

- See the ranks on that vessel and all the sets of working gear ordered for them.
- Edit a set by clicking the pen icon in the right corner. This will take you to the Working Gear page. To read more about adding or editing working gear, see this page.
OCIMF tab
If the vessel is a tanker, click on the OCIMF tab and you will go to this page:

Here you can:
- See and edit basic info for the tanker including the IMO, name, flag and operator, enabled ranks, and enabled embarkation types. You can also reset the override here.
- See the tanker’s Officer and Engineer crew details including name, nationality, CoC, tanker experience and more. To find out more about syncing with OCIMF SIRE via Martide,see this page.
- Generate a report for the tanker by date and download it as an Excel file by clicking the Generate Report button and download arrow at the top.
Matrix tab
Click on the Matrix tab and you go to this page:
Here you can:
- See your combination of ranks, their combined years with the operator, combined years in rank, and combined years on all tanker types. If an entry is green it means those ranks have met the operator or client's requirements. If it is red, they have not.
- Edit entries by clicking the pen or delete them by clicking the trash can.
- Add a new entry to the matrix by clicking the Add New button at the bottom
Rotation tab
Click on the Rotation tab and you will go to this page:

Here you can:
- See your vessel’s crew changes, both past and upcoming.
- Add a note to a crew change by clicking the pen icon at the end of the row. The note will appear beneath the crew change information - see below:

How to filter your vessels
You can filter your vessels to make it easier to find what you’re looking for. At the top of the Vessels page there is a funnel icon:

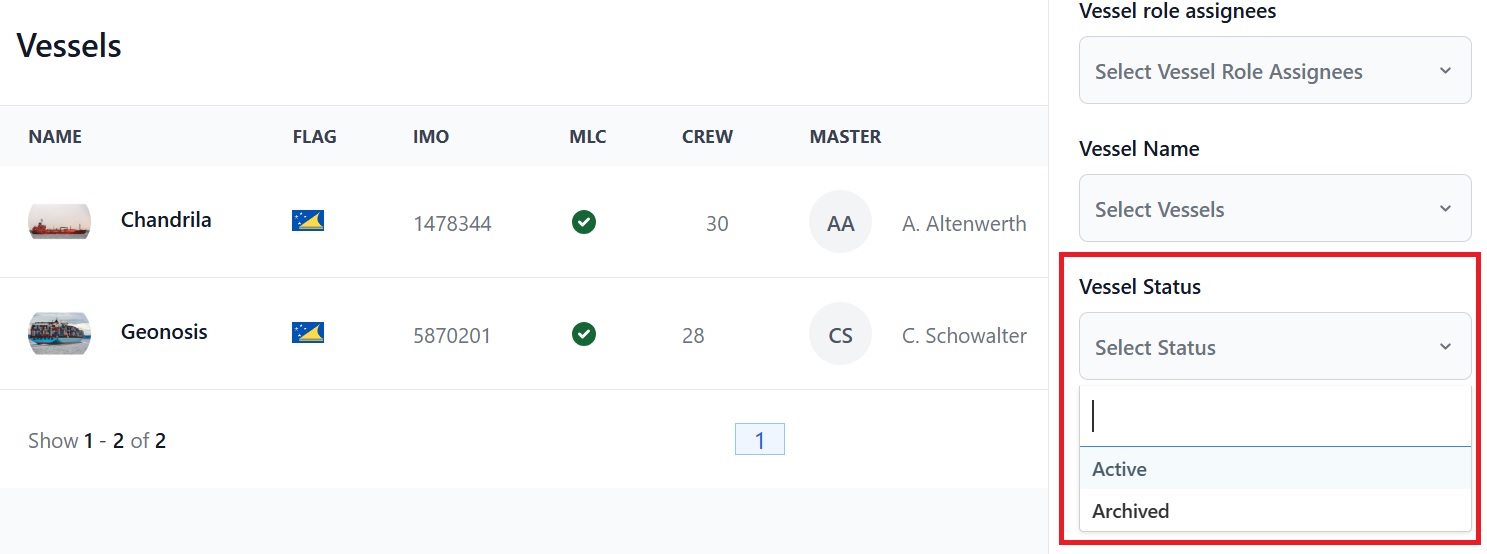
When you click the funnel a side box opens and you can filter vessels by Technical Manager, Vessel Role Assignees, Vessel Name, Vessel Status and Flag:

How to set a vessel’s status
Vessels have two statuses: Active or Archived. The default view on the Vessels page is active vessels only. To see archived vessels, click the blue funnel icon to filter your vessels (see above.) Go to the Vessel Status filter and click Archived in the drop down menu then Search and archived vessels will show on the main page.
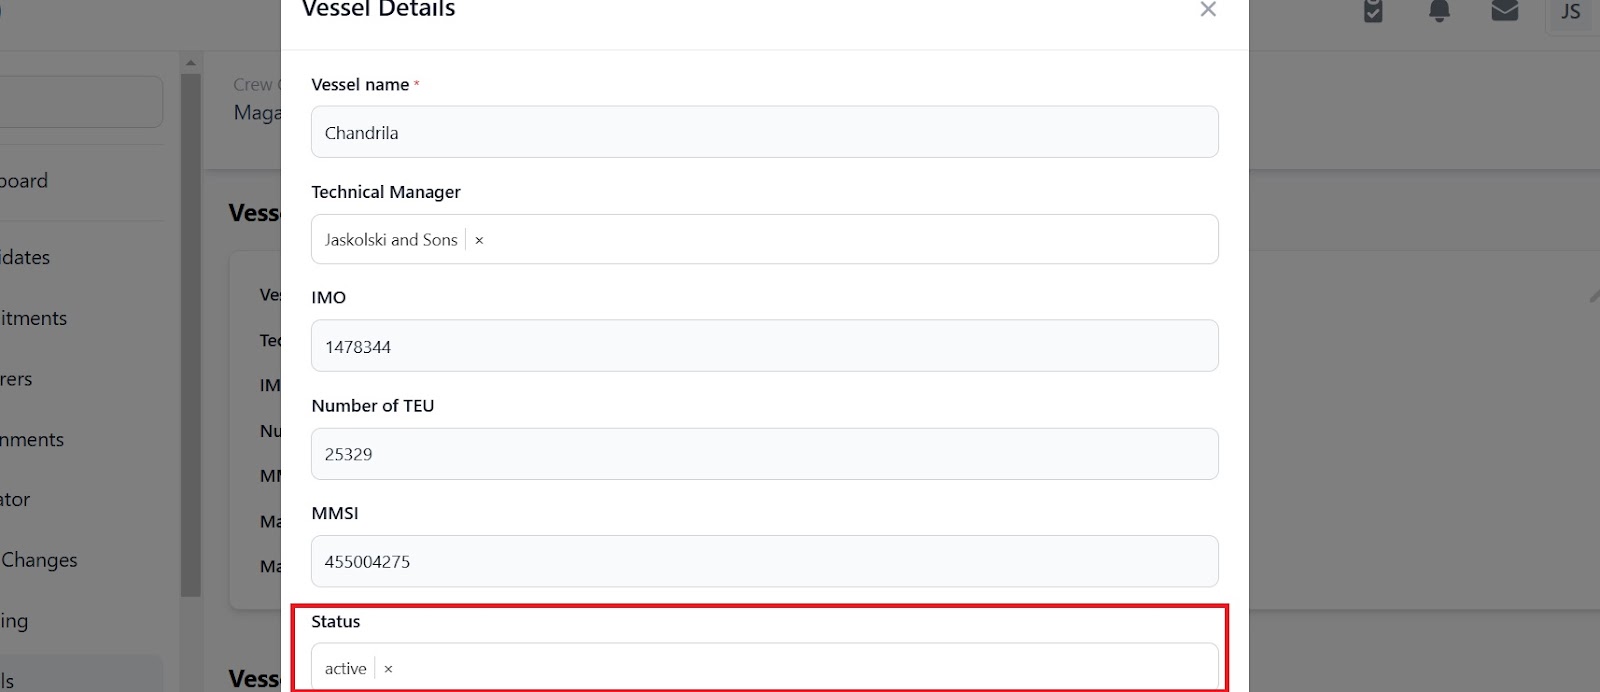
When you create a new vessel its status will be Active. To change a vessel’s status from Active to Archived or Archived to Active:
- Click the vessel’s name on the Vessels page.
- Click the pen icon in the right hand corner of the Vessel Details section.
- In the Status box change your vessel’s status to either Active or Archived as needed.
- If you change a vessel to Archived it will disappear from the Vessel’s page and you will need to use the filters to see it again. (As above.)
If you need any further help, please contact us here.