Messages
As an employer or manning agent you can send messages and respond to each other, as well as any of the seafarers in Martide’s system, using our in-built messaging feature.
How to use the Message Inbox
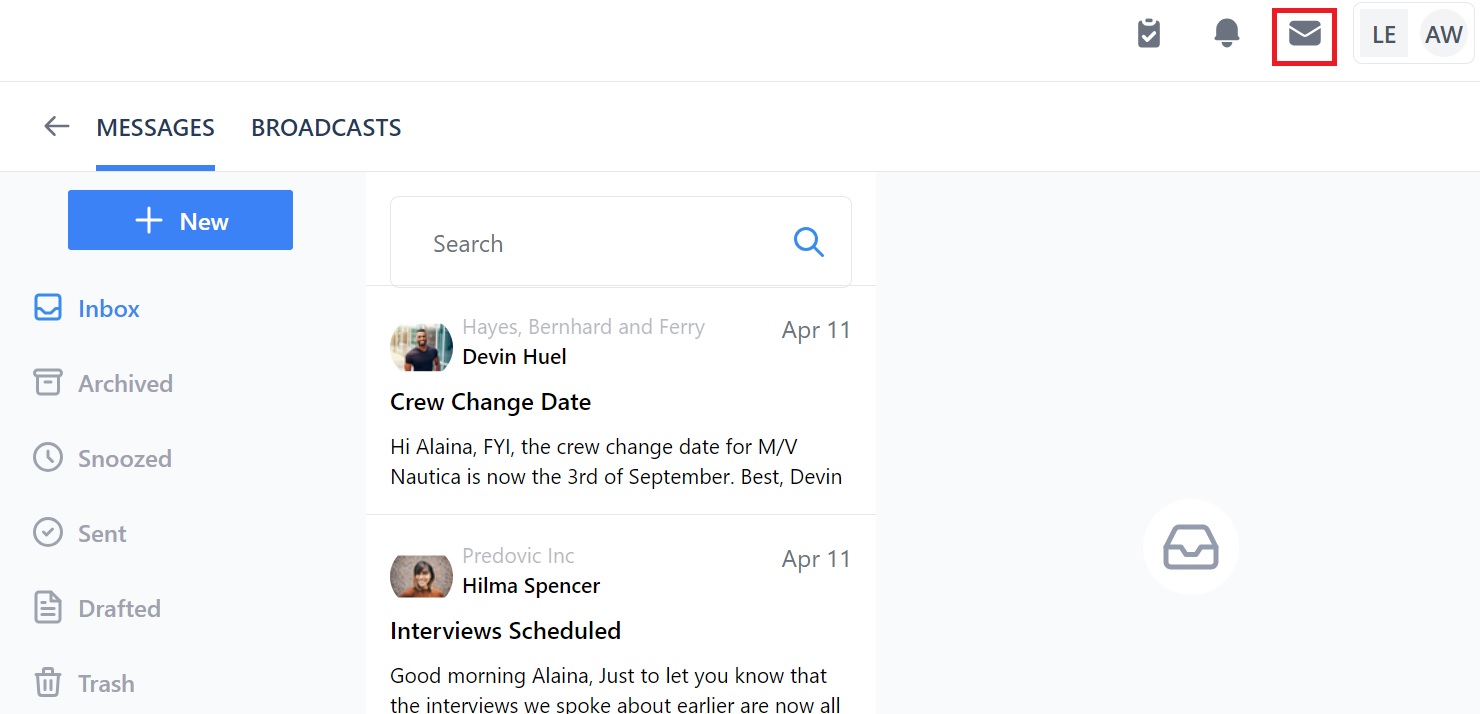
Log in to your Martide account. Click on the envelope icon at the top of the page:

That will take you to your message inbox. It looks like this:

In your inbox you’ll see your messages and a number of icons in the column to the left of the messages. This is how your messages are stored and organized in the system:

Here's what the icons mean:
- The document tray: This is the default view as seen above - you will see all the messages in your inbox.
- The storage box: Click this to see your archived messages.
- The clock: Click this to see messages you have 'snoozed' to deal with later.
- The circle and checkmark: Click this to see your sent messages.
- The document: Click this to see your draft messages.
- The trash can: Click this to see your deleted messages.
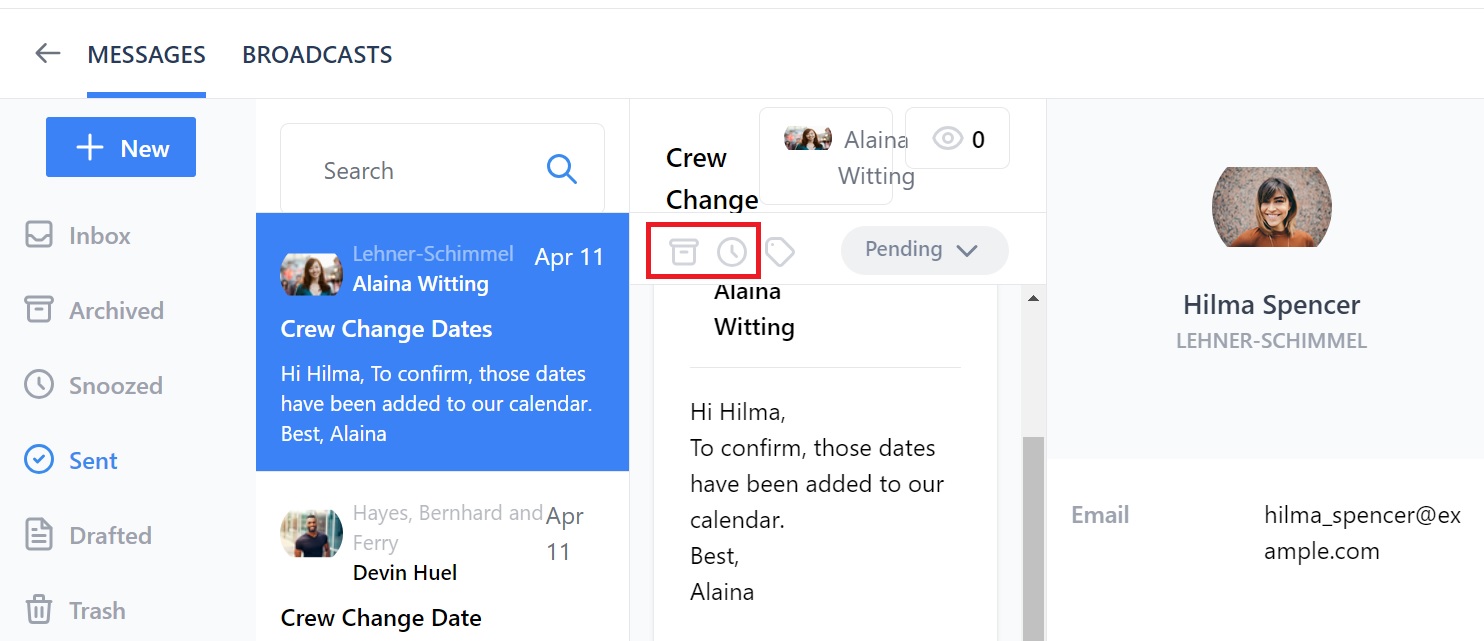
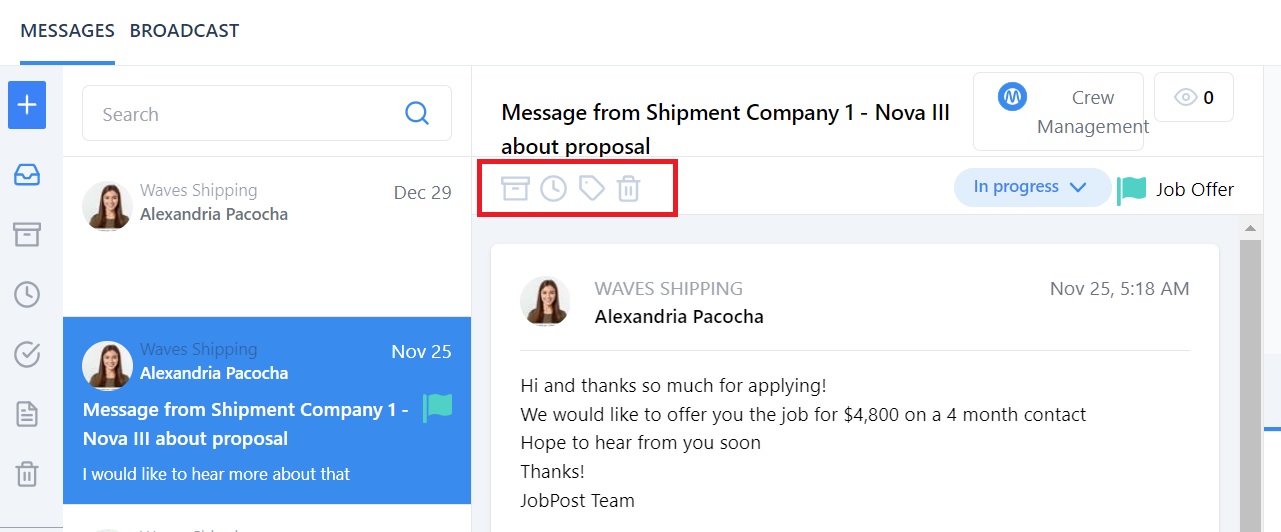
You can archive, snooze or delete a message by clicking on one of the icons that appear at the top when you open a message:

Understanding your messages
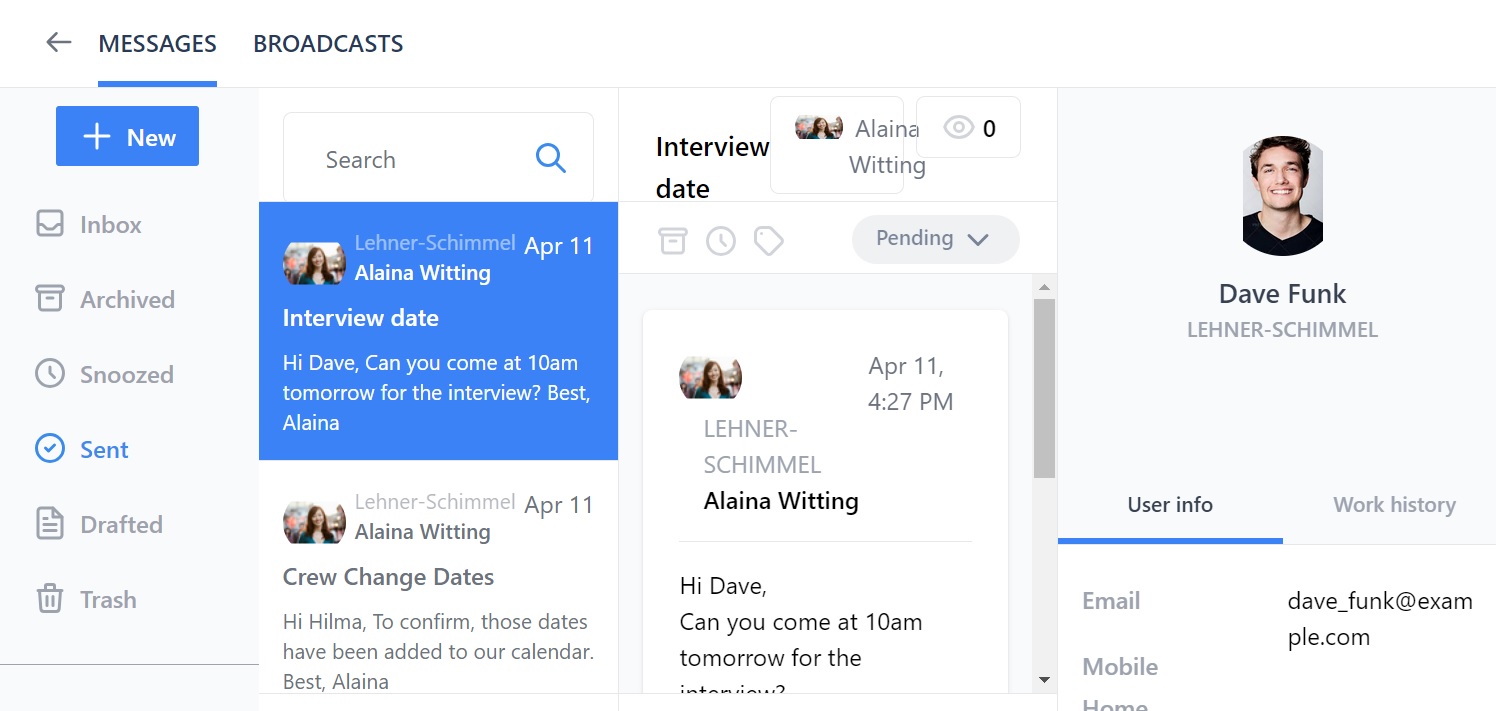
When you click on a message in the left hand column you will see this:

How to use this page:
- The message you are looking at is highlighted in blue on the left.
- In the middle column is the message thread of emails you have sent and received.
- Above the middle column are icons to archive, snooze, tag or delete the message thread. Click the icon to take the relevant action. We will explain tags below.
- To the right of the icons is the message status. Click the down arrow to choose from pending, in progress or done.
- On the top right of the middle column is the group this vacancy is assigned to. In our example it is Crew Management.
- You can also see how many people are 'watching' this vacancy by the number next to the eye icon.
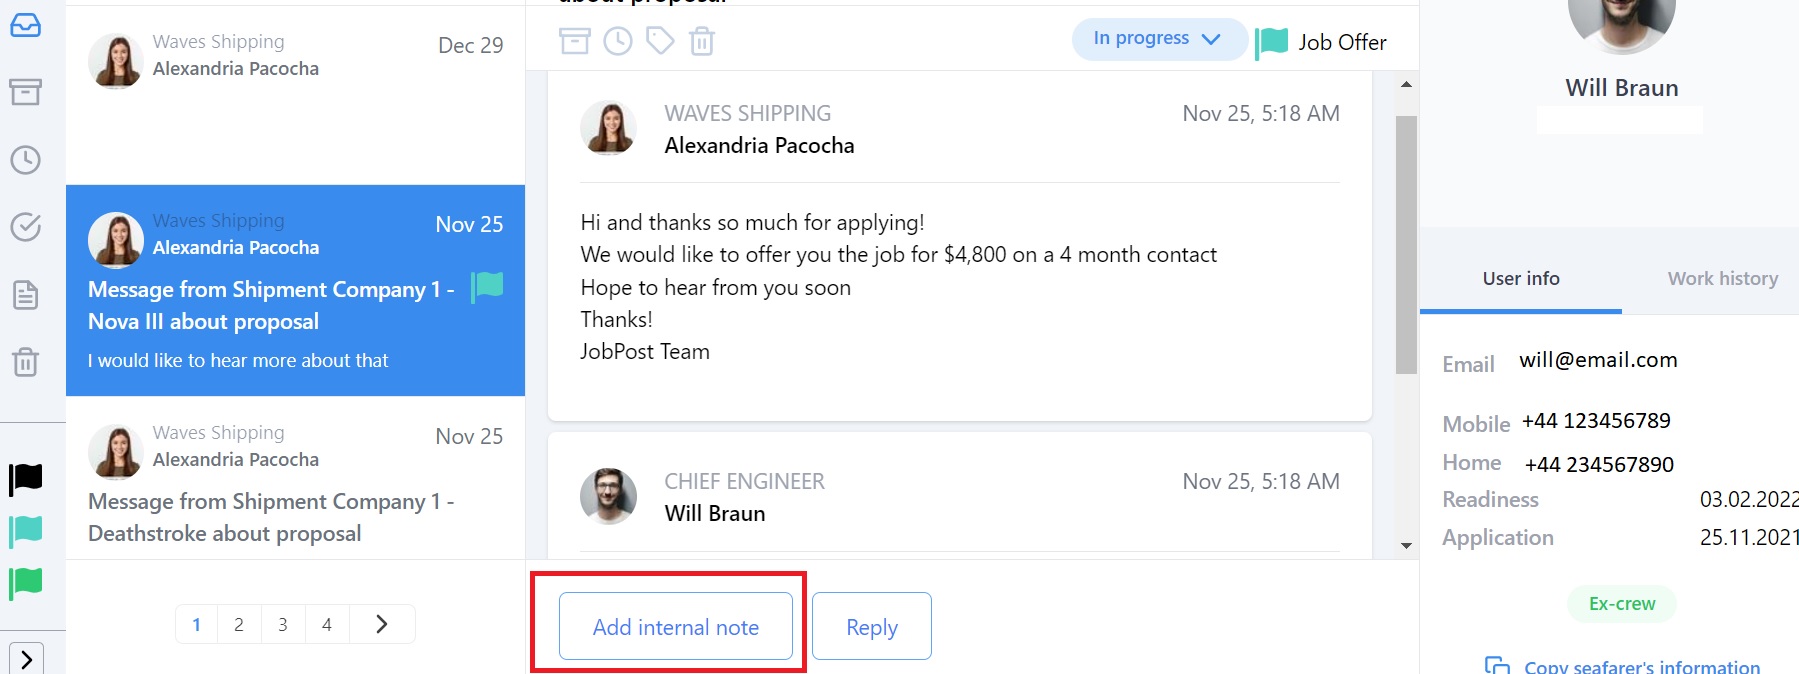
- Below the middle column are two buttons: Add internal note and Reply. Click Reply to write a new message in this thread. We will explain internal notes below.
- The column on the right shows the person you are talking to. In our example it is a seafarer candidate called Will Braun.
- Click on the candidate's name to go to their seafarer profile.
- You can see Will's User info under his profile picture. If you click on Work history you will see who created his profile, who the manning agent is and his last 5 positions.
How to add a tag to a message
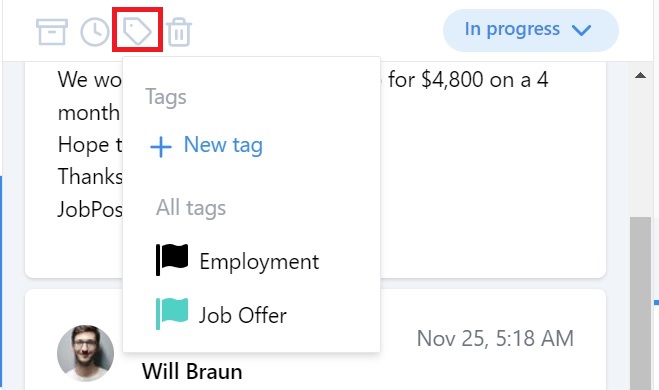
Tags help you organize your inbox. When you have a message thread open, click the tag icon at the top of the page:
Here you can:
- Add a new tag by clicking on +New tag.
- Choose a tag that you have already created - in our example we have 2 existing tags: Employment and Job Offer.
Now we're going to add a new tag:

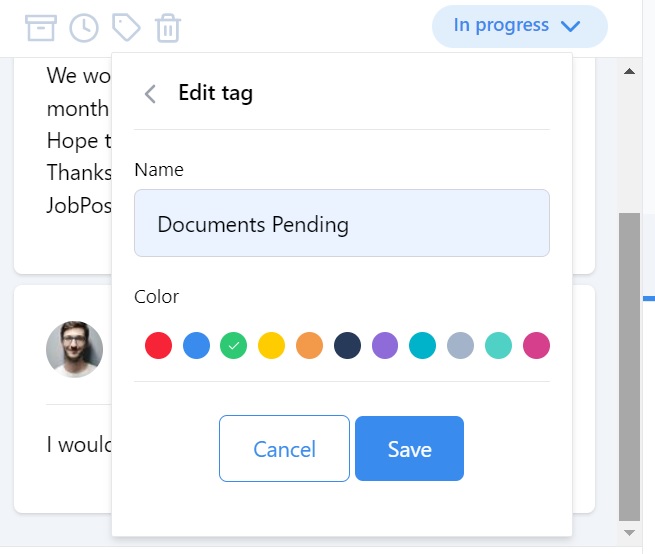
- Type the name of your tag into the box. Our new tag is called Documents Pending.
- Choose a color for that tag. We have chosen green.
- Click Save when you're done.
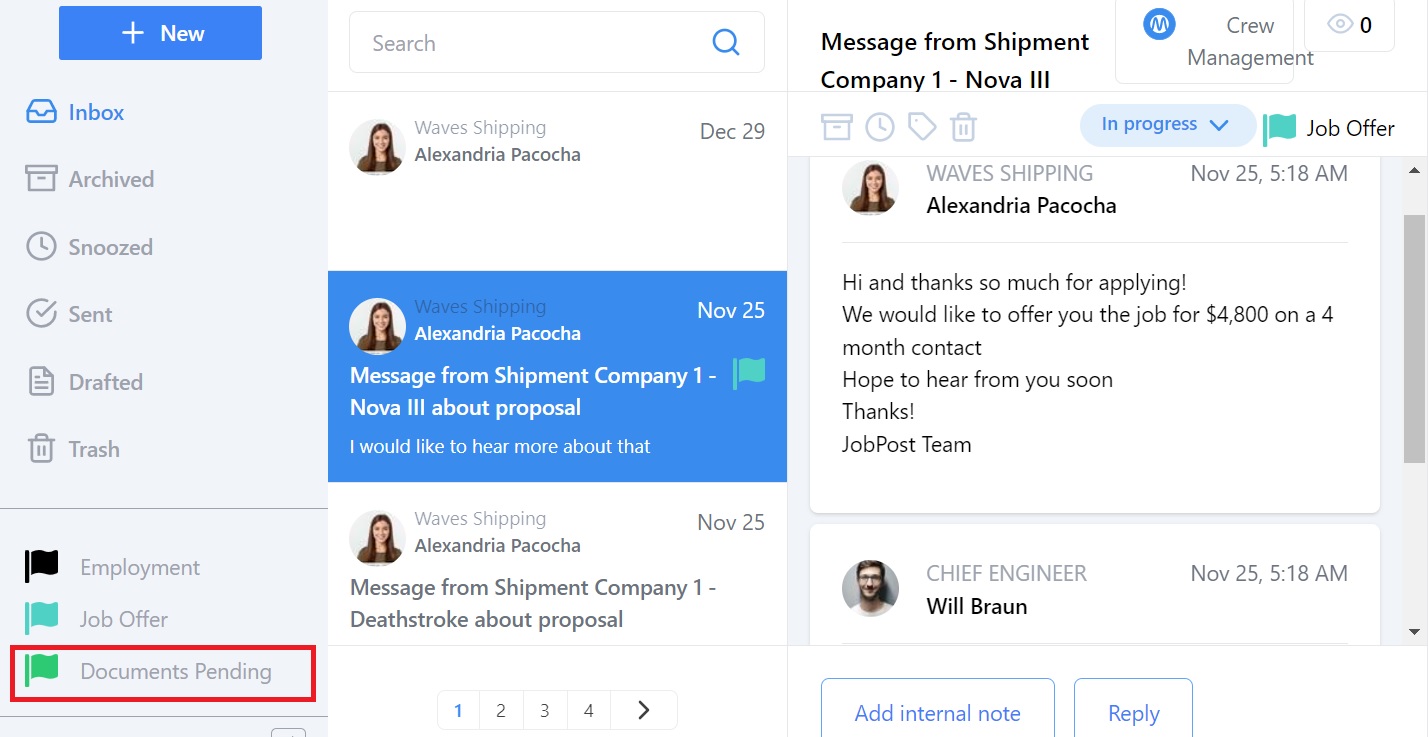
Your tag will now appear in the icons column:

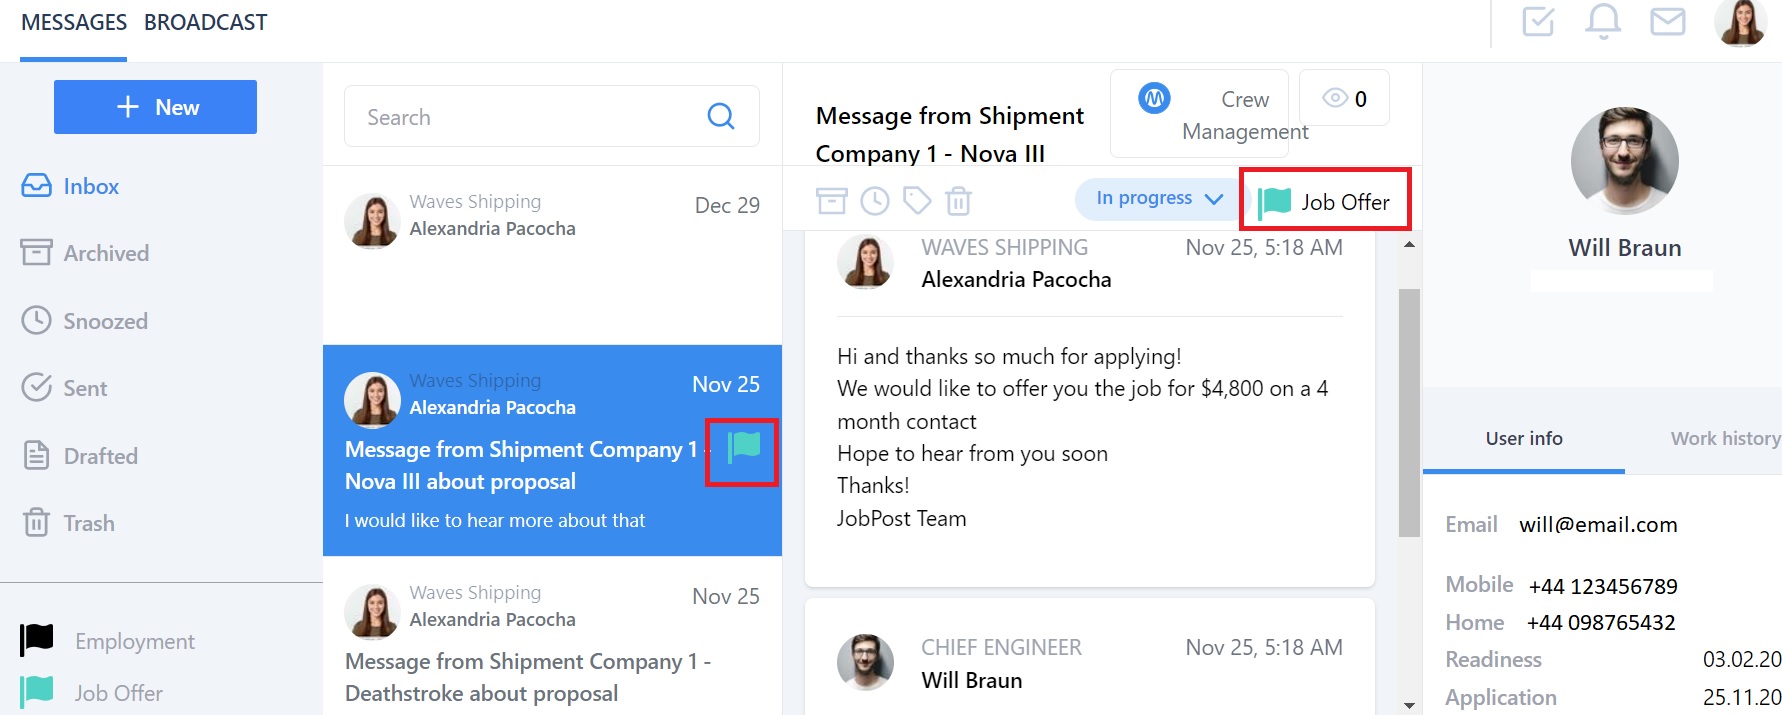
When you add a tag to an email thread it will also appear in the email preview and at the top of the middle column next to the other icons:

How to add an internal note to a message thread
Internal notes allow you to leave useful notes and reminders. The person you are sending the message to will not see the note.
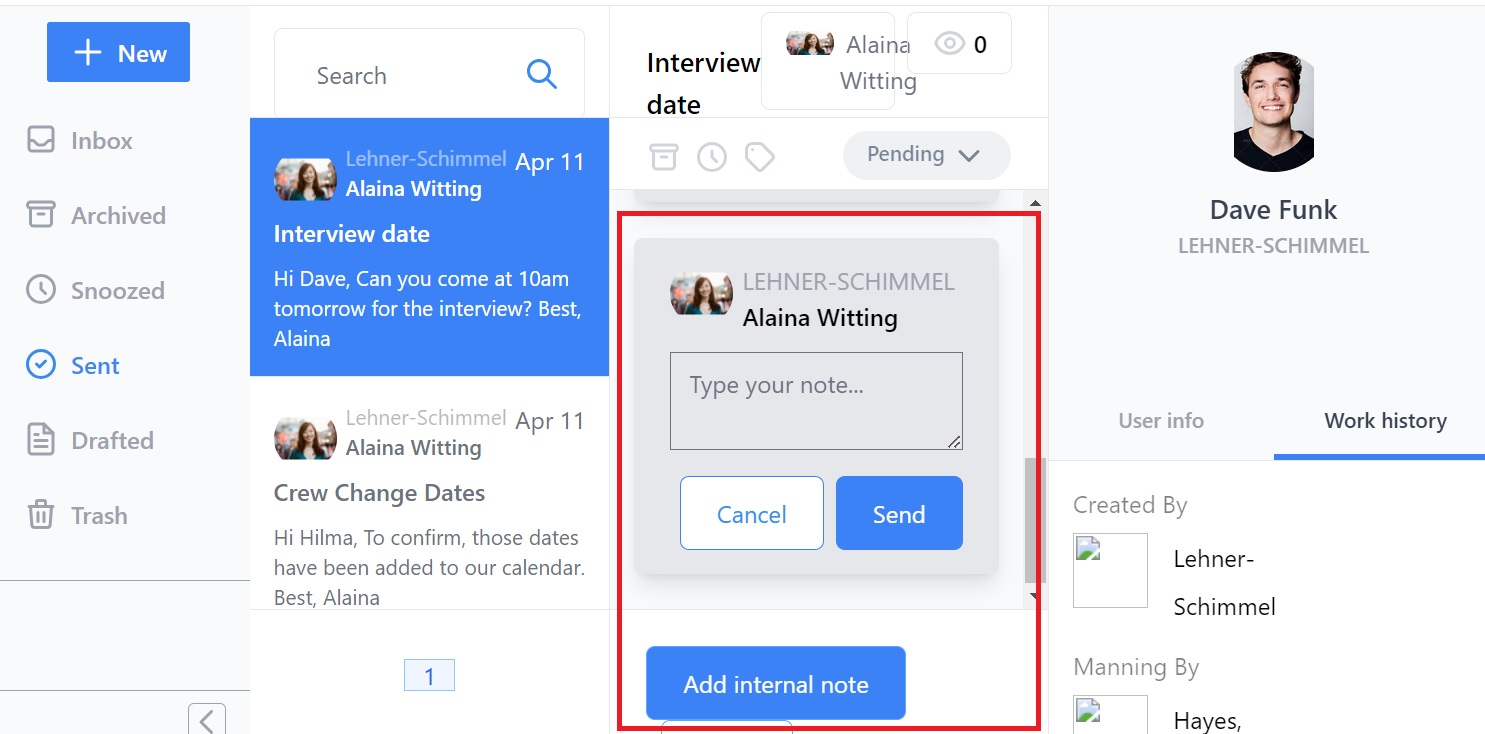
Click on a message. The Add internal note button is underneath the message thread:

Click the button and you will see this:
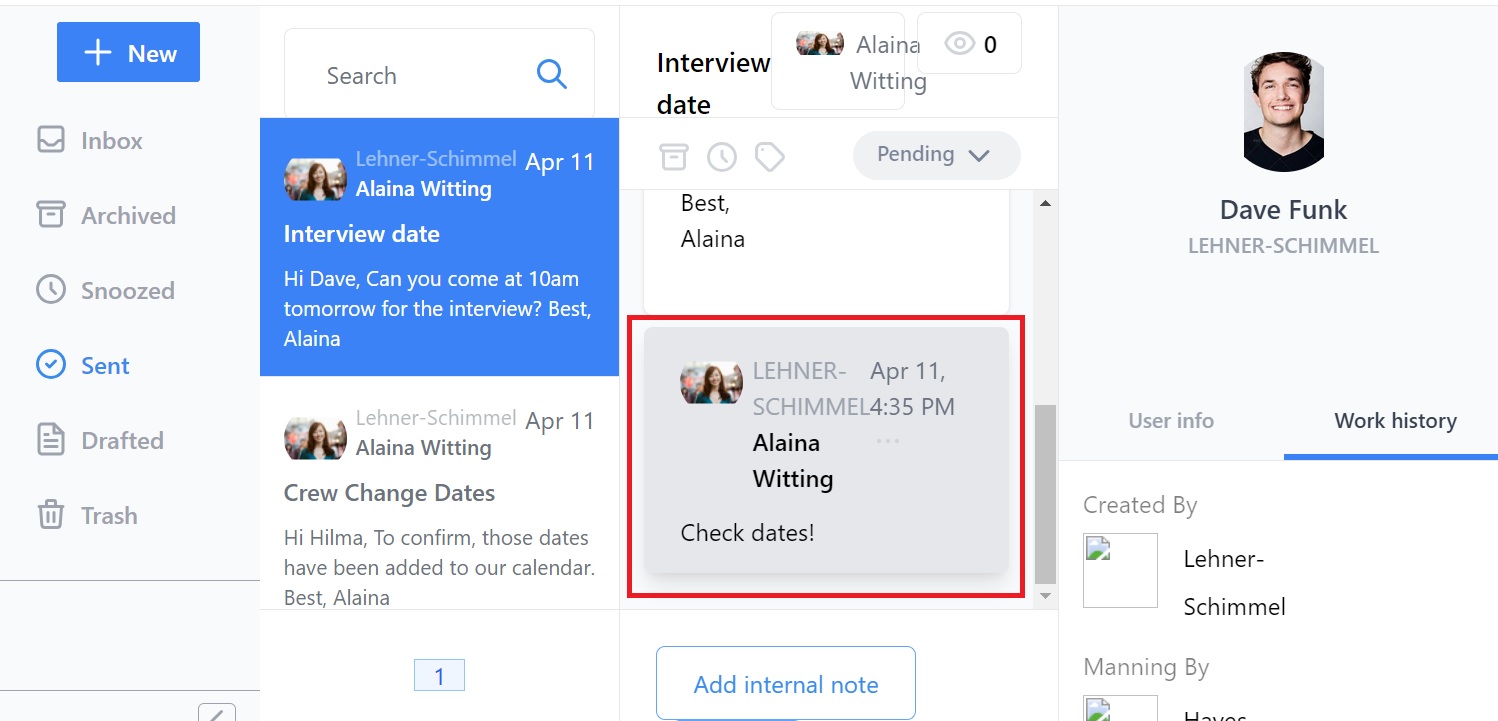
When you've written your note, click Send and it will appear in the message thread:
Broadcasts
The Broadcast feature lets employers (but not manning agents) send a message to multiple recipients.
At the top of the page you will see two options: Messages and Broadcast. The default page is Messages i.e. your inbox:

Click on Broadcast and you will go to this view. In our example we have already sent some Broadcasts:

Here you can:
- Click on the blue + New button to write and send a new Broadcast.
- See your Sent, Draft and Trash Broadcasts (the default view is Sent.)
- See who has been Assigned to a Broadcast and who is Watching.
- See any color coded tags you've created.
- Search for Broadcasts using the Search box at the top.
How to send a Broadcast
Click on the blue + New button. That will open a blank message:

Click on the To box and you will see a pop-up box that looks like this:

Here you can:
- Select the manning agent or agents who represent the seafarers you want to send a Broadcast to.
- Select the nationality or nationalities of the seafarers you want to send a Broadcast to.
- Select the rank or ranks of the seafarers you want to send a Broadcast to.
- Select the status or statuses of the seafarers you want to send a Broadcast to. Statuses are Active, Unavailable, Left, Retired, NFR (Not For Rehire.)
- Select the Seafarer Pool or Pools of the seafarers you want to send a Broadcast to.
- Select the Client or Clients for the seafarers you want to send a Broadcast to.
- Select if you want to send the Broadcast to seafarers or candidates.
- Select if the seafarers that you want to send a Broadcast to are ex-crew, not ex-crew or both.
- Select if the seafarers that you want to send a Broadcast to are ashore, onboard, or both.
- Select the manning agent or agents that you want to include in the Broadcast.
For example:

The boxes at the bottom tell you how many seafarers and manning agents you are sending the Broadcast message to.
When you’re finished, click the Apply button and you will be taken to this screen. In our example we’re sending a message about contract updates to seafarers from the manning agent Davis, Kunze and Lebsack and to the manning agent themselves:

Here you can:
- Type your subject.
- Type your message.
- Add an attachment by clicking the paperclip icon in the bottom left.
- Click Save to draft to save the Broadcast and finish it later.
- Click Cancel to cancel the Broadcast.
- Click Send to send the Broadcast.
When you have sent the Broadcast, if you click on it in your Sent page you can see a list of seafarers who received the message underneath it.
You can also add tags to Broadcasts in the same way as you can to normal messages. If you would like to read more about the Broadcast feature you can visit its stand alone page here. This page goes into more detail about writing draft Broadcasts and adding tags.
And that's it! We hope you’ve found this guide to the Messages feature helpful but if you have any questions please don’t hesitate to contact us.